Posted on 18 Comments

The ‘Tall & Skinny Shimmy’ Challenge Soap

November’s challenge over on Amy Warden’s Great Cakes Soapworks was to (attempt to) recreate what Amy named the ‘Tall & Skinny Shimmy’. This technique is also called the wall pour or segment filling, and has been perfected by Tatiana Serko, an amazing soaper who created the tutorial video for the challenge. I’ve seen this design before and always wondered how it was done, SO there was no doubt in my mind as to whether I’d be giving it a go this month.  Here’s the design she created for the tutorial:

Tatiana's Tall & Skinny Shimmy
Tatiana’s Tall & Skinny Shimmy

I recently bought a shiny new tall & skinny mould, and this challenge marked it’s first outing. This was the first problem. Turned out the mould holds more soap than my regular mold. I kind of thought it would, but checked on the website where I bought it to make sure.  Unfortunately, in my haste, I looked at the wrong listing, and so had the wrong volume in my head. Luckily I’d had a sneaking suspicion that that figure might be incorrect (just by looking at the mould – which is LONG), so I prepped two batches of my masterbatched oils, just in case.

I decided (once again) to use a fragrance I’d not used before. Not as crazy as it sounds – I used a blend of Patchouli & Sweet Orange essential oils, both of which I’ve used separately many times without any problems.

I added the fragrance blend to the oils, then added the lye and mixed gently with a whisk until the soap was fully emulsified, but no more. In her tutorial, Tatiana said that she doesn’t use a stick blender, and simply lightly hand mixes her soap. With some trepidation, I decided to do the same, and split the soap into seven, colouring each portion a different shade, and mixing thoroughly by hand.

Prepped colourant
Prepped colourants

I then set up my mould as per Tatiana’s instruction.  I placed two pencils parallel to each other on my work table, on either side of my mould.  I put one side of the mould onto one of the pencils, so that there was a tilt to the mould, and then poured the first colour down and along the side of mould that was NOT on the pencil.  I then moved the mould so that the other edge was sitting on the other pencil (and the mould was therefore tilted lengthways the other way) and poured down and along the opposite side. I did this with all seven colours, alternating the side each time. The soap was very thin, and had barely reached trace – I think it perhaps could have been just the tiniest bit thicker – note to self for next time…

Anyway, of course, it turned out I didn’t have enough soap made up to fill the mould, so I quickly separated out another three portions of the second batch, added colour, and continued to pour. The pouring was fast and fraught, and I didn’t get the opportunity to take any photographs – sorry!

Once the pour was complete, and the mould was full, I swirled to the top and put it to one side to harden up.

Tall & Skinny Shimmy in the Mould

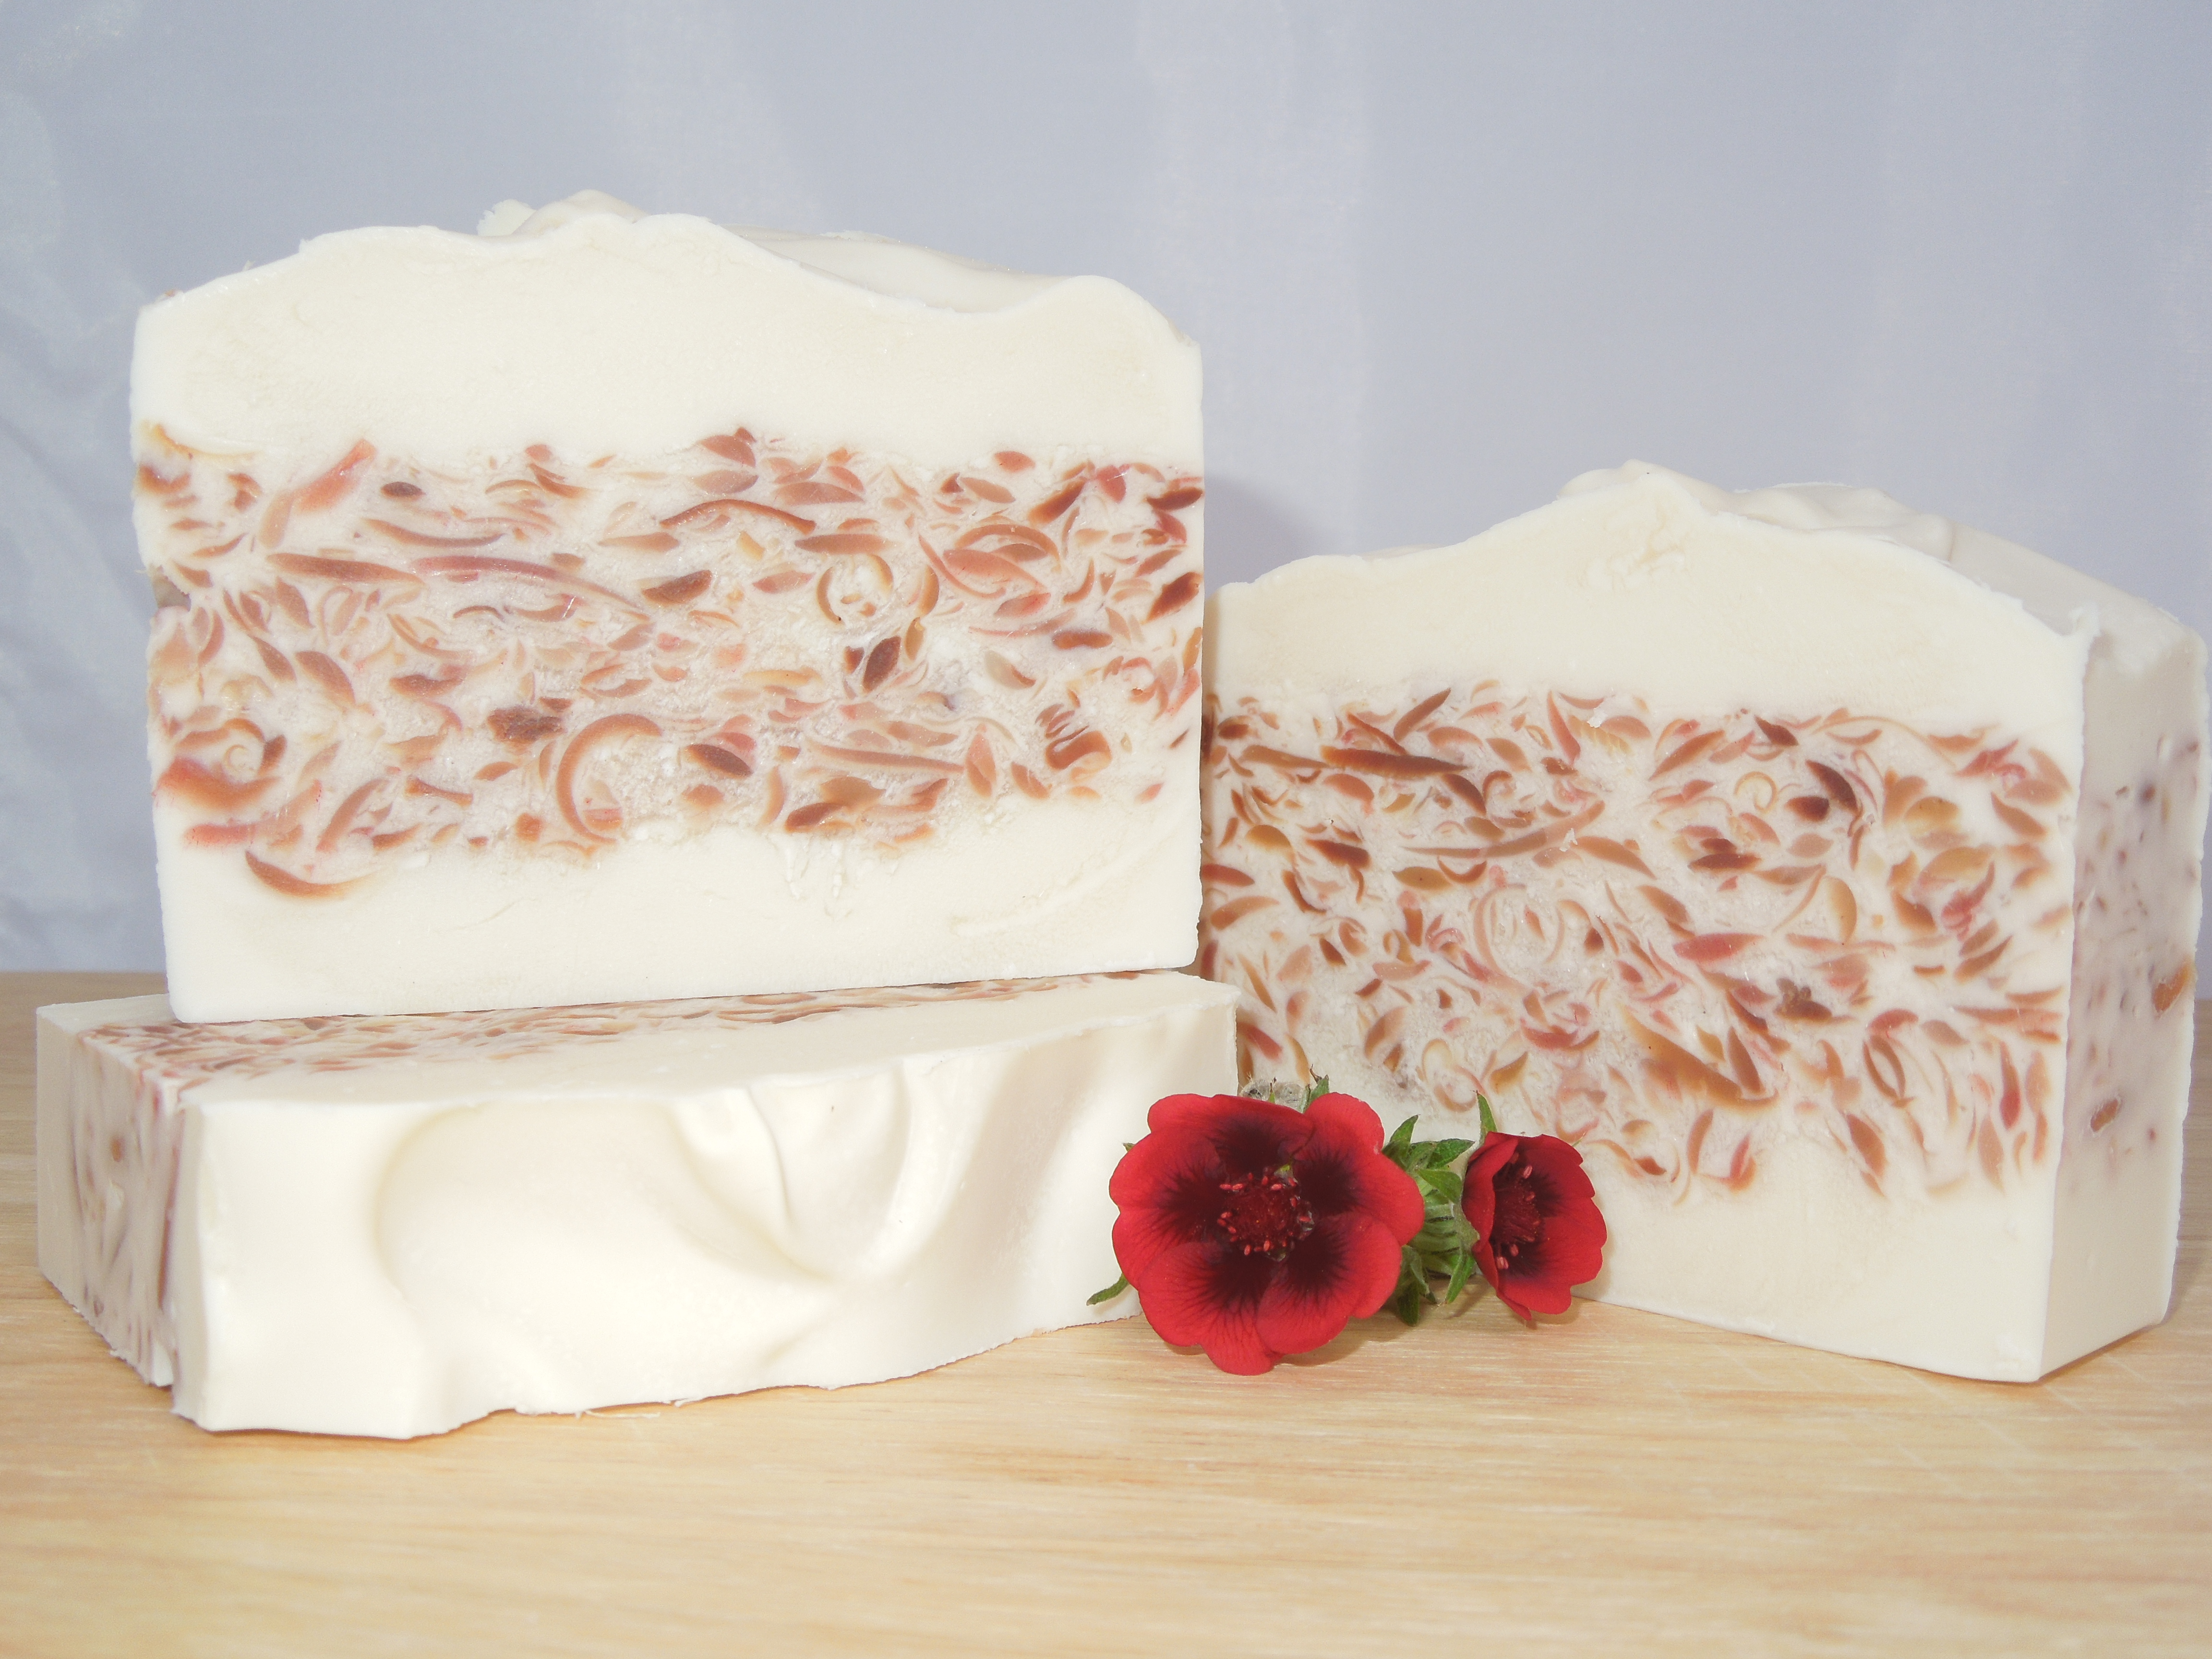
As it was poured at such a light trace, it took a while to harden up sufficiently, but three days later I felt confident enough to take it out of the mould:

Tall & Skinny Shimmy in the mould
Ready for cutting

I was REALLY apprehensive about cutting this one, I didn’t have the time (or the ingredients) to make another one, so I was hoping it wasn’t a complete disaster. As it was, it’s not too bad. I did get a little bit of a shimmy, but there’s no doubt that the pouring left a lot to be desired!!

Tall & Skinny Shimmy (kinda)

I think had I had the correct volume of soap from the beginning, and just had the seven colours to pour, I may have had more luck – it’s clear that my scrabbling for more soap towards the end caused issues with the design at the top.

Another issue I had was that the silicone liner was so tall and long, it didn’t stay flush to the sides of the mould – the sides bent into the middle, and so while pouring down one side, I had to use my other hand to hold the other side of the silicone mold away from the middle, which was a bit awkward.

I’m really happy to have been able to give this one a go, and will probably try it again at some point in the future – thanks Amy!

Thanks for reading – I’ll be back soon with a post on my holiday soaps.

Posted on 14 Comments

Makeovers (1: Serenity)

Quite a few of my soaps have had a makeover recently. No matter that I have (more or less) a set range of fragrances & designs, there’s always room to improve and to flex those creative muscles.

One of the most popular essential oil soaps that I sell is Serenity. The fragrance is a blend of Bergamot, Patchouli, Orange and Ylang Ylang essential oils.  The very first time I made a full batch of this one I carefully weighed out the appropriate amount of essential oil blend for the amount of soaping oils used, then put it to one side.  I then split my batter into three, coloured one white and two different shades of blue, then poured the soap into the mold, creating what I fully expected to be an awesome drop swirl. Except I’d forgotten to the add the fragrance. Argghhhh! There was nothing to do but scoop it all out, thoroughly mix in the essential oils, and put the whole lot back into the mould. Of course I ended up with a very plain, pale blue bar of soap which smelled amazing but looked nothing like my original plan:

Serenity Take 1
First incarnation of Serenity

The next few times I made Serenity, I decided to go with a single colour drop in a paler background.  Most of my drop swirls up to this point had been a white soap with coloured drops, but I wanted to try something a little different.  Here I used Icelandic Blue mica for the base colour and Denim Blue mica for the drop:

The second incarnation of Serenity
Second incarnation of Serenity

I used that design for a while, and it sold well enough, but it didn’t wow me, and last year I decided it needed updating.  The current Serenity has a base of Icelandic Blue mica, and drops coloured with Titanium Dioxide and Blue Dragon mica. I think it’s rather pretty and goes well with the name, so this design will be staying (for now anyway :-D)

Third incarnation of Serenity


Posted on 12 Comments

Ooops…

I made this soap a couple of months ago and it’s been a surprisingly good seller, despite its rather ‘plain jane’ looks:

CP Soap - Serenity

Ordinarily I love my colours and swirls, and in my head this one was going to be a beautiful drop swirl design in shades of blue, a bit like this green one I made not so long ago…

Green drop

but it wasn’t to be…

I usually soap at room temperature. To that end I generally mix up my lye solution and melt my hard oils and butters during the baby’s midday nap, so that they’ve cooled down nicely by the time both kids are asleep in the evening. I also weigh out my liquid oils and add them to the melted oils as well – this starts the cooling process and also makes the ‘hard’ oils and butters less likely to re-solidify as they cool.

So on this occasion I prepped everything as normal, and once the bedtime routine was finished I eagerly set to work.  I combined the oils with the lye, added the essential oils (a blend of Bergamot, Patchouli, Orange and Ylang Ylang) then portioned out the batter and mixed in the colours (titanium dioxide, denim blue mica and ultramarine blue pigment). It was only after I’d poured all of the white portion into the mould that I realised that, even when I dropped in the two blues, I wouldn’t have anywhere near enough soap to fill the mould.

It only took a second or two for the penny to drop.   For some reason I had skipped a step at lunchtime, and hadn’t added the liquid oils to the melted oils.  My measured out liquid oils were still in a jug, put away safely to one side. Arrrgghhhhh! I couldn’t bear to waste a 3lb batch of soap, so did the only thing I could think of. All the mixed batter went back into a big bowl (oh the colours looked so pretty as I poured them in!) along with the liquid oils and I stick blended like crazy. The batter had originally behaved very well and traced beautifully (I’d had no indication that anything was amiss) so I had no idea whether it would work or not. I fully expected ricing, seizing or something equally frustrating but no, it all combined really well and I was able to pour my (by this stage) very plain, unicolour soap.

Despite everything, I’ve called it Serenity. The colour is very calming, and the fragrance blend is soothing and comforting. It’s funny how things turn out.

Posted on 4 Comments

Yet another confetti soap

I liked my first confetti soap so much that I think I got a little obsessed with making them. This was the second, and here’s the third, and final (for now!) confetti soap:

soap 010

This one was made with brown coloured gratings from amber glow and chocolate vanilla truffle and fragranced with a blend of cinnamon, patchouli and bergamot essential oils. It smells gorgeous 🙂

Here’s the full set of three:

soap 020

Now to crack on with stocking up for the upcoming farmers’ markets – more of which soon!