Just a quick catch up this week. Posts have been fairly few and fair between over the last couple of weeks because I’m gearing up for Blogtober – every time I think ‘Ooh, that might make a good blog post’ I decide to save it for next month…
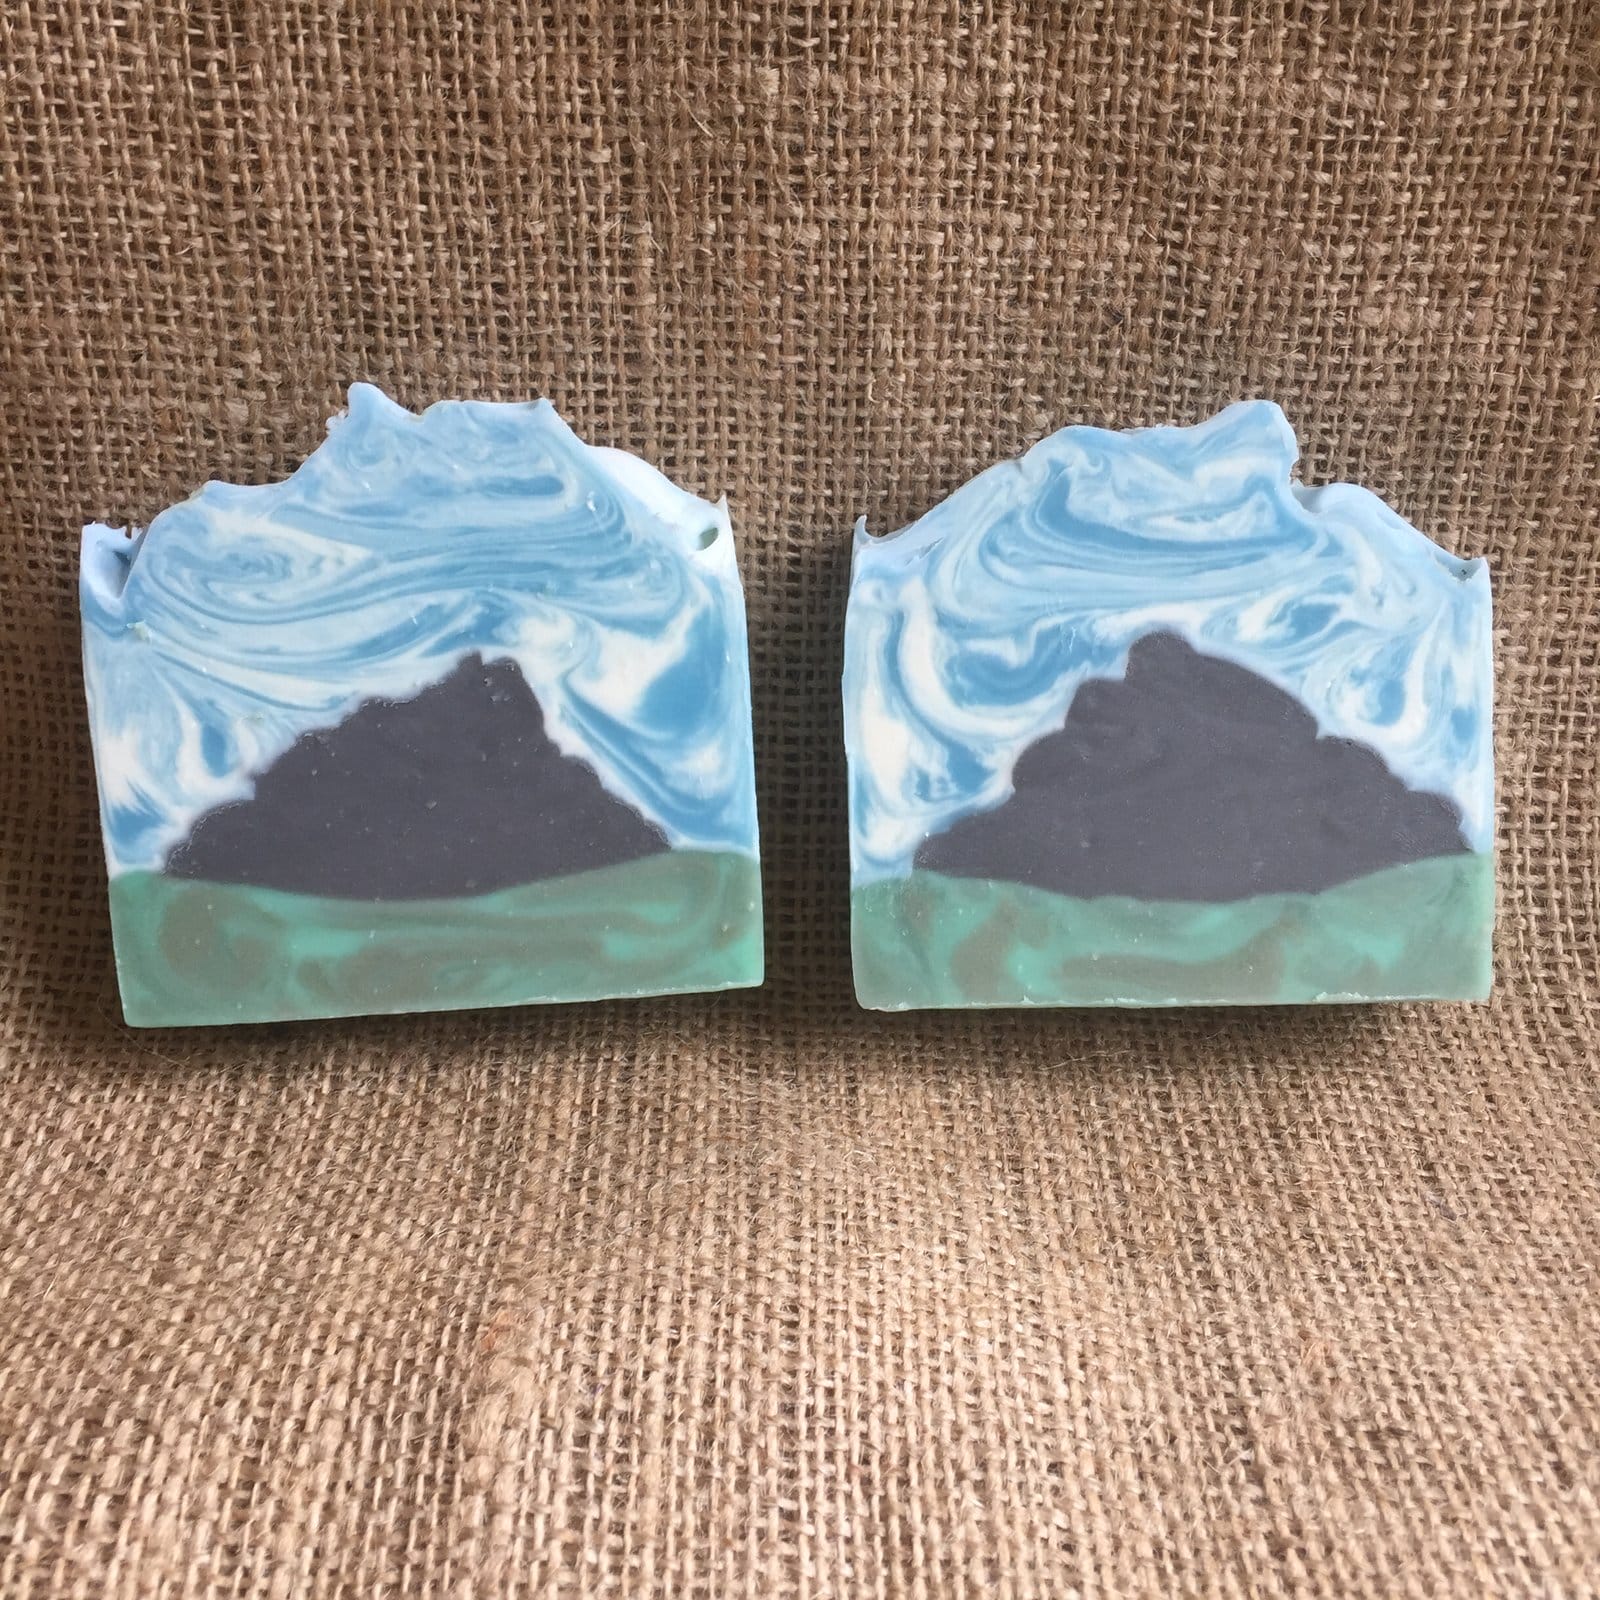
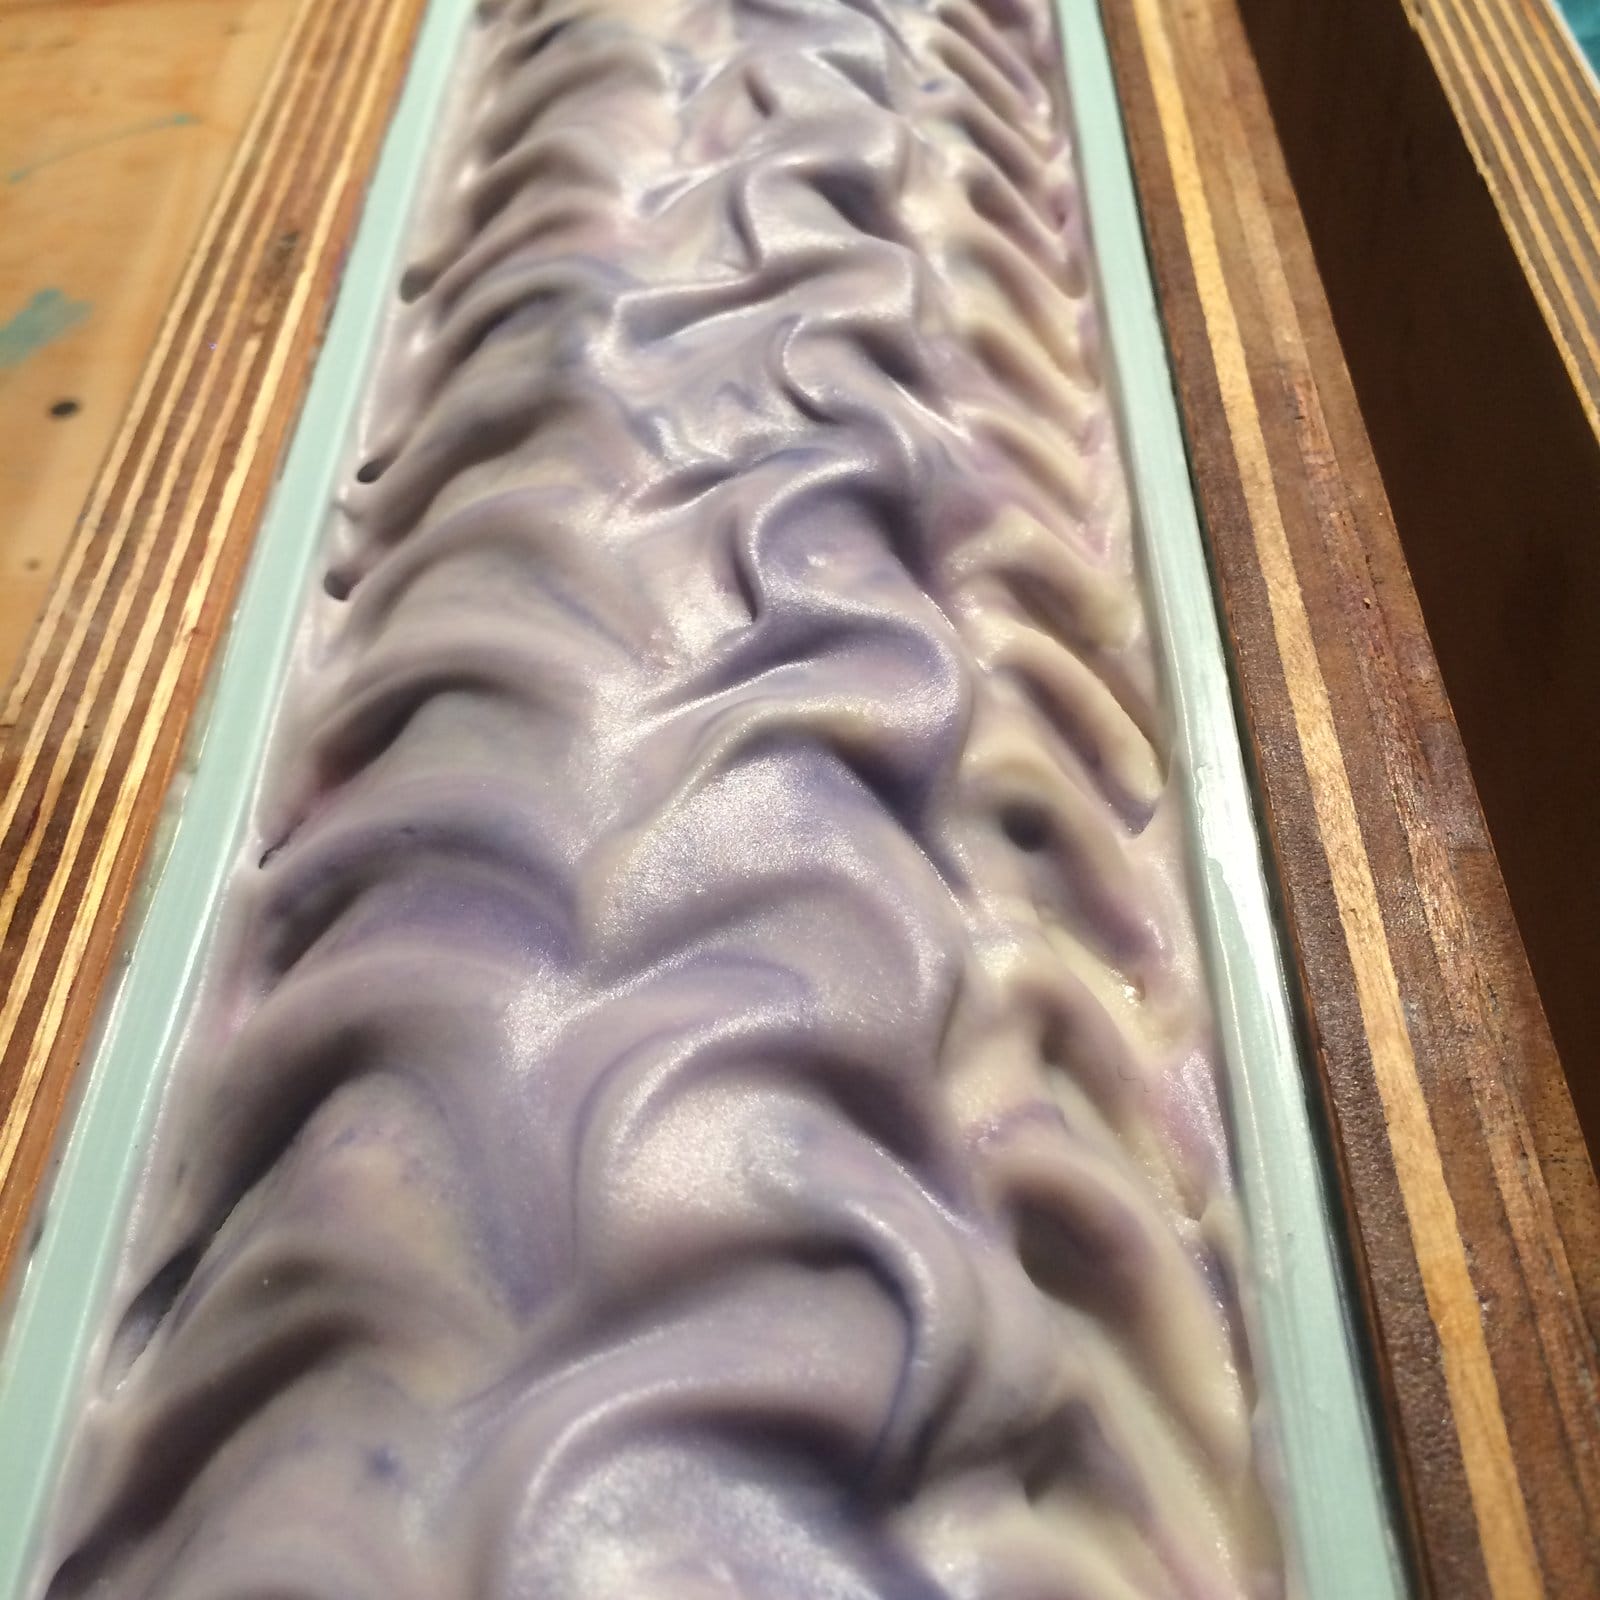
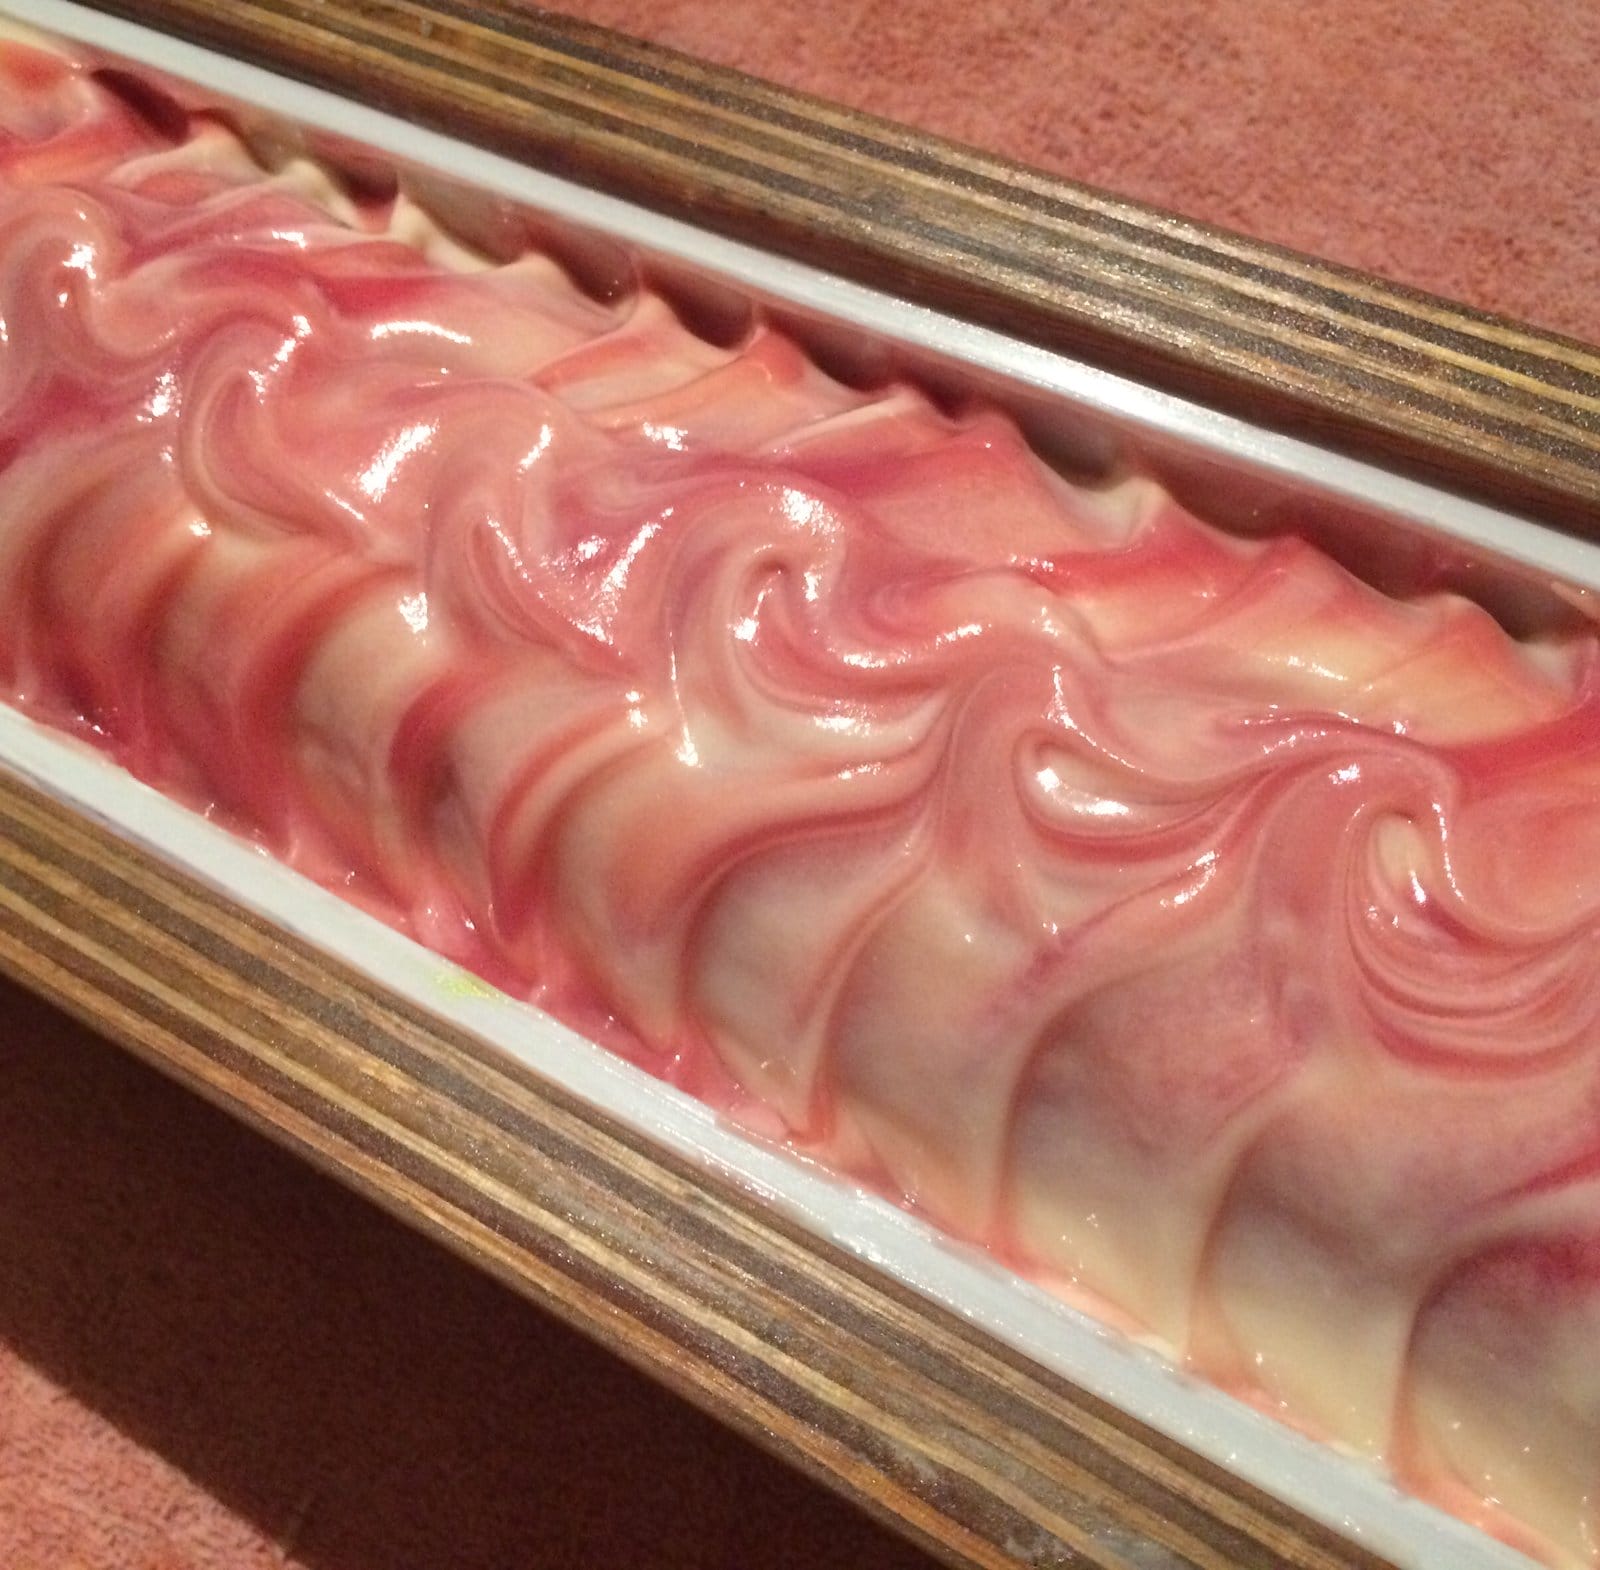
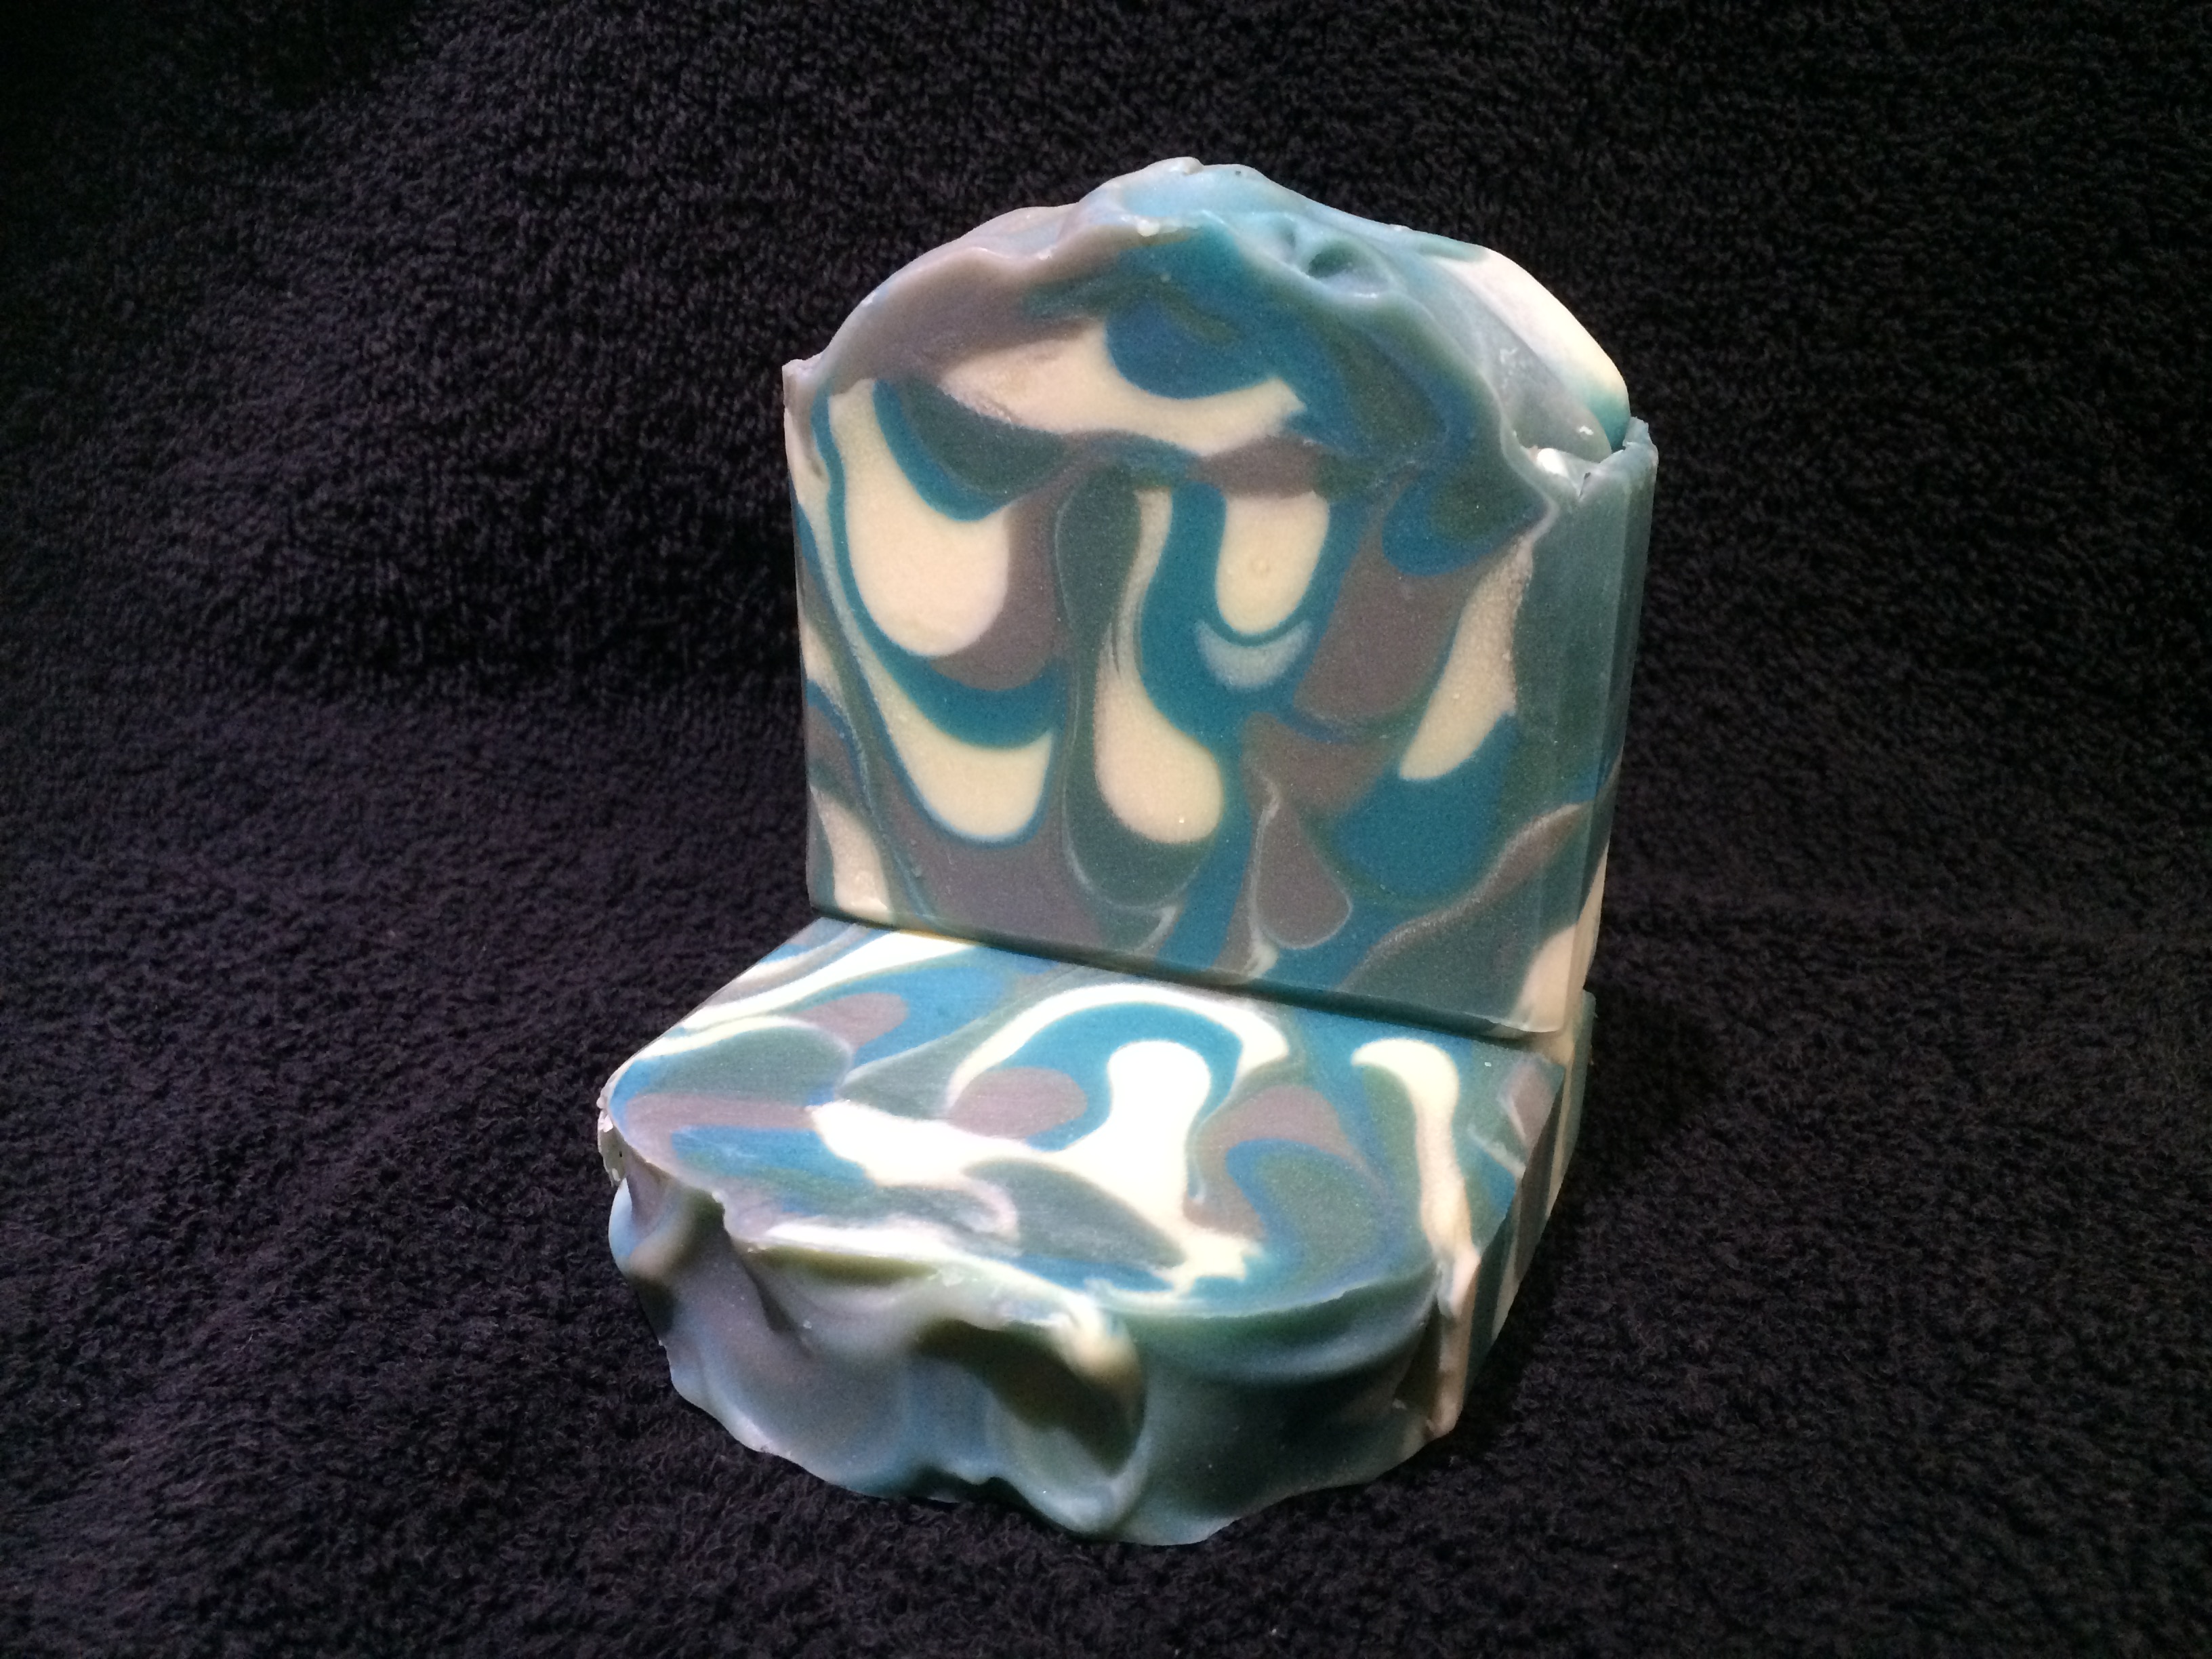
I was waiting for supplies to arrive last week so I only made one main batch of soap – a remake of ‘Yr Wyddfa’ (Snowdon):
Yr Wyddfa in the Mould
I’ve been trying to find a better way to create this design – this was the previous version which, while it sold really well, has, to me, more than a passing resemblance to *ahem* dog mess :-/
Yr Wyddfa
and when I saw the lovely designs created and document by Danica on her blog Seife und anderes, I realised that the sculpted layers technique might just be the way forward. There’s a great description of the technique on Danica’s blog, so I won’t go into details here (and anyway, I forgot to take any photos of the process, I was so anxious to get on with it – next time I will definitely document it better) so here’s the final result:
Yr Wyddfa / Snowdon
The colours aren’t quite right this time – the mountain needs to be more grey, and the greenery needs to be more, well, green… but I’m getting there. It’s fragranced with a blend of essential oils including rosemary, peppermint, eucalyptus, lemon and patchouli.
I also made another batch of dinosaurs and more stars for the next batches of Frosted Christmas Tree (which I still need to photograph to show you – oops!)
Star Embeds
A couple of weeks ago I ordered a selection of green mica samples from U-Makeitup and this week they arrived – a lovely collection:
Green Mica SamplesGreen Mica Samples – labelled
Oh, and the Christmas ribbons have started to arrive – I know it probably still feels a bit early but I’ve already had a wholesale order for my Christmas range for delivery by 22nd October, so there’s no time to be to complacent…
Christmas Ribbons
Thanks for reading – my next post will be the first of this year’s Blogtober posts on the 1st of the month (next Sunday – eek!)
It’s Tuesday eve, and I think I’m pushing the time limit for posting a round-up of last week, so I’m going to make this a quickie…
The main focus of the beginning of last week was ‘Back to School’, which didn’t actually happen until Tuesday, when both kids headed into school with a quick kiss and barely a look back. I gave a little jump for joy, and headed straight into the soap kitchen to make soap. Mostly restocks (double batches of Bewitched & Luscious Lavender) but also made some progress on the Christmas stock – a double batch of Warm Gingerbread which, as per the test batch, moved really quickly, but I managed to get a small drop element in there. Cut photos to come next week I hope…
Bewitched, Warm Gingerbread & Luscious Lavender
I added a little mica swirl on the top of the Warm Gingerbread, just for some added interest:
Warm Gingerbread Mica Swirls
Wednesday and Thursday I was at the (part-time) day job, but managed to find some time to start on cutting, bevelling, wrapping and labelling a big order of mini guest bars.
Mini guest bars
The rest of the week was spent doing the usual soapy stuff, including spending as much time as I could uploading info and photos to the website – I think I’m still on track to launch at the beginning of October *crosses fingers*
Friday… Friday was kind of special, and had been planned for a while. Before having children my husband and I used to do a lot of hill / mountain walking, but we’d not been to the top of a mountain for about eight years. With both kids in school, we packed a lunch and off we went. The weather wasn’t great and we got a good soaking on the way up, but the weather cleared at the summit and we were rewarded with a lovely view. We descended in sunshine and were dry before we got home. It was absolute heaven, and we’re already planning the next one…
The view from the summit 1The view from the summit 2Happy Hikers
Or is it a Blogday? Either way, I published my first couple of posts on the 28th June 2013, Woohoo!! At that point I hadn’t made any soap since the birth of my daughter two months before, nor for a good few months before that due to day-long morning sickness and an extreme aversion to the smell of fragrance AND essential oils. (I’d had to ask my husband to put all my supplies up in the attic as even catching an accidental whiff of any of my soaps had me heading for the bathroom – urgh..)
Fast forward and that newborn is now four years old (funny that :-D) and she’ll be joining her big brother at school full time in September. That will mean much, MUCH more time for soaping and the business as a whole (including the blog!). I’m also hoping that I’ll have a bit more time for myself, and of course my poor, long suffering husband who has spent more evenings than I care to mention alone on the sofa while I focused on The Soap Mine.
I have loads of ideas for new products, blog posts and growing the business generally, so please stick with me – I hope I’ll still be here in another four years time, and I hope you’ll still be reading. Thank you all!!
Oh, here’s a little bit of soap in the mould from a couple of days ago, just because it’s pretty lol…
There’s been a lot of interest in my rainbow drop swirl (Tutti Frutti) soap recently, so I thought I’d put together a little pictorial tutorial for anyone who’s interested in how it’s done (I really, REALLY should start making videos shouldn’t I?).
Many of you will already know how big a fan I am of the drop swirl technique. Almost all of my core range is made using either a full or partial drop swirl, and Tutti Frutti is no exception. I made another couple of batches recently, and took some photographs along the way…
**Please make sure you’re familiar with the basics of soapmaking before you try any advanced swirls (Soap Queen is a good place to start) and always wear protective clothing / gloves / goggles. Safety first!!**
I generally make soap at room temperature, so I’ll mix up the lye solution in advance and put it to one side to cool down (I don’t discount the water for this one). I’ll also melt the hard oils and butters and combine them with the liquid oils and butters and allow them to cool down to room temp.
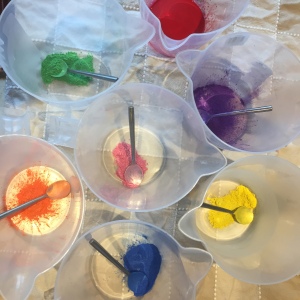
Next I measure out the seven different micas straight into the pouring jugs (actually here you’ll see six different micas and one liquid colourant. It’s notoriously difficult to get a good red in CP soap, but I use a liquid colour from Gracefruit which is rather good. They appear to be out of stock of the red at the moment, but hopefully it’ll be back in soon.)
colourants ready for mixing into the soap batter
Next I add my fragrance oil to the room temp oils and butters. Many people add their fragrance AFTER adding the lye and tracing the soap, but my preference is to add it before.
I then add a couple of teaspoons of the fragranced oils to each jug of mica and get them well blended. I know it’s common practice to skip this stage and simply add the traced lye batter directly onto the powdered mica (or add the powdered mica directly to jugs of traced batter), but I don’t always use a stick blender and this way I know I can get the colour incorporated well just by giving it a good mix with a spatula.
Pre-mixed colourants, oils and a jug of lye water
I get my moulds ready – notice my high-tech method of stopping the mould sides from bowing inwards 😀
Moulds prepared…
And then we’re ready to go… I mix the lye water into the tub of (already fragranced!) oils and butters, and share the soap batter out equally into the seven prepared jugs. It would appear I forgot to get a photo of that stage – sorry! What we’re looking for is a really light trace as the soap will thicken up during the pouring process. Personally I don’t stick-blend this soap AT ALL. I find that by the time I’ve mixed up all the colours thoroughly it’s already at a light trace, but this will very much depend on how quickly your particular soap recipe traces and which fragrance you’re using. I’ve even found that certain micas can inhibit trace, so there are many different factors involved. It’s a case of using your judgement and, to be honest, trial and error.
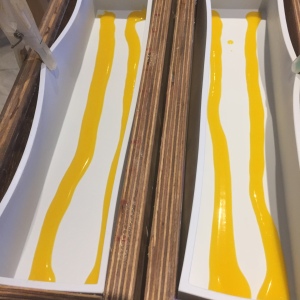
Next comes the pour. First in this time was yellow:
First pour – yellow
What’s crucial for a nice drop is the height from which you pour the soap in to the mould. At the early stages my jug is quite close to the bottom of the mould as I pour a line of soap along the length of it. Here’s the next couple of pours:
Red and orange poured next
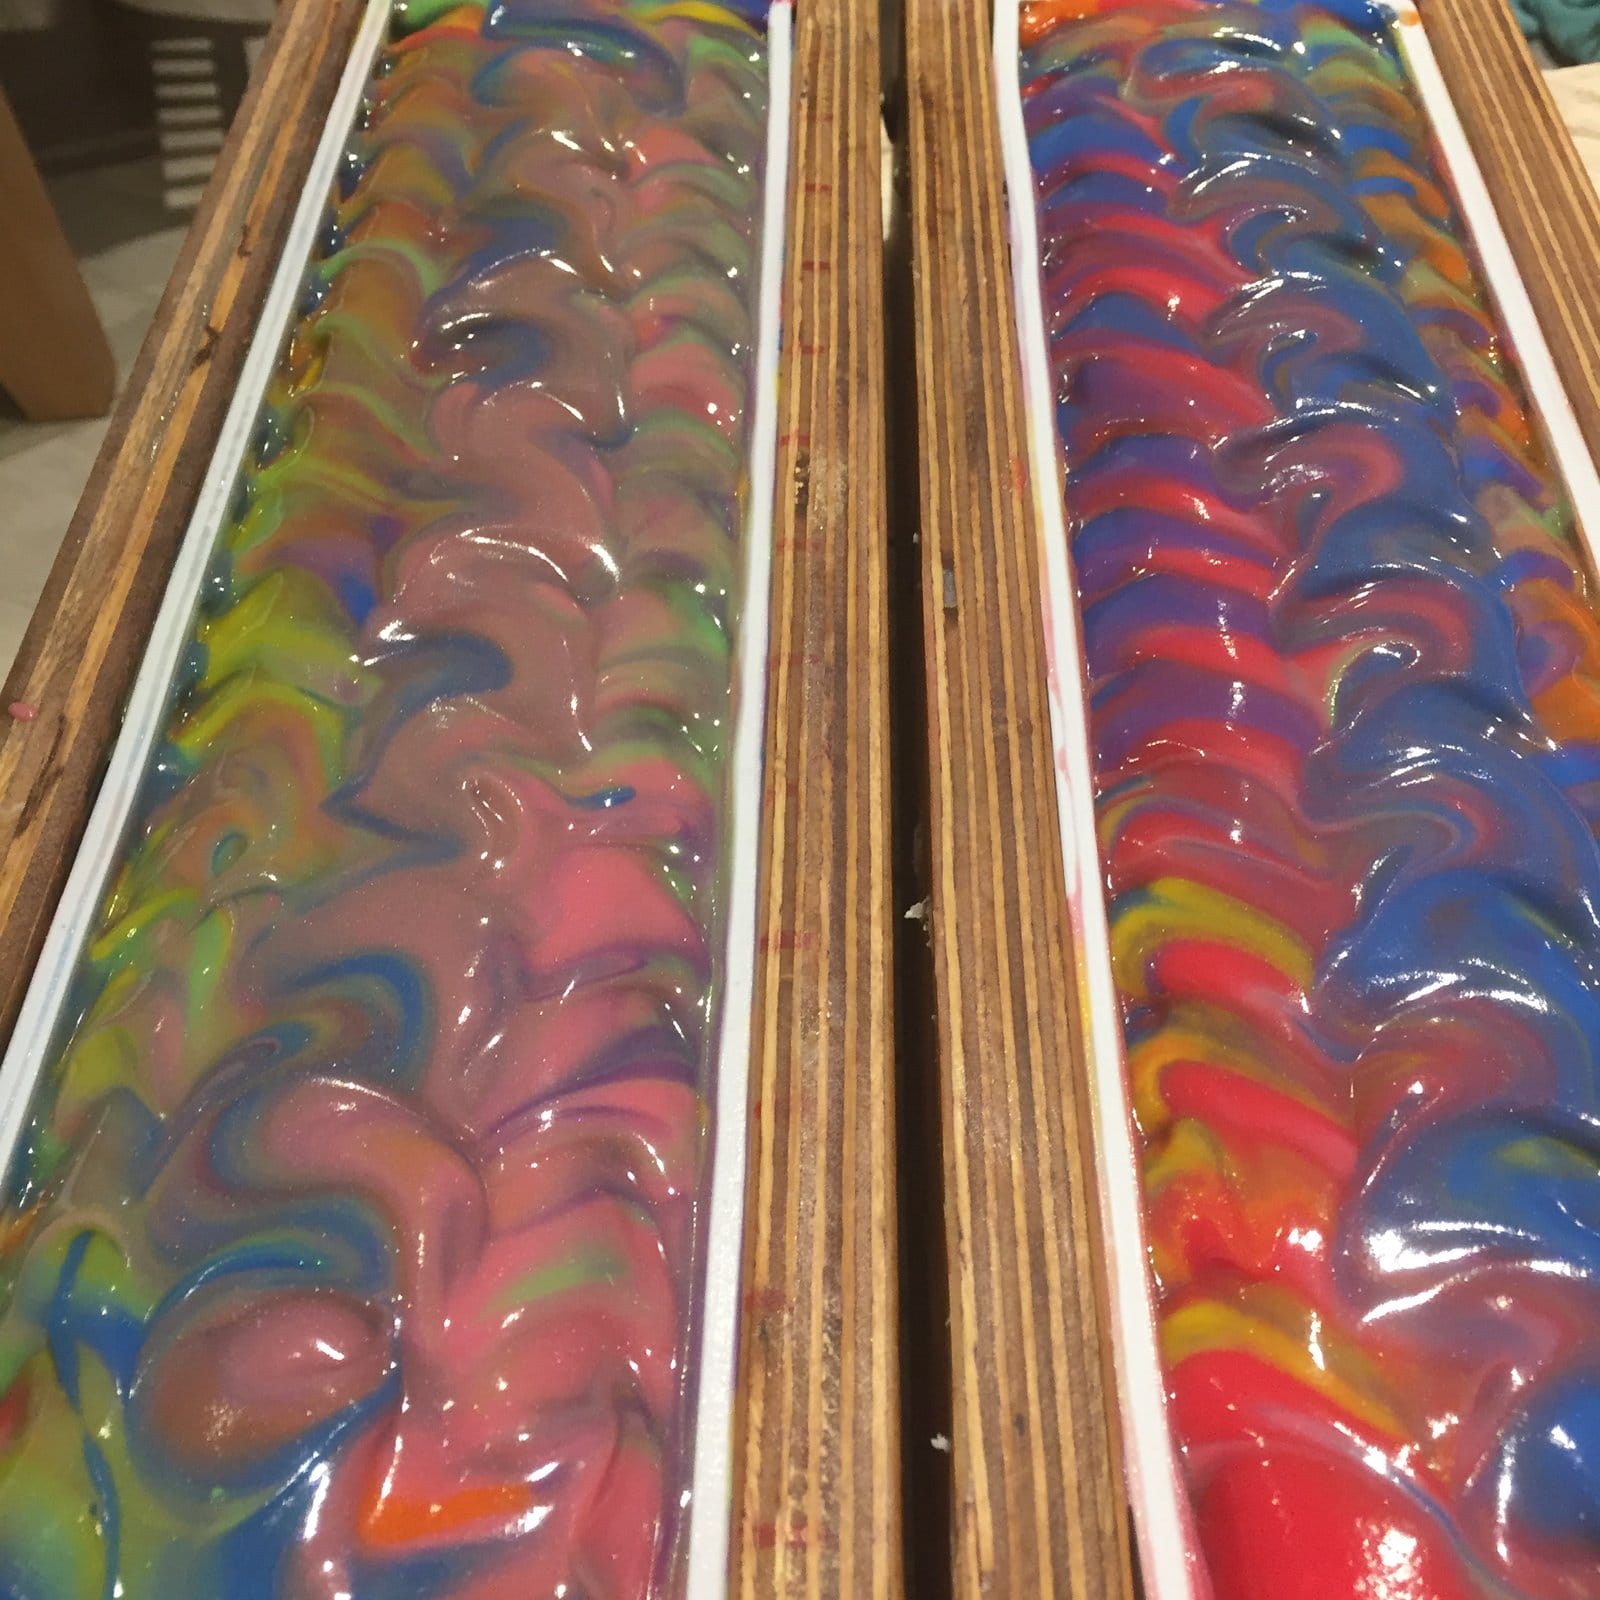
Once the bottom of the mould has been covered with soap, I start to raise the jugs a little higher as I pour, so that the soap drops into the previous layer, rather than sit on the top of it. It’s very hard to give a precise height as it very much depends on how thick your soap batter is (the thicker it is, the higher you’ll need to drop it from)
More colours poured
I try to make sure I pour from the jugs in the same order on each round of pouring, and also try to make sure I’m not pouring a colour on top of the same colour in the mould.
I keep pouring until the moulds are full:
Filling up the mouldAlmost full…Full!
By this stage the batter is quite a bit thicker than when I started to pour, and looks none too tidy, but it doesn’t really matter once I start adding texture to the top:
Starting to tidy up the top
And the finished item:
Tutti Frutti in the mould
I generally leave soap in the mould for 48 hours before I unmould and cut:
Rainbow Drop Swirl mid-cut
And that’s it. It’s cured for 4 weeks, bevelled and tidied up, cured for another 2 weeks then released for sale.
Some time ago I started using the Instagram hashtag #dropsaretops for some of my photos – please use the tag to share your own drop swirls and make this drop swirl junkie very happy 😀
I almost didn’t post a weekly update this week as it’s been a strange one, work-wise. The children have been off school for half term, and although the youngest only goes for two hours a day, I’ve still missed that time to ‘get stuff done’. Days have been spent entertaining the children, and evenings have been mostly spent wrapping and labelling for a couple of BIG wholesale orders I have going out this week. Then we had a weekend away visiting family, so I have very to share on the soapy front.
But then I remembered that I needed to show you the cut of the Tutti Frutti that I made last week:
The children start back at school tomorrow, so I’m hoping this coming week will be far more productive on the soaping front, and keep an eye out for my February update coming up in the next couple of days.
I found that photograph that I thought I’d deleted yesterday. Actually, I had deleted it, but discovered that my phone keeps a copy of recently deleted photos – who knew? (Many people, clearly, but not me 😉
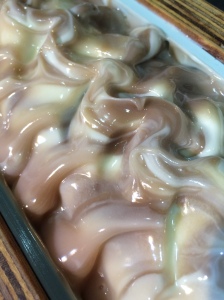
So, just popping in and out quickly to finally share the third of last weeks batches:
Here it is in the mould:
Luscious Lavender in the Mould
And here it is freshly cut (and a little rough and ready). The twist (such as it is) is a slightly different shade of the darker purple – I’d run out of the regular mica so had to improvise:
As I was putting together yesterday’s ‘Wet Soap Wednesday on a Friday’ post, I was thinking about how much I like soap tops, and remembered that I’d done a post a while back about them. When I went looking, I was surprised to find it had been almost two years ago: Soap Tops from November 2014. I was also struck by how different those tops were to the way I do things now. So today’s post is a quick round up of my favourite soap tops from more recent times.
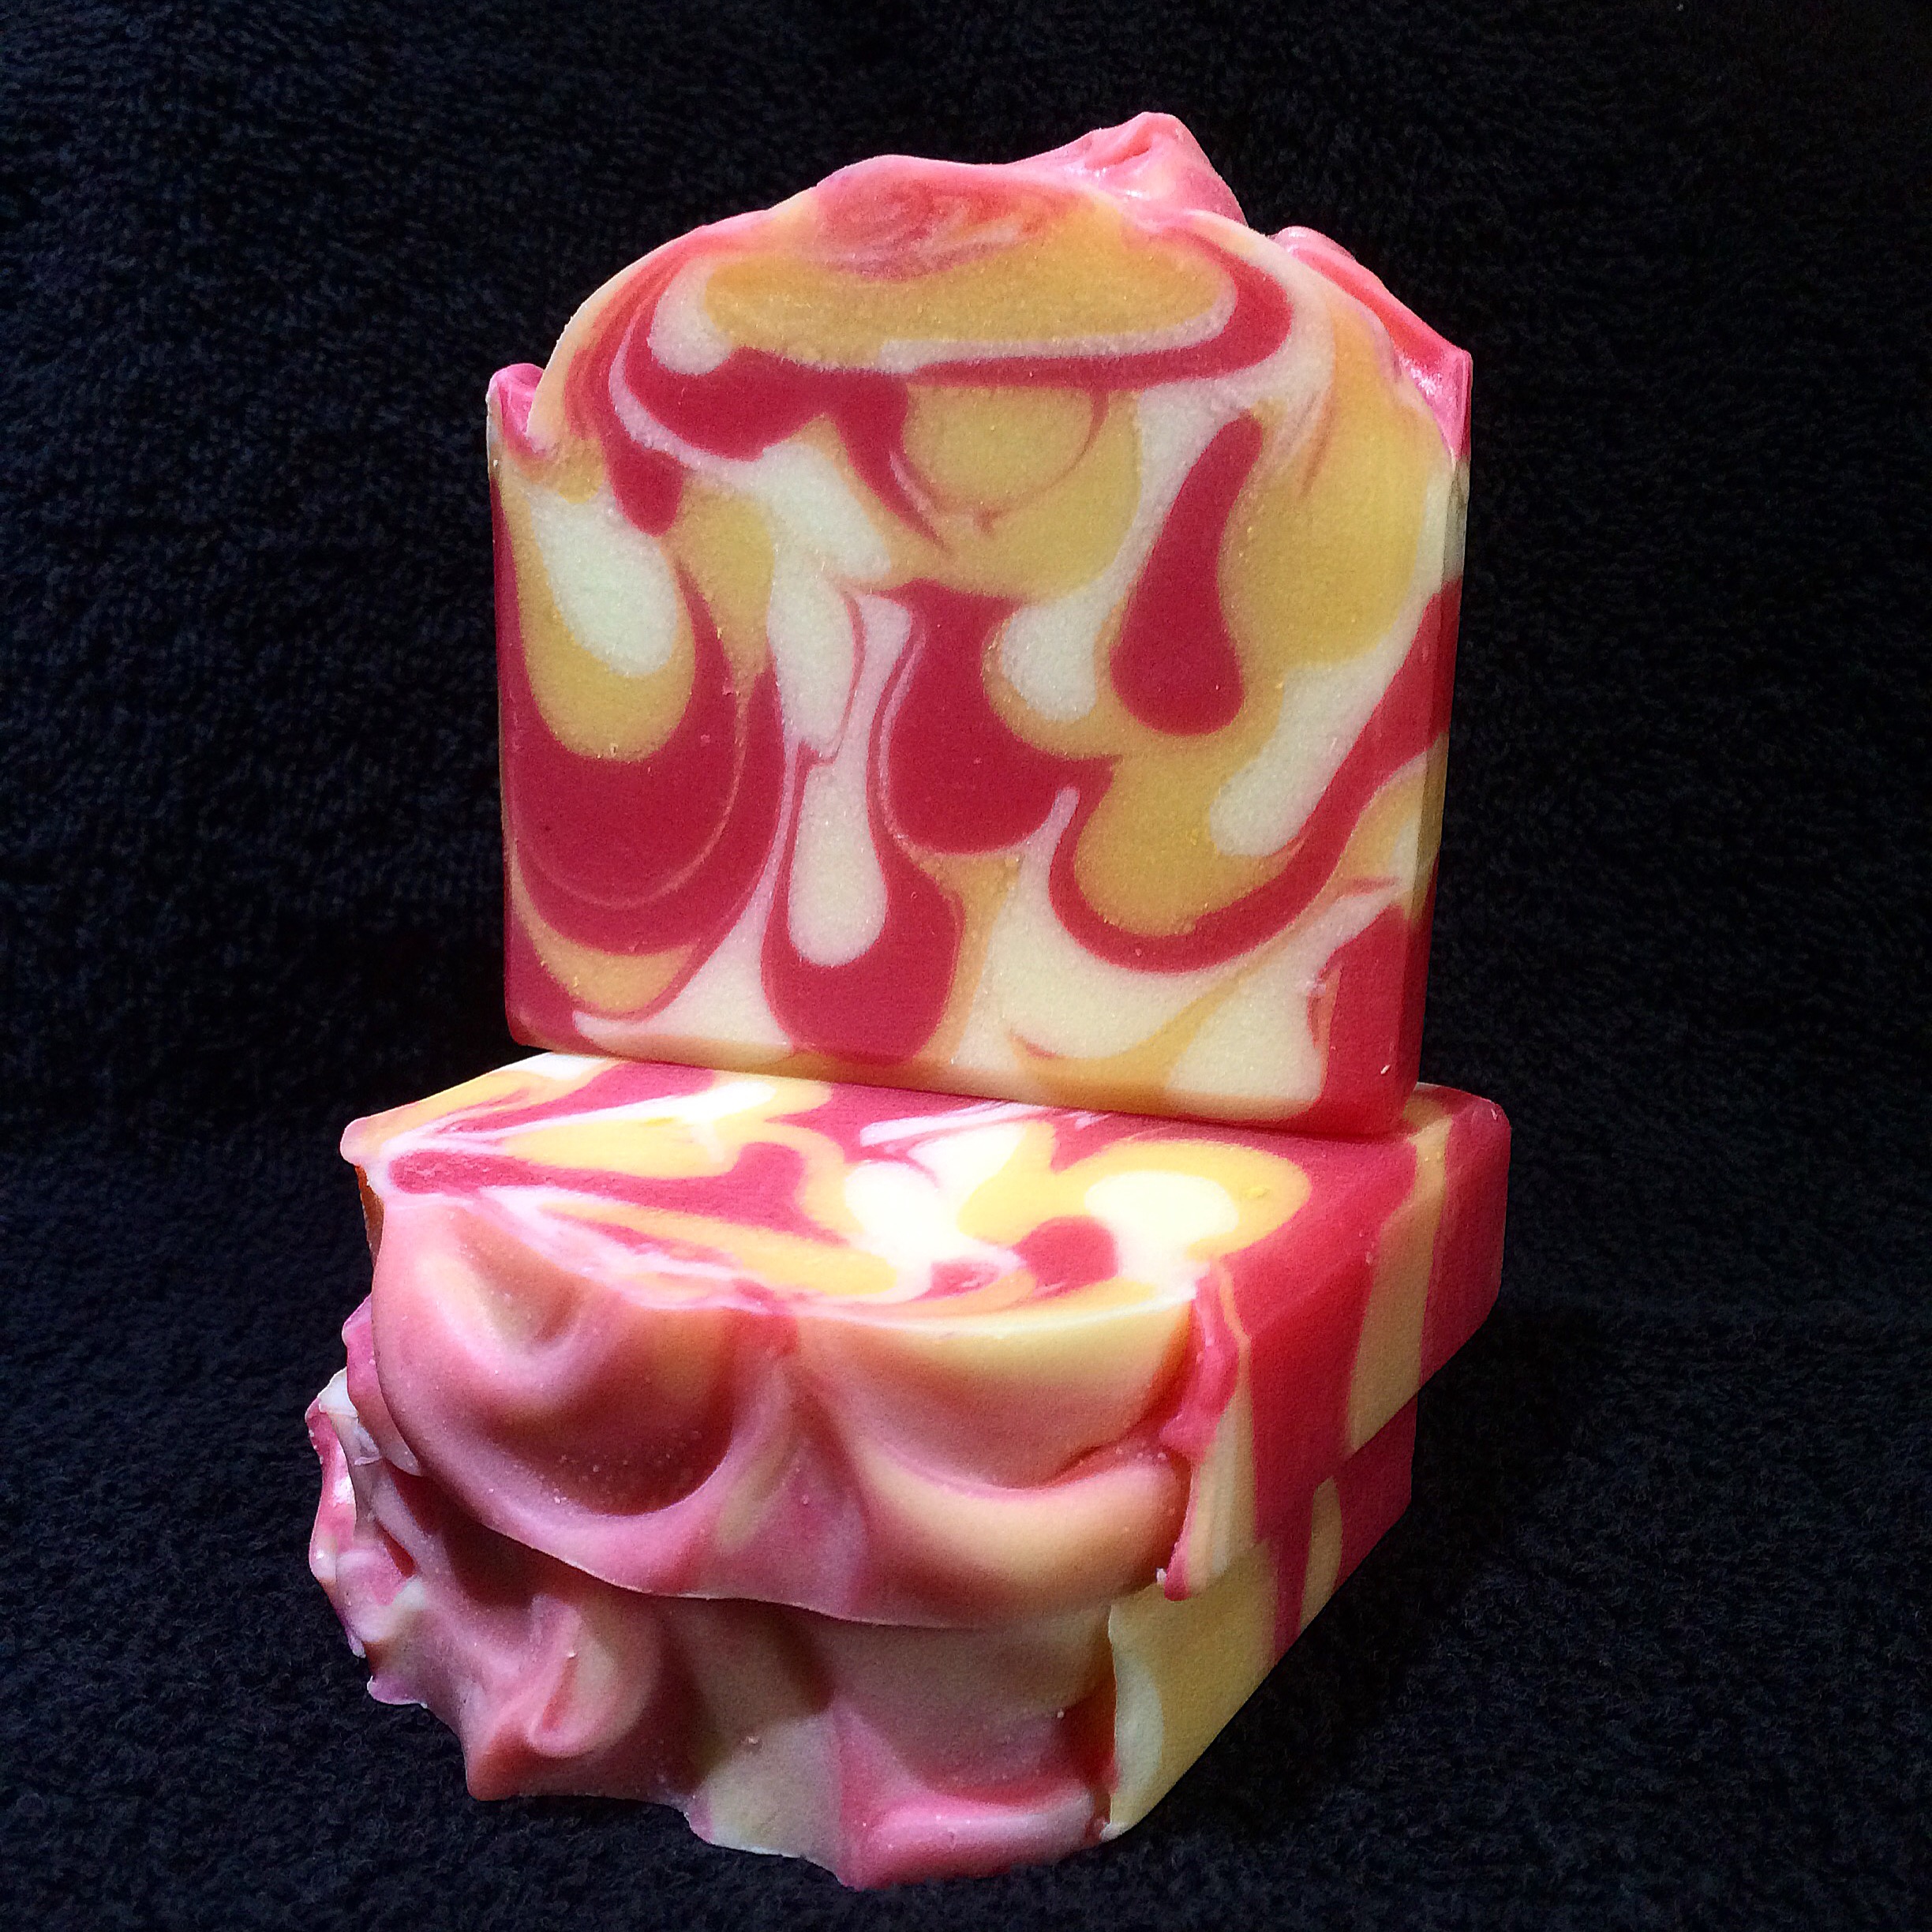
First up is a dupe of the DKNY fragrance, Be Delicious – appley, cucumbery and absolutely….Delicious:
Delicious
Then there’s a recent batch of Clarity which turned out just beautifully (last night’s batch didn’t look quite as good as this in the mould!)
Clarity
The top of this Oatmeal, Milk & Honey batch swirled really nicely:
Oatmeal, Milk & Honey
And this batch of Florida Sunrise (now discontinued) looked gorgeous as it started to gel:
Florida Sunrise
Another recently discontinued fragrance – a custom blend called Enigma, looked luscious freshly swirled:
Enigma
Finally I just LOVE how this batch of Serenity looked in the mould:
Serenity
I’d be lying if I said every single batch looks like these, but I do tend to add a lot more texture to the tops than I used to, and I think I prefer them that way. I guess it’s about time I revised my header photo!!
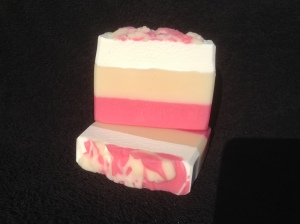
The soap that I’ve long called ‘Love Spell’ is scented with a fragrance oil that is a copy of the designer perfume ‘Love Spell’ by Victoria’s Secret. Having recently applied for my bath bomb assessment, which includes bombs fragranced with the same fragrance oil, I was reminded that I can’t call them (or my soap!) Love Spell as it contravenes copyright. I knew this, and I should have changed it ages ago, but to be honest I just didn’t spend the time to come up with a replacement. As it was, when I received the message from my assessor, the new name came to me within a minute or two. Typical! Anyway, it will henceforth be known as Bewitched.
I first made it back in the summer of 2014. You can clearly see where the top portion, coloured with titanium dioxide, shrank more than the rest of the bar during the curing process. The top was simply spattered with leftover soap batter:
Bewitched V1
Soon after that I got into tiger stripe pouring, which I initially made with a flat top (and experimented with some black stripes):
Bewitched V2Bewitched V3
And later with a textured top:
Bewitched V4
Finally I brought it in line with the rest of the range i.e. with a full bar drop swirl:
Bewitched V5
Day 23 of Blogtober 2016. I’m starting to believe I can actually do this 😀
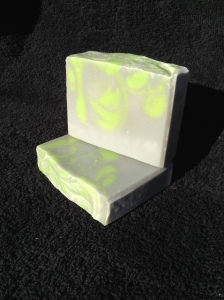
I have a brand new essential oil bar, and it needs a name… This bar is scented with lavender, lemon and lime EOs. Heavier on the lavender and lemon, lighter on the lime, but it’s definitely discernible.
Please give me a name 🙂
I’m offering a free bar to the person who comes up with the name that I eventually select, and you can either enter below in the comments field, or on the competition post on my FB page. It’s open to anyone, wherever you are in the world – I’ll cover postage costs too (last time I did this it the bar went over the pond to the US). So don’t be shy – I know you’re a creative lot!!
FYI The other essential oil bars in my range are called Serenity, Clarity, Peace, Boho Baby, Flowers and Luscious Lavender.
PS – the winning name will be chosen on Saturday 29th October, 9pm UK time.
Wet Soap Wednesday comes round again surprisingly quickly. Though, a bit like Christmas, it shouldn’t really be as surprise should it? It’s not as if there’s a possibility it might not turn up on time…
I digress. These are Super Scrubby Peppermint, Love Spell and Clarity, all freshly poured and rocking the glossy look.
Soap in the Mould
This was Love Spell just poured and before the top was textured:
Love Spell, freshly poured
And here it is after the obligatory titivation:
Love Spell
Day 13 tomorrow – sooo close to halfway. If you’re still with me almost 2 weeks in I thank you, very much. If you have any themes or topics you’d like me to touch on during the second half of Blogtober do let me know – I’ll try to fit in a bit more of that personal stuff I find so awkward too 😀
Blogtober Day 10. Day 10 folks!! A third of the way through, nearly…
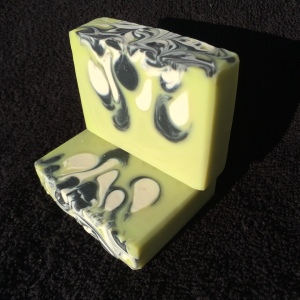
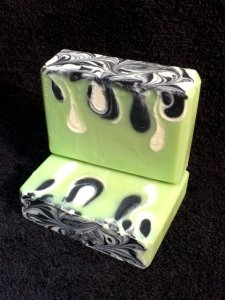
Anyway, this the sixth in an occasional series on the evolution of Soap Mine soap designs. Previously I’ve covered Serenity, Wake Up! (discontinued), Tutti Frutti,Delicious and Luscious Lavender, and this time it’s the turn of ‘Clarity’, fragranced with a gorgeous fresh blend of Lemongrass and Clary Sage Essential Oils.
This one has proved to be one of my bestsellers over the years, and I’ve been making it for a long time, so please forgive the quality of some of the photographs. I’ve said it before but soap photography is as steep a learning curve as soap making!
First came the two color version – a cool grey base with lime green drops:
Clarity v.1
I wasn’t overly enamoured with with the grey, so soon after it became a three colour bar, with a green base and white and black drops.
Clarity v.2Clarity v.3
When I started adding texture to the tops, Clarity was included of course:
Clarity v.4
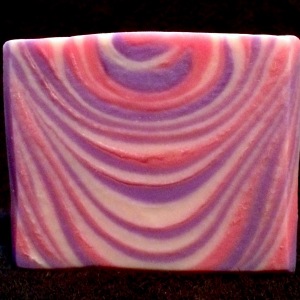
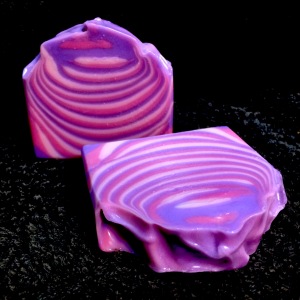
And so it was, for many, many batches. But then one day, very recently, I decided to ring the changes and, drum roll please…Ta da! This is the new look for Clarity:
Clarity v.5
The black base of the bar is coloured with activated charcoal, purported to be excellent for your skin. I found this post recently which talks about the benefits of activated charcoal in soap, but of course, I make no medical claims for my soap whatsoever! 😉
Did you know Wet Soap Wednesday is a thing? Certainly on Facebook and Instagram it is anyway. Today’s post is a quickie – the fruits of last night’s soaping session.
From left to right: Three Kings, Luscious Lavender & Christmas Tree
Um… Ooops! It would appear that it’s been five months since I last posted here. I knew it had been a while, but FIVE MONTHS?? In fairness I have been incredibly busy, and posting on the blog was one of things that I kept putting off until I had more time. Well, now I have more time. Today my youngest child started school. Only two hours a day this year, but that still gives me 10 WHOLE HOURS a week to ‘get stuff done’, and high on my list of priorities is to resurrect this blog and start posting much more often.
Since my last post I’ve standardised all of my range, including the seasonal bars. I may post more about these in the future, but here’s a quick peek:
Love Spell:
Cherry Blossom (Spring Special):
Afternoon at the Races (Summer Special – Strawberries & Champagne fragrance):
Criccieth Beach (Summer Special – Rockpool fragrance):
And, as there’s always an exception (or two) to the rule, there were also a couple of anomalies – one confetti bar which I made to use up all the bits of soap that I get when I bevel the bars, and one that seized badly when I added the fragrance so I had to simply do what I could with it to get it into the mould, and actually, it turned out ok:
Confetti Soap (Lemon Verbena fragrance):
Black Rock Sands (Beachy fragrance):
What else?
Well, I’ve gained two more wholesale accounts, bringing the total of retail outlets stocking my soap up to ten, and started supplying one-third sized bars to two businesses offering guest accommodation. Much of my time has been spent making, wrapping and labelling soap to keep up with demand. Generally this means working once the kids are in beds, so lots of late night soaping for me!
Every Thursday evening during the holiday season (April – Oct) I’ve been giving a soapmaking presentation to visitors staying in local Holiday Fellowship accommodation. I LOVE being able to share the process, and it’s always really well received – so much so that I’ve already been asked to go back next year 😀
During May and June I participated in a European soap swap with 20 other soapmakers from all over Europe. It involved making an all natural soap, without artificial colours or fragrances, and I was waaay out of my comfort zone. I’ll share more in another post.
We enjoyed a lot of fantastic family time over the school holidays, with long weekends camping, trips to the beach, geocaching and scavenger hunts (despite the weather not always playing ball – I’m fully expecting an Indian summer now that the kids have gone back to school!).
Plans for the near future include getting my bathbomb assessments organised in time for Christmas, making a facial bar, and experimenting further with sugar scrubs and lip balms before I decide on final recipes. Oh, and launch the website, but you’ve heard that one before 😉
New Year is generally a time for looking forward for me (I’m still working on those 2016 business goals I touched on in my last post) but last week I was browsing and sorting (supposedly – I’m easily distracted 😉 ) through my HUGE collection of soapy photographs and I came across some from the early days. I can remember being SO proud of this one – my first every straight lavender essential oil soap:
Luscious Lavender #1
Note the rounded corners – I hadn’t yet discovered the joys of silicone liners lol… You can also see the signs of a partial gel here too.
It wasn’t long before I began standardising (and simplifying) the swirls, and this was the next incarnation – an In The Pot (ITP) swirl:
Luscious Lavender #2
I went through a phase of experimenting with mica in oil swirls on the top of the bars – though I’m not sure why I thought this was a complementary colour for the top-swirl…
Luscious Lavender #3
When it came to developing a cohesive range I decided to make all my essential oil soaps with a drop swirl, and so came up with this two colour lavender drop in a white base:
Luscious Lavender #4
The colours have remained the same ever since – I use titanium dioxide for the base and two micas called ‘grape’ and ‘lilac beauty’ for the drops:
Luscious Lavender #5Luscious Lavender #6
Thanks for checking in – I really do hope to be back soon with those 2016 goals!
One of my best sellers is, quite literally, ‘Delicious’. It’s fragranced with a dupe of the DKNY fragrance ‘Be Delicious’ which has the fresh scent of apples blended with floral / woody fragrances. To date I’ve always made it with a simple ITP swirl (with apologies for the lighting on the bottom bar):
Delicious – ITP Swirl
When I’m against the clock and frantically trying to get my stock levels back up, an ITP swirl is mercifully quick to execute. But, for me at least, they are unpredictable, and the colour distribution isn’t always as I would like. So I decided to try using the same colours but with a drop swirl, and this is how it came out:
Delicious – Drop Swirl
I LOVE it! So that’s me with one less ‘quickie’ during busy stocking-up soapmaking sessions, but I reckon it’s worth it 🙂
It has though brought to mind an ongoing dilemma I have about what’s most important when it comes to the soaps that I create. I put a lot of thought into what oils and butters go into my bars to give them skin-loving, super-lathering properties, but then I hear people say that they look too pretty to use. It’s a phrase I’ve heard at every single craft fair / Christmas market I’ve ever sold at. I know people are being complimentary but – Noooooooooooo! Use them! Use them, then buy more 😀
November’s challenge over on Amy Warden’s Great Cakes Soapworks was to (attempt to) recreate what Amy named the ‘Tall & Skinny Shimmy’. This technique is also called the wall pour or segment filling, and has been perfected by Tatiana Serko, an amazing soaper who created the tutorial video for the challenge. I’ve seen this design before and always wondered how it was done, SO there was no doubt in my mind as to whether I’d be giving it a go this month. Here’s the design she created for the tutorial:
Tatiana’s Tall & Skinny Shimmy
I recently bought a shiny new tall & skinny mould, and this challenge marked it’s first outing. This was the first problem. Turned out the mould holds more soap than my regular mold. I kind of thought it would, but checked on the website where I bought it to make sure. Unfortunately, in my haste, I looked at the wrong listing, and so had the wrong volume in my head. Luckily I’d had a sneaking suspicion that that figure might be incorrect (just by looking at the mould – which is LONG), so I prepped two batches of my masterbatched oils, just in case.
I decided (once again) to use a fragrance I’d not used before. Not as crazy as it sounds – I used a blend of Patchouli & Sweet Orange essential oils, both of which I’ve used separately many times without any problems.
I added the fragrance blend to the oils, then added the lye and mixed gently with a whisk until the soap was fully emulsified, but no more. In her tutorial, Tatiana said that she doesn’t use a stick blender, and simply lightly hand mixes her soap. With some trepidation, I decided to do the same, and split the soap into seven, colouring each portion a different shade, and mixing thoroughly by hand.
Prepped colourants
I then set up my mould as per Tatiana’s instruction. I placed two pencils parallel to each other on my work table, on either side of my mould. I put one side of the mould onto one of the pencils, so that there was a tilt to the mould, and then poured the first colour down and along the side of mould that was NOT on the pencil. I then moved the mould so that the other edge was sitting on the other pencil (and the mould was therefore tilted lengthways the other way) and poured down and along the opposite side. I did this with all seven colours, alternating the side each time. The soap was very thin, and had barely reached trace – I think it perhaps could have been just the tiniest bit thicker – note to self for next time…
Anyway, of course, it turned out I didn’t have enough soap made up to fill the mould, so I quickly separated out another three portions of the second batch, added colour, and continued to pour. The pouring was fast and fraught, and I didn’t get the opportunity to take any photographs – sorry!
Once the pour was complete, and the mould was full, I swirled to the top and put it to one side to harden up.
Tall & Skinny Shimmy in the Mould
As it was poured at such a light trace, it took a while to harden up sufficiently, but three days later I felt confident enough to take it out of the mould:
Ready for cutting
I was REALLY apprehensive about cutting this one, I didn’t have the time (or the ingredients) to make another one, so I was hoping it wasn’t a complete disaster. As it was, it’s not too bad. I did get a little bit of a shimmy, but there’s no doubt that the pouring left a lot to be desired!!
Tall & Skinny Shimmy (kinda)
I think had I had the correct volume of soap from the beginning, and just had the seven colours to pour, I may have had more luck – it’s clear that my scrabbling for more soap towards the end caused issues with the design at the top.
Another issue I had was that the silicone liner was so tall and long, it didn’t stay flush to the sides of the mould – the sides bent into the middle, and so while pouring down one side, I had to use my other hand to hold the other side of the silicone mold away from the middle, which was a bit awkward.
I’m really happy to have been able to give this one a go, and will probably try it again at some point in the future – thanks Amy!
Thanks for reading – I’ll be back soon with a post on my holiday soaps.
This month’s challenge for Amy Warden’s monthly Soap Challenge Club over at Great Cakes Soapworks is to create a soap using the ‘Clyde Slide’ technique. The Clyde Slide is named after Clyde of Vibrant Soaps, who uses this technique to create beautiful (and exquisitely coloured) soaps – do check out his videos on YouTube if you get the opportunity.
As I’ve just started production of this year’s Christmas soaps, I decided to design my challenge soap around a fragrance oil called ‘Yule Log’. It’s a chocolately, almondy, cakey fragrance, with notes of cinnamon, ginger, vanilla and musk and is delicious out of the bottle. How does it smell in soap? I’d love to tell you but, um, well, I forgot to add it. Oh well, sensitive noses deserve pretty soap too don’t they?
I used a light brown mica as the base colour, to represent the sponge, and dark brown mica, titanium dioxide (white) and red liquid colourant for the cream, chocolate and holly berries elements. I did consider using a little green too for the holly leaves, but in the end I’m glad I didn’t.
I prepped the soap batter and added the colours, making sure I kept the batter at a light trace:
Coloured soap
Then I poured the white, red and dark brown soap batters into the bowl containing the lighter brown soap. I completely forgot to take a photo of this stage, but I used exactly this pattern (this was my second attempt):
Clyde Slide in the Pot
Usually, when I use the ‘In the Pot’ technique, I would now give the pot a quick stir, just once or twice, but I always stir before pouring. For a Clyde Slide, you DO NOT stir. I can’t tell you how much I wanted to stir!!
Here it is mid-pour:
Clyde Slide mid-pour
Then I swirled the top:
Clyde Slide top swirl
And two days later, Ta Da!! My unscented Yule Log Clyde Slide:
Clyde Slide, The Cut
And here’s a close up to show the trademark ‘Clyde Slide’ feathering – it’s not a blurred photo, honest :-D:
Clyde Slide Close Up
Many thanks to Amy for her major feat of organisation (apparently there are over 180 entrants this month!), I’m really looking forward to seeing all the other entries. Good luck if you’ve entered!
I’m going to quickly gloss over how long it’s been since I last posted and share a soapy pic – ‘cos that’s what you’re here for right? 😉
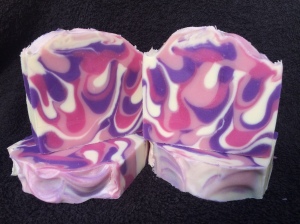
Soap fragrance oils containing vanilla are often considered tiresome because of their propensity to discolour and potentially ruin a carefully designed soap. But they smell so good! I absolutely love the smell of ‘Pink Kisses’ from Gracefruit, but my first attempt at using it was a complete disaster. It was early on in my soaping career, and discolouration wasn’t even on my radar. I used a selection of pretty pink colours and was so excited to see what it would look like, so imagine my disappointment…
Looks ain’t everything!
Every failure’s a learning opportunity eh? 😀
Four (!!) years on and I decided to give it another go – this time I was a little more careful with my design. Splitting the batter into two, I coloured one half with Orchid Pink Mica, and added the fragrance oil to the other other portion only, adding a little Titanium Dioxide to mitigate the effect of the vanilla. This was the result:
First Kiss
Needless to say I’m so much happier with this one. I think the browning effect of the vanilla actually improves the look of the bar and gives it some depth and interest.
I hope you’ll agree that my photography skills have improved a little too 😀 😀 😀
This website uses cookies to improve your experience. We'll assume you're ok with this, but you can opt-out if you wish. Cookie settingsACCEPT
Privacy & Cookies Policy
Privacy Overview
This website uses cookies to improve your experience while you navigate through the website. Out of these cookies, the cookies that are categorized as necessary are stored on your browser as they are essential for the working of basic functionalities of the website. We also use third-party cookies that help us analyze and understand how you use this website. These cookies will be stored in your browser only with your consent. You also have the option to opt-out of these cookies. But opting out of some of these cookies may have an effect on your browsing experience.
Necessary cookies are absolutely essential for the website to function properly. This category only includes cookies that ensures basic functionalities and security features of the website. These cookies do not store any personal information.
Any cookies that may not be particularly necessary for the website to function and is used specifically to collect user personal data via analytics, ads, other embedded contents are termed as non-necessary cookies. It is mandatory to procure user consent prior to running these cookies on your website.