Posted on 26 Comments

The ‘Clyde Slide’ Challenge Soap

This month’s challenge for Amy Warden’s monthly Soap Challenge Club over at Great Cakes Soapworks is to create a soap using the  ‘Clyde Slide’ technique.  The Clyde Slide is named after Clyde of Vibrant Soaps, who uses this technique to create beautiful (and exquisitely coloured) soaps –  do check out his videos on YouTube if you get the opportunity.

As I’ve just started production of this year’s Christmas soaps, I decided to design my challenge soap around a fragrance oil called ‘Yule Log’. It’s a chocolately, almondy,  cakey fragrance, with notes of cinnamon, ginger, vanilla and musk and is delicious out of the bottle.  How does it smell in soap? I’d love to tell you but, um, well, I forgot to add it. Oh well, sensitive noses deserve pretty soap too don’t they?

I used a light brown mica as the base colour, to represent the sponge, and dark brown mica, titanium dioxide (white) and red liquid colourant for the cream, chocolate and holly berries elements. I did consider using a little green too for the holly leaves, but in the end I’m glad I didn’t.

I prepped the soap batter and added the colours, making sure I kept the batter at a light trace:
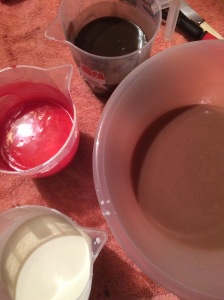
Coloured soap
Coloured soap

Then I poured the white, red and dark brown soap batters into the bowl containing the lighter brown soap.  I completely forgot to take a photo of this stage, but I used exactly this pattern (this was my second attempt):
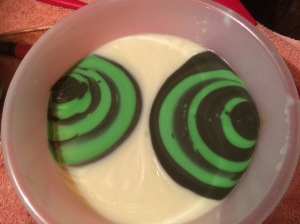
Clyde Slide in the Pot

Usually, when I use the ‘In the Pot’ technique, I would now give the pot a quick stir, just once or twice, but I always stir before pouring.  For a Clyde Slide, you DO NOT stir. I can’t tell you how much I wanted to stir!!

Here it is mid-pour:

Clyde Slide mid-pour

Then I swirled the top:

Clyde Slide top swirl

And two days later, Ta Da!!  My unscented Yule Log Clyde Slide:

Clyde Slide, The Cut

And here’s a close up to show the trademark ‘Clyde Slide’ feathering – it’s not a blurred photo, honest :-D:

Clyde Slide Close Up

Many thanks to Amy for her major feat of organisation (apparently there are over 180 entrants this month!), I’m really looking forward to seeing all the other entries. Good luck if you’ve entered!

Posted on 34 Comments

Spinning Swirl Challenge Soap

Despite signing up for them at every opportunity, it’s been an awfully long time since I’ve managed to get round to make a soap for Amy Warden’s monthly Soap Challenge Club over at Great Cakes Soapworks.  This month’s challenge really piqued my interest though, and I was determined to give it a go.  The challenge was to create a soap using the Spinning Swirl technique (which I hadn’t come across before) and, after months of making nothing but restocks, I was keen to try something a bit different. This technique involves pouring very fluid soap batter into a slab mould and then spinning the mould itself. Amy provided a great video tutorial, and this one of the soaps that she made to illustrate the technique:

Amy's Spinning Swirl Soap
Amy’s Spinning Swirl Soap

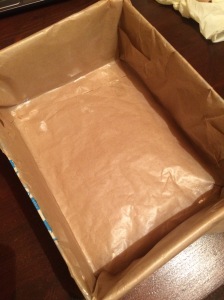
One of the stipulations of the challenge was that the soap had to made in a slab mould, which I don’t own. So my first challenge was to improvise a slab mold. A shoe box did the trick:

Improvised Shoe Box Mould

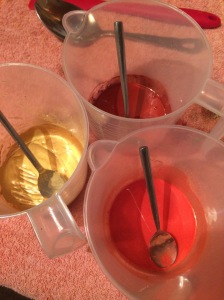
I prepared my colourants. The fragrance oil is described as a creamy, powdery, honey fragrance, and I wanted warm colours to reflect that.  I used Radiant Gold mica, Sicilian Orange mica and Red iron oxide and mixed them with a little of the oils (to which I’d already added the fragrance).

Micas mixed with a little oil from the main batch
Colourants mixed with a little oil from the main batch

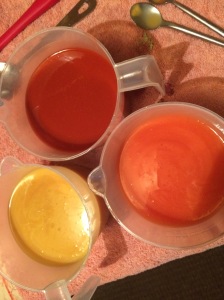
I added the lye to my usual oils and butters, and then poured the batter equally into the three jugs, stirred well then stick blended very VERY briefly (as I needed it to stay fluid for as long as possible):

Soap ready to pour
Soap ready to pour

I poured the soap into the mould, alternating colours in a faux-funnel type pour:

Soap mid-pour
Soap mid-pour

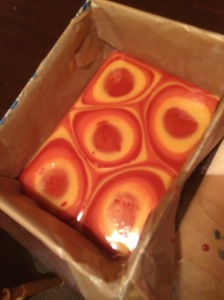
Once the soap was all poured, I gritted my teeth, gripped the mould with both hands, and started to rotate the mould as quickly and as firmly as I dared while praying that it wouldn’t all slosh out onto my table. After making probably about 20 full rotations, I swirled the top with a skewer and put it aside to firm up. A couple of days later I unmolded and found this left behind in the diy mould:

Leaked soap!
Leaked soap!

THAT is why I love my silicone moulds so much 😀 Anyway – the unmolded soap didn’t look too promising:

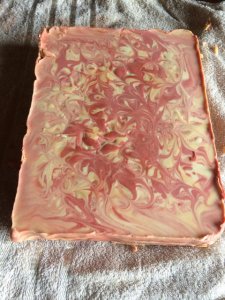
Unmoulded Spinning Swirl

Not only do I not have a slab mould, I also don’t have a cutter that can cope with a big ole slab of soap, so I had to make the first cuts with a Very Big Knife. Needless to say, I wasn’t particularly accurate:

First cuts - spinning swirl
First cuts – Spinning Swirl

And THAT is why I love my single wire Bud cutter 😀 Anyway, I was able to use my beloved cutter for the rest of the cuts:

Final cuts - Spinning Swirl
Final cuts – Spinning Swirl

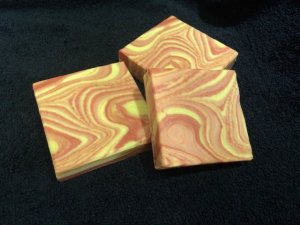
And, after a little love and attention, I’m really happy with the result:

Spinning Swirl Soap
Spinning Swirl Soap

Many thanks Amy for organising the challenge! It was a real pleasure to try something new and I’m looking forward to seeing what the other entrants come up with.