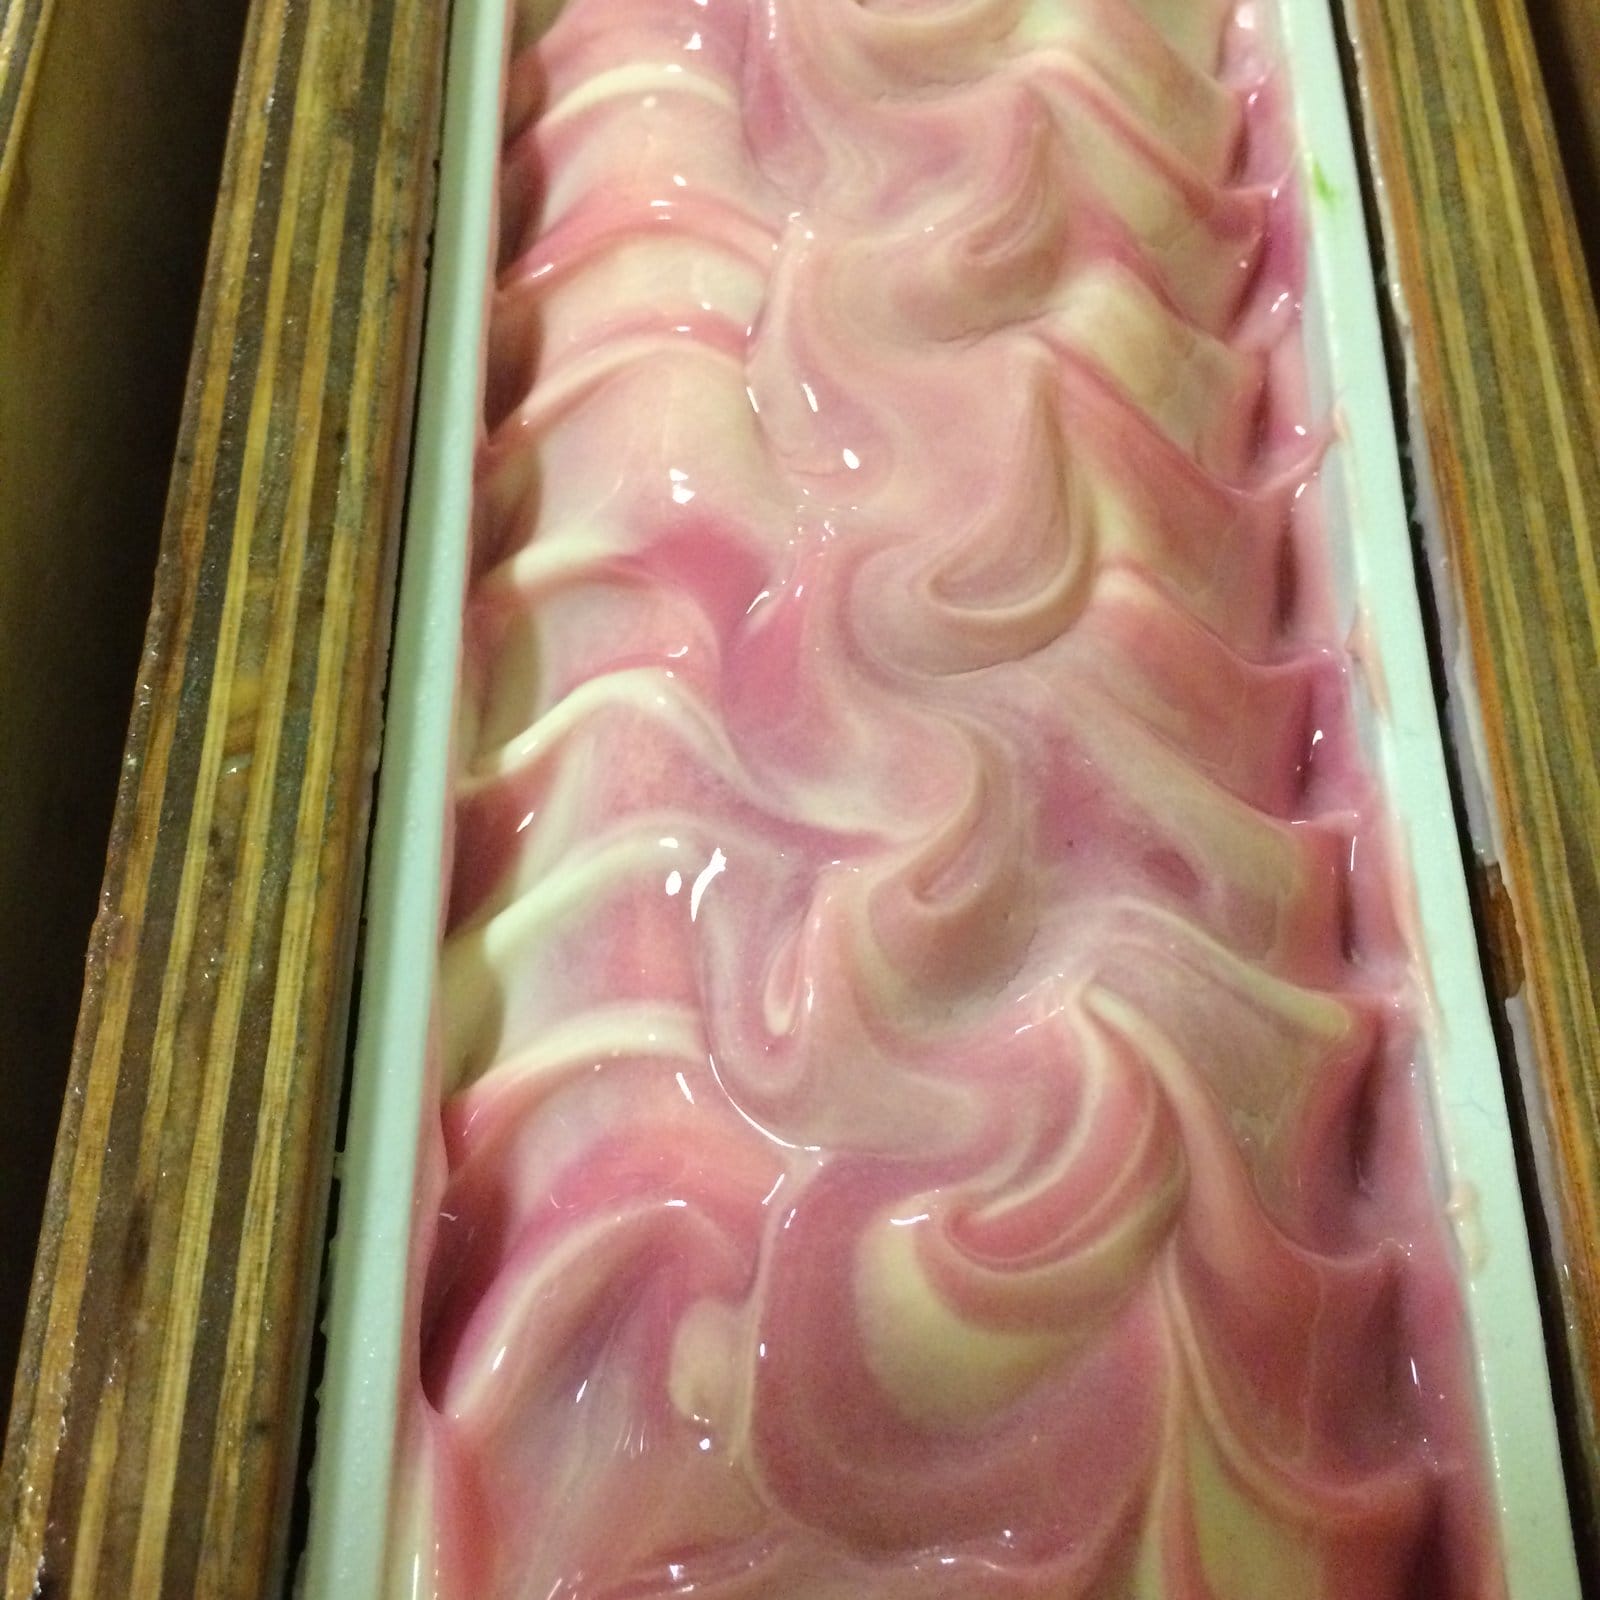
I see a lot of discussion on line about how to deal with soda ash on soap tops. Freshly poured soap is so glossily glorious – it can be a disappointment when you come back to it a day later to find it dulled and marred by an ashy deposit:

The ash is formed when the lye (Sodium Hydroxide, NaOH) in the soap reacts with Carbon Dioxide CO² in the air, and is totally harmless; the soap is no less effective. Nevertheless many find it to be aesthetically displeasing, and I’ve seen many methods used, some fairly elaborate, to eradicate it. In my early soapmaking days I was advised dip each individual bar into a pan of boiling water. Yes, this removed the ash and resulted in wonderfully glossy bars, but wow, it was tedious. I then read that could simply hold each bar in the steam that came from a boiling kettle. Only kettles these days don’t boil continuously – and flicking that switch 20 times a minute was….tedious. Then I had a lightbulb moment – I could hold the soap in the steam that came from a pan of water at a rollling boil. Yes, I am FULLY aware that I could have easily missed one of those steps out… That worked too but was still pretty longwinded and let’s be honest, tedious. There was also the ever present risk of scalding myself trying to use these methods. I came perilously close, believe me.
These days my ash removing regime is simple, fast and effective. I use an ordinary steam iron, on steam setting, to remove the ash from the soap tops before I’ve even unmoulded them. Half of this loaf has already been steamed:

My old, but trusty, Morphy Richards…

Holding the iron just a couple of inches above the top of the soap, I press the steam button continuously to cover the soap in steam, moving the iron back and forth. This is the result
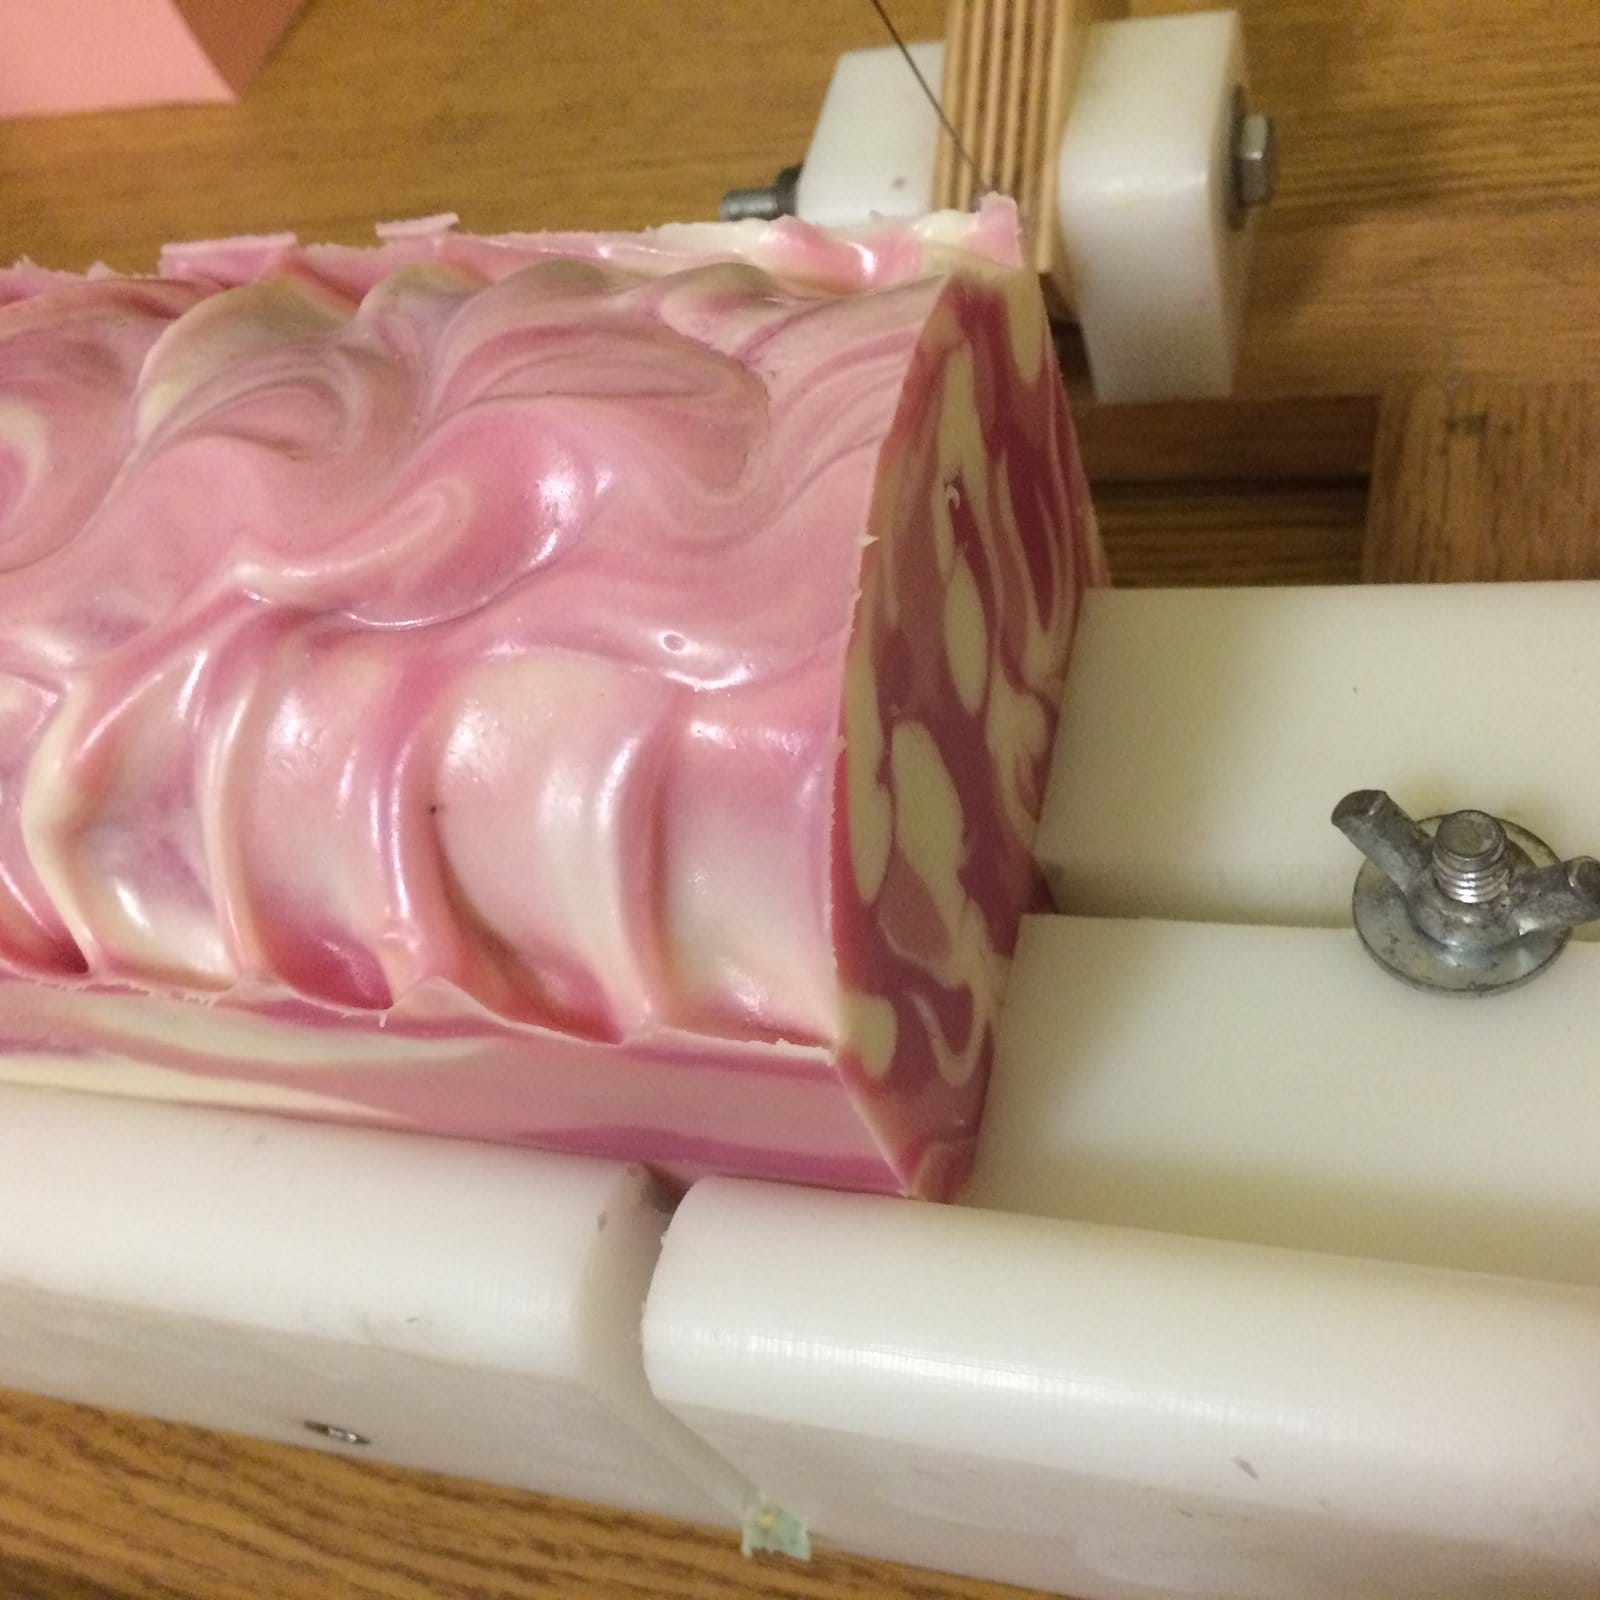
Easy peasy! And absolutely zero chance of scalding myself. It looks freshly poured but is actually fully set up and ready to be unmoulded. I usually leave it for about 10 minutes to dry off, and then unmould:

And cut – notice how glossy it still is:
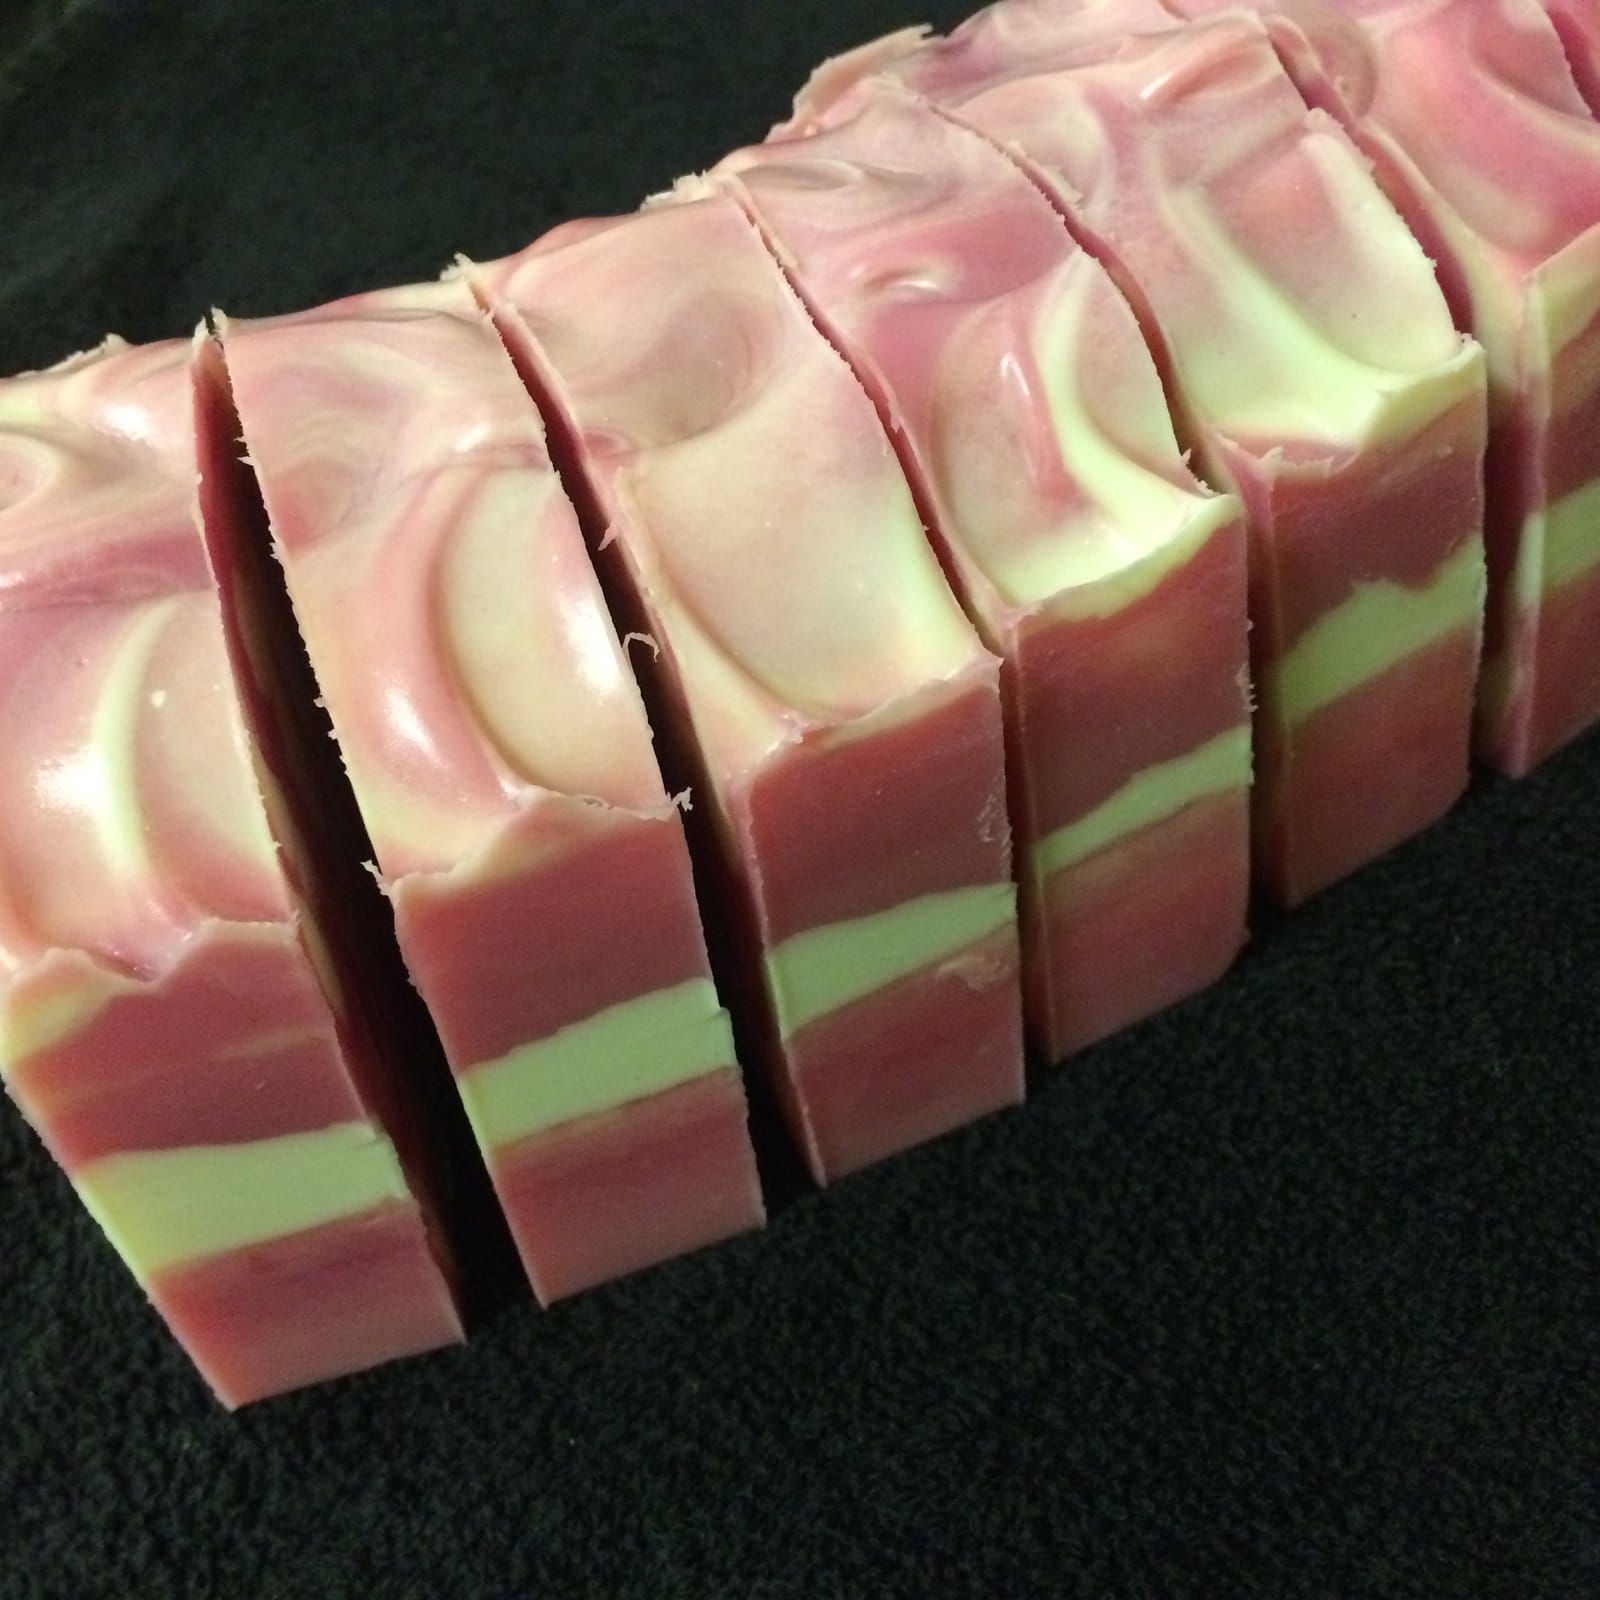
After the cut, before the tidy up – perfectly dry and glossy:
I’ve made a video of the steaming process, but I’m struggling to upload it :-S Once I figure it all out I’ll add it to this post 😀
Thanks for the tip, I’d do just that on my next trial batch 🙂 By the way, do you have any tips on getting rid of (or cover) the strong lye smell of cp soaps? I’ve made several batches of cp soap before and added extra fragrance oils but once it is cured the lye smell came back strong. Is this normal? xx lina
Hi Lina, do give it a go, it works really well. As for the smell of lye, it’s not something I’ve noticed personally, even with unscented soap. I know it sounds obvious but have you run your recipe through a lye calculator to be certain you’re using the correct amount? Are you certain it’s lye that you can smell? It sounds quite unusual to me.
Hmmm yes, I always use the lye calculator to make sure my recipe is ok and usually using 5% superfat. It is that smell when you mix lye with liquid portion, that smell kind of lingers around once it is cured. I find the smell is stronger when I used milk as the liquid as opposed to water. I wouldn’t say the smell is so strong to put off using the soap, it just one thing that always bothers me to find out why 🙂 Again, thanks Vicki for your tip, I shall try it once my soap is cured!
Thanks for sharing. This is a great and simple way to get rid of soda ash.
Amazing difference a steam can make!