Posted on — Leave a comment

Why I Don’t Describe my Soap as ‘Natural’

Two Bars of Spiced Golden Pear Handmade Soap
Two bars of Spiced Golden Pear Soap Handmade Soap and a facecloth

Last year, a woman came up to my stall at one of the Christmas markets and asked:

“Are all these soaps natural, yeah?” 

My response was “Well, it depends what you mean by natural”, hoping that would open up a conversation about ingredients etc. But no, she gave me a disdainful look and walked away, mumbling something about only using natural stuff…

Here at The Soap Mine you won’t ever find me describing my bars as ‘natural’, which might seem a little odd for a business making soap from lovely oils and butters.  So why’s that then?

What does ‘natural’ actually mean?

Well, that’s the problem, really.  Ask ten people what they mean by natural skincare and you might get ten different answers.

  • Does it mean every ingredient comes directly from a plant?
  • Does it mean nothing has been manufactured or processed?
  • Does it mean a product contains no synthetic ingredients?
  • Or does it simply mean something that feels wholesome and environmentally friendly?

It’s a word that sounds reassuring, but without a clear explanation it doesn’t tell you very much about what’s actually inside a product, and there IS no industry-standard definition of the word.

Natural doesn’t automatically mean better

I know I bang on about this quite a lot, but it’s worth repeating.  Just because something comes from nature doesn’t automatically make it harmless, gentle or suitable for everyone’s skin.

Poison ivy is natural. So are stinging nettles.  Essential oils, lovely as they can be, contain naturally occurring fragrance compounds that some people are sensitive or even allergic to.  Equally, an ingredient made in a laboratory shouldn’t be something to be frightened of.  What actually matters is what the ingredient is, how it’s used and whether it’s suitable for the finished product.

Soap itself is the result of chemistry

Traditional soap is made through a chemical reaction between oils or fats and an alkali. I start with oils and butters such as olive oil, coconut oil, shea butter and cocoa butter, then combine them with a carefully calculated sodium hydroxide solution. That sodium hydroxide has been created in a lab, and 99.9% of makers* of solid soap** in the land use it.

The resulting reaction, called saponification, transforms those ingredients into soap and glycerine.  Which means the finished soap is not simply a mixture of untouched plant oils in their ‘natural’ state

It’s a brand new product, created through chemistry.  And that’s an important distinction because rubbing olive oil and cocoa butter onto your hands wouldn’t have quite the same cleansing effect!

I’d rather tell you what’s actually in it

Some of my soaps are scented with essential oils, others with fragrance oils.  I use cosmetic-grade colourants, usually mica, to create the designs. My soaps are vegan-friendly and palm-free, and I formulate them using carefully chosen oils and butters.

These are specific things I can explain.  I’d much rather tell you exactly what I use and why, than rely on a broad description that could mean something different to every customer.

Oh and while we’re here, there’s no such thing as ‘chemical-free’ soap either.  Water is a chemical. Oxygen is a chemical. Everything around us is made of chemicals.

So when I describe my soap, I prefer to talk about the ingredients, how it’s made and what you can expect from it.  It might not sound quite as romantic as promising something completely natural and chemical-free. But it’s waaay more accurate.

And I’d rather give you accurate information than a lovely-sounding claim that doesn’t really mean anything.

Vicki x

*There is a tiny group of niche soapmaker who make their own lye from ashes, but it’s extremely difficult to get certification to sell the soaps made from it as it’s difficult to ensure uniformity of product. If a soapmaker is making their own lye, believe me, it will be their USP and you’ll know about it – they’ll be shouting it from the rooftops. In all my years making soap I’ve never found anyone certified to sell soap made with lye they’ve created themselves.

**Liquid soapmakers use potassium hydroxide rather than sodium hydroxide, but the point still stands – the potassium hydroxide is created in a lab.

Posted on — Leave a comment

Does handmade soap contain lye?

Here’s a question that comes up quite often when people discover how traditional soap is made.

“Does your soap contain lye?”

The short answer is that I use lye to make my soap, but a properly formulated and fully saponified bar doesn’t contain any free, caustic lye.

And before anyone starts worrying about what they’ve been washing themselves with, let me explain. Because this is one of those occasions when a little understanding of the chemistry makes everything much less alarming.

First of all, what exactly is lye?

Lye is the name commonly given to a strongly alkaline substance or solution used in soapmaking.

For traditional solid soap, the alkali is sodium hydroxide (NaOH), also known as caustic soda. It’s usually supplied as white pellets or flakes, which are dissolved in water before being combined with oils and butters. Sodium hydroxide isn’t some mysterious soapmaking ingredient. It’s widely used in industry, including paper manufacturing, water treatment, food processing and the production of cleaning products.

It also happens to be essential to making traditional solid soap.

For liquid soap, soapmakers generally use a different alkali called potassium hydroxide, which produces softer, more soluble soaps. But here at The Soap Mine, it’s sodium hydroxide that I use to transform my lovely oils and butters into the solid bars you see on the shelves.

Isn’t lye dangerous?

Yes, absolutely. And I’m not going to pretend otherwise. Sodium hydroxide is a highly caustic substance, which means it can cause serious chemical burns if it comes into contact with skin or eyes.

When it’s dissolved in water, the process generates a significant amount of heat, and the resulting solution needs to be handled carefully.

This is why soapmaking isn’t simply a case of throwing a few ingredients into a mixing bowl and hoping for the best.

I work with appropriate protective equipment, including gloves and eye protection, and follow careful procedures for measuring, mixing and handling my ingredients. The sodium hydroxide is always added to the water, never the other way around (that’s super dangerous) and suitable containers (never glass!) ventilation and safe working practices are essential.

It’s a substance that deserves respect. Not fear, but certainly not complacency either. I’ve been making soap for years, and I still take these precautions every single time.

So why use something so caustic to make soap?

Because without a strong alkali, you simply can’t make traditional soap. I could mix olive oil, coconut oil, shea butter and cocoa butter together until the cows came home, but I’d still just have a greasy mixture of oils and butters. To turn those ingredients into soap, they need to undergo a chemical reaction with sodium hydroxide.

And that reaction has a rather wonderful name: Saponification.

What happens during saponification?

This is where the chemistry gets interesting.

Oils and butters are made up largely of substances called triglycerides. These are molecules made from fatty acids joined together by a substance called glycerol (also known as glycerine).

When I combine my oils and butters with a carefully calculated solution of sodium hydroxide, a chemical reaction begins. The triglycerides are broken down, and the fatty acids react to form something completely new: the sodium salts of fatty acids. Which is a very scientific way of saying soap. Glycerine is also produced naturally during the reaction.

In simple terms:

Oils and butters + sodium hydroxide = soap + glycerine

The starting ingredients are chemically transformed into new substances with different properties.

It’s rather like the difference between flour, eggs and a finished cake. The ingredients you start with aren’t necessarily present in the same form once the process is complete. (Although I wouldn’t recommend tasting the soap to test the analogy).

Does that mean there’s no lye left in the finished bar?

Yes, that’s exactly what should happen in a correctly formulated and properly made bar of cold process soap. The sodium hydroxide reacts with the fatty components of the oils and butters during saponification. By the time that reaction is complete, there should be no free, caustic sodium hydroxide remaining.

And here’s an important point: the lye doesn’t evaporate or disappear during curing.

That’s a misconception I see surprisingly often. Sodium hydroxide doesn’t simply evaporate away while the soap sits on a shelf. It is consumed during the chemical reaction that produces soap. In fact, saponification is largely complete within the first day or two of making a normal cold process batch.

The four-to-six-week curing period that follows is mainly about allowing excess water to evaporate and the internal structure of the soap to develop, producing a harder, longer-lasting bar.

I’ve written a separate blog post about why handmade soap needs to cure if you’d like to know more about that part of the process.

Of course, if soap has been incorrectly formulated or badly mixed, it can contain excess lye. That’s why accurate calculations, good manufacturing procedures and proper quality control matter so much. It’s also why I don’t recommend treating soapmaking as an exercise in guesswork.

What about all those strange ingredient names on soap labels?

If you’ve looked at the ingredients on one of my bars of soap, you might have spotted names such as:

  • Sodium Olivate
  • Sodium Cocoate
  • Sodium Shea Butterate
  • Sodium Cocoa Butterate
  • Sodium Castorate

They could sound a bit intimidating, but they’re simply the names of the soaps produced when different oils and butters react with sodium hydroxide. For example, Sodium Olivate is the soap produced from olive oil, while Sodium Cocoate is produced from coconut oil.

Remember that chemical reaction we talked about earlier – saponification? This is the result.

The oils and butters have reacted with sodium hydroxide to form new substances, and those new substances have their own names.

Why don’t I just use the familiar ingredient names?

Because cosmetic labelling in the UK is regulated, and I’m required to provide an ingredient list using recognised cosmetic ingredient names.

These standardised names are commonly called INCI names, which stands for International Nomenclature of Cosmetic Ingredients.

So when you see Sodium Olivate or Sodium Cocoate on my soap labels, I’m not choosing complicated names to make my products sound more scientific, and I’m certainly not trying to bamboozle anybody! I’m just using the recognised names for the saponified ingredients, as required by the labelling specifications for my products.

In fact, standardised ingredient names are intended to make things less confusing, not more. They allow ingredients to be identified consistently across different cosmetic products, regardless of the manufacturer’s preferred descriptions.

They’re particularly important for people who need to check ingredients because of allergies or sensitivities.

So although the ingredient list might look like a collection of rather complicated chemical names, there’s nothing mysterious going on. It’s just the chemistry of soapmaking, written in a language that probably makes much more sense to a cosmetic chemist than to the average person standing in their bathroom. 😂

Why do I think it’s important to explain all this?

Because I think customers deserve to know what’s in the products they’re using, and how those products are made.

I’ve occasionally seen soap advertised as “lye-free”, usually with the implication that this somehow makes it safer, purer or more natural than soap made using sodium hydroxide. But if it’s genuine traditional soap, an alkali was involved somewhere in its manufacture, even if the person selling the finished product didn’t handle it themselves.

Melt-and-pour soap bases, for example, have generally already undergone saponification before the soapmaker buys them. There’s nothing wrong with using a premade base, but it’s misleading to suggest that traditional soap can be made simply by leaving the lye out.

And as I’ve said many times before, I’m not a fan of frightening people with scientific ingredient names or pretending that something becomes inherently safer just because it’s described as natural. EVERYTHING is made of chemicals. What matters is which chemicals we’re talking about, how they’re used and what happens to them during manufacture.

So yes, I use sodium hydroxide to make every bar of traditional cold process soap at The Soap Mine.

I handle it carefully, calculate my recipes accurately and allow every batch to undergo the processes needed to become the finished product. The result isn’t a dangerous mixture of caustic soda and oils. It’s soap. And I still think it’s rather amazing that such ordinary ingredients can undergo a chemical reaction and become something so completely different.

Even after all these years, the chemistry hasn’t lost its magic.

Vicki x

Posted on — Leave a comment

Is bar soap hygienic?

A foamy bar of Cysur Soap being used.

Yes. For everyday washing at home, a bar of soap is a good, effective choice. You don’t need a pump bottle to get your hands clean. And yet “Is bar soap hygienic?” is one of those questions that keeps coming up.

I understand the thinking. Someone washes their dirty hands with a bar, puts it down, and the next person picks it up. Surely that means they’re passing their germs along? It sounds plausible. But it misses a rather important part of the process: the washing.

True soap is naturally alkaline

Traditional soap, made by combining oils and fats with an alkali, is naturally alkaline. That makes it a less welcoming environment for bacteria to grow in. And bar that can dry between uses also offers less moisture for microbial growth.

So the idea that a properly kept bar is simply a cosy home for germs misses some useful chemistry. Its alkalinity is part of the picture, alongside drying between uses and the washing and rinsing that happen when you use it. Alkaline doesn’t mean sterile, but there’s no need for soap to be sterile to help you get clean.

The soap helps wash germs away

Soap helps loosen dirt and oils, allowing them and microbes to be rinsed away, so finding bacteria on a used bar doesn’t mean those bacteria will remain on the next person’s hands after washing.

In a study published in Epidemiology & Infection, researchers deliberately added two types of bacteria to soap bars at levels far higher than those previously reported on used bars. After people washed with those bars, neither test bacterium was detected on their hands. That’s reassuring evidence for routine handwashing.

And what about the pump bottle?

We often assume liquid soap must be more hygienic because nobody touches the soap itself. But we do touch the pump. Usually with the very hands we’re about to wash. When did you last clean yours, the pump I mean, obvs! No judgement. There are quite enough things on the household jobs list already. 😂

A liquid soap dispenser isn’t automatically germ-free. Research into refillable liquid-soap dispensers has found bacterial contamination, including biofilms on and inside pump heads. That doesn’t mean you should worry about every bottle beside the sink. It does mean that “it comes out of a pump” is by no means a guarantee of better hygiene.

Soap dishes and dispensers both benefit from being kept clean.

A bar is easy to look after

You don’t need an elaborate routine.

Rinse off any visible dirt, keep your bar on a draining dish, and give it a chance to dry between uses. Clean the dish regularly too. Sensible care for something you use every day, and it helps the bar last longer as well.

The important bit is how you wash

Whether you prefer a bar or a bottle, a hurried dab of soap and a quick splash won’t make the most of either. The NHS recommends washing for around 20 seconds, covering all parts of your hands, then rinsing and drying thoroughly.

You could spend those seconds enjoying the scent and luscious lather of a lovely handmade bar.

So, can you use solid soap with confidence?

For ordinary washing at home, yes, absolutely! A well-kept bar, water and a thorough wash make a perfectly practical combination. If you’ve been avoiding solid soap purely because you thought it was unhygienic, please don’t let that be the thing that puts you off.

Choose a bar you enjoy using, give it somewhere to drain, and let it get on with the job.

Lovely soap. Clean hands. Fewer plastic bottles. Sounds like a good arrangement to me. 😉

Vicki x

A foamy bar of Cysur Soap being used.

Posted on — Leave a comment

How long does a bar of soap last?

One bar of Enfys (rainbow) soap on a soap dish

Someone on Threads asked me a very reasonable question:

“If I only used a bar of soap for handwashing, say six times a day, how long would it last?”

My first thought was: how long is a piece of string? Which is spectacularly unhelpful, I know. But even with the number of washes supplied, there are a few more things I’d need to know before offering anything resembling an accurate answer.

How big is the bar?

A little guest soap and a full-sized bar aren’t starting with the same amount of soap. “One bar” is a bit like “one slice of cake”. There are slices, and then there are slices.

What’s the soap like?

Different recipes produce bars that behave very differently in water. The oils used, the formulation and how long the soap has cured can all affect how quickly it wears down. So even two bars of the exact same weight, but from different makers, won’t necessarily last the same length of time.

How much soap do you use each time?

Do you rub the bar just long enough to get soap onto your hands, put it down and carry on washing? Or does the bar stay in your hands for the whole performance? Both count as “one wash”, but they can use quite different amounts of soap. I’m not suggesting you shorten your handwashing. Just that once you’ve got enough soap, the bar can sit that bit out.

What’s your water like?

Hard water makes it harder to build a lather, which may mean you use more soap each time. Same bar, same number of washes, different water: potentially a different lifespan.

What happens between washes?

This is a big one. A bar on a draining dish, away from splashes, gets a chance to dry. A bar sitting in a puddle keeps softening even while nobody’s using it. You might only wash your hands six times a day, but your soap could be spending the other twenty-three-and-a-bit hours quietly turning to mush. Not the way it should be spending its free time.

How many people use the bar?

Six washes a day for you is one thing. Six washes for you, plus everyone else who wanders past the sink, is another. Soap does not keep a visitors’ book. The children may have been involved.

So what’s the answer?

I can’t reliably turn “six washes a day” into a particular number of days or weeks. And even if I had answers to all the questions above, It would be difficult to even hazard a guess, there are so many factors involved. So the simplest way to find out is to note when you start a bar and see how long it lasts in your household. That gives you a useful guide for the next similar bar, used in the same way.

In the meantime, give it a draining dish, keep it out of standing water, and put it down once you’ve got enough soap on your hands.

I can make the soap. I can’t supervise its living arrangements. 😉

Vicki x

One bar of Enfys (rainbow) soap on a soap dish
Enfys / Rainbow

Posted on — Leave a comment

Can you use a Bar of Soap in the Shower?

Some of you are going to look at that heading and think I’ve lost my mind, because lots of us have been using solid soap in the shower forever, but you’d be surprised how often I’m asked this question. The answer, of course, is always YES! A bar of soap isn’t just for washing hands at the basin. You can absolutely use it to wash your body in the shower too.

Maple & Elm handmade soap and a loofah

If you’ve always used shower gel, it might feel like a slightly unfamiliar way to wash, but there’s nothing complicated or weird about it (despite what some people seem to think 😝 After all, shower gels in plastic bottles are actually a fairly modern concept, in the great scheme of things.

How do you use it?

You have a few options, depending on what you prefer.

Use your hands. Wet your hands and the bar, work up some lather, then put the soap down and wash your skin with your soapy hands.

Use the bar directly. Gently glide it over wet skin, put it down once you have enough soap, then use your hands to spread the lather and wash.

Use a washcloth or loofah. Wet it first, rub the soap over it and work up a lather before washing. Rinse it thoroughly afterwards and leave it somewhere it can dry.

None of these methods is compulsory. Choose whichever feels easiest and most enjoyable for you.

Do you need lots of bubbles?

You don’t need to produce a mountain of foam before you can wash. You can use just nough soap to spread over the areas you’re washing, then rinse thoroughly. However there is something lovely about lots of luscious lather and foam. It’s all down to your personal preference.

If you live in a hard-water area, building a lather can take a little more effort, and a washcloth or loofah may help you work up the bubbles. Don’t worry though, fewer bubbles or less lather doesn’t mean your soap is any less effective.

Where should you keep the bar?

I can’t stress this enough: keep your soap somewhere it can drain and dry between showers.

A draining soap dish, ladder or suitable shower rack can work well. The important thing is that the bar isn’t sitting in collected water.

Keep it out of the direct spray too. Water running over the bar will wash soap away even when you’re not using it.

And once you have enough soap on your hands or cloth, you can put the bar down. It doesn’t need to stay under the water for the whole shower.

What about a soap saver bag?

I recommend those for the last little slivers, so you can use up every bit. For a full-sized bar, a draining soap dish is my preference. Leaving it inside a damp bag can keep it wet and encourage it to soften.

A small change to your routine

If you enjoy shower gel, using a bar may simply be something you haven’t considered. It’s worth trying if you’d like to reduce your single use plastic consumption, or might enjoy the choice of fragrances and designs a handmade bar offers.

Choose a soap that suits your skin and your preferences, use it in whichever way works for you, and give it somewhere sensible to dry.

That’s really all there is to it. Your lovely bar is for all washing opportunities, not just the bathroom sink 😉

Vicki x

Posted on — Leave a comment

Why does handmade soap need to cure?

Buckle up for Day 6 of Blogtober!

It looks like soap. It smells like soap. So why won’t I let you have it yet?

Because looking finished and being ready to leave the workshop are two different things. Rather like me putting my coat on, then remembering fourteen things I need to do before I can actually leave the house.

What does “curing” mean?

First of all, let’s clear up what curing isn’t.

Soap is not slowly “turning into soap” for four to six weeks. The chemical reaction between the oils, butters and sodium hydroxide, known as saponification, is largely complete within the first 24 to 36 hours after I pour the soap into the mould.

Curing is what happens afterwards.

During the curing period, excess water gradually evaporates from the bars. At the same time, the internal structure of the soap continues to develop and become more crystalline. The result is a harder, longer-lasting bar with better lather and a more refined feel when you use it.

When soap is first cut, it is still quite soft, largely because of its water content. Water is an essential part of the soapmaking process because I combine my oils and butters with a solution of sodium hydroxide and water to make the soap. But we don’t want all of that water to remain in the finished bar.

A soft bar of soap simply won’t last very long in your bathroom. It will wear away much more quickly, which is no good for you and no good for your hard-earned money either. So, while the bars are curing, water is slowly evaporating and they become firmer and harder. The structure of the soap continues to develop too, helping to improve the lather and the overall performance of the finished bar.

That cure time is what allows the soap to become the product I actually want you to use.

And just to clear up another common misconception: curing isn’t about waiting for sodium hydroxide to “evaporate”. That isn’t how the chemistry works.

How do I cure my bars?

Once I’ve unmoulded and cut a batch of soap, the individual bars spend around four to six weeks curing before they are ready for sale.

Over the years I’ve collected hundreds of plastic stacking baskets for the job. Before I start cutting, I line enough baskets with tissue paper, then place each freshly cut bar inside with space around it so that air can circulate freely.

I usually fit two loaves’ worth of soap into each basket, and every basket is labelled with the soap variety, its batch code and the date it will be ready to use.

A basket of curing soap

The baskets are then stacked away and left to do what soap does best at this stage: very little, very slowly.

How curing affects the weight of a bar

As the bars cure and lose water, they naturally lose some weight too. A commonly quoted rule of thumb is that a bar may lose around 10% of its original weight during curing, but in practice that can vary quite a bit from batch to batch.

That means I need to allow for that weight loss when I cut and cure the bars, so that once they are ready for sale they still meet the minimum weight stated on the packaging.

For many years I labelled my bars as 100g, but because curing isn’t completely predictable, I would occasionally end up with perfectly good finished bars weighing 98g or 99g. Technically, that meant I couldn’t sell them as 100g bars.

These days I label them as a minimum of 95g instead. I haven’t made the bars any smaller or changed the recipe, and most still weigh more than 100g when they are ready for sale. The 95g minimum simply gives me a sensible margin for the natural variation that happens during curing.

Why not sell it sooner?

Because I want you to receive a bar that performs properly, rather than one that has been rushed out of the workshop before it is ready. Admittedly, this can make stock planning rather interesting. If a particular variety suddenly becomes very popular, I can’t simply make another batch today and have it back on the shelf tomorrow. Every new batch still needs its full cure time.

That can occasionally mean a favourite soap is out of stock for a while, but shortening the curing period isn’t a compromise I’m willing to make. Waiting those extra weeks gives you a harder, longer-lasting bar that is properly ready to be used.

Why doesn’t commercially made soap need a long cure?

Commercial soap is usually produced very differently from traditional cold-process soap, which is why it can often be made, packaged and sent out much more quickly.

Mechanical processing: Many factory-made soaps are processed using heavy machinery that removes moisture and compresses the soap into a dense, hard bar. Milled soaps may be passed through rollers several times before being pressed into their final shape, so they don’t rely on weeks of air-drying to become firm.

Different formulations: Commercial bars contain ingredients designed to give them hardness, stability and a long shelf life. Some are technically detergent-based cleansing bars rather than traditional soap, so the manufacturing process is completely different from cold-process soapmaking.

Glycerin may be removed: During some large-scale soapmaking processes, the naturally produced glycerin is separated from the soap and used elsewhere. Because glycerin attracts and holds water, removing some or all of it also changes the moisture content and behaviour of the finished bar.

Handmade cold-process soap, on the other hand, is usually left much closer to the state it naturally reaches after saponification, so time does part of the work that industrial processing can achieve much more quickly.

So, although four to six weeks might seem like a long time to wait for something that already looks perfectly finished, that curing period is an important part of making good cold-process soap. It gives each bar the time it needs to become harder, longer lasting and ready to perform as it should.

It may not be the most exciting stage of soapmaking, but it is 100% worth the wait 😉

Vicki x

Posted on — Leave a comment

How long does soap stay in the mould before I cut it?

Day 5 of Blogtober 2026, and I’m back to answer another cutomer question. “How long does soap stay in the mould for before I unmould and cut it?”

If you follow The Soap Mine on Facebook or Instagram, you’ll have seen videos of soap being poured, and soap being cut.  But what happens in between those two events?  How long does the soap stay in the mould before it’s ready to be taken out and cut?

Multiple soap moulds full of soap
Freshly Poured Eryri Soap

Well, my usual routine these days is to pour the soap on one day, and unmould and cut it the following day.   But it wasn’t always that way.  When I first learned how to make soap I read somewhere that I should give soap a good 48hrs in the mould. So that’s what I did.  For quite a while actually.

It was only when I NEEDED to unmould sooner, for some long-forgotten reason, that I discovered that I didn’t need to wait the full 48 hours. 24 was plenty…  I guess the need had never arisen before, so I’d never tried it. Habits are strong

Nowadays I tend to make soap later on in the afternoons, between 3-6pm.  Before then I’m packing website orders, wrapping soap, completing paperwork, planning social media and so on and so forth, but the end of the afternoon is often reserved for soapmaking.  I then unmould and cut the soap the following day, before lunch, generally between 10.30 and 12.30.  (Yes, I’m quite wedded to my routines!).  

So while I’ve never investigated the absolute SOONEST I can unmould and cut my soap, I can say that my* loaves are generally ready the following morning, less than 24 hours after being poured. And quite possibly sooner.

*It’s worth noting that different formulations will have different setting-up times. Some soapmakers will unmould 48 or even 72 hours after pouring, while some will do it all within the same working day.  All part of the fun!

Of course, being ready to cut doesn’t mean it’s ready to use. There are still several weeks of curing to go, but that’s a whole other blog post. 😁

Vicki x

Posted on — Leave a comment

Do I need an antibacterial soap?

It’s Day 4 of Blogtober, and today I thought I would answer a question I get asked quite often about antibacterial soap.

Some people seem to think that an antibacterial soap will be “stronger” or “cleaner” somehow, but for everyday washing at home? The answer is a resounding ‘No’, ordinary soap and water are enough. “Antibacterial” sounds reassuring, doesn’t it? Like your soap has had extra training and turned up wearing a tiny security badge. But labelling a soap as ‘antibacterial’ doesn’t mean that your hands, or anywhere else for that matter, will be any cleaner.

Isn’t killing bacteria the whole point?

Washing with soap and water helps remove dirt and germs from your skin so you can rinse them away. Your soap doesn’t need added antibacterial ingredients to do that job.

The NHS advises that washing your hands properly with soap and water removes dirt, viruses and bacteria, helping to stop infections spreading. Its everyday handwashing guidance calls for soap, a thorough wash, rinsing and drying, without specifying an antibacterial soap. So no, you don’t need to go hunting for the most intimidating bottle on the shelf.

Could antibacterial ingredients contribute to resistance?

There’s another reason to question whether we need them in everyday soap. Research has shown that some antibacterial ingredients, including triclosan, can favour bacteria that are less susceptible to them. Laboratory studies have also found links with resistance to certain antibiotics.

That doesn’t mean every antibacterial handwash is a tiny superbug factory. But it does raise a sensible question: why add an ingredient we don’t need, when ordinary soap and water already do the everyday job?

“Antibacterial” might sound like an upgrade, but for your bathroom sink, it’s an unnecessary one.

What really matters is how you wash

A quick splash, a vague rub of of soap and wiping your hands on your jeans isn’t quite the routine we’re aiming for. 😂 For handwashing, the NHS recommends around 20 seconds of washing, (roughly the time it takes to sing ‘Happy Birthday twice), making sure you clean your palms, the backs of your hands, between your fingers, your thumbs and your fingertips. Then rinse and dry thoroughly.

Why I don’t make antibacterial soap

My soap is made for everyday washing. I don’t add antibacterial ingredients or make antibacterial claims, because a well-used bar of ordinary soap does the job you need it to do. I’d much rather make you a lovely bar you actually enjoy using, and encourage you to wash properly.

Note – If a healthcare professional has asked you to use a particular antiseptic/antibacterial wash, follow their advice. That’s a different situation from choosing soap for your bathroom sink. But for the everyday stuff, keep it simple: soap, water and a thorough wash.

No tiny security badge required.

Vicki x
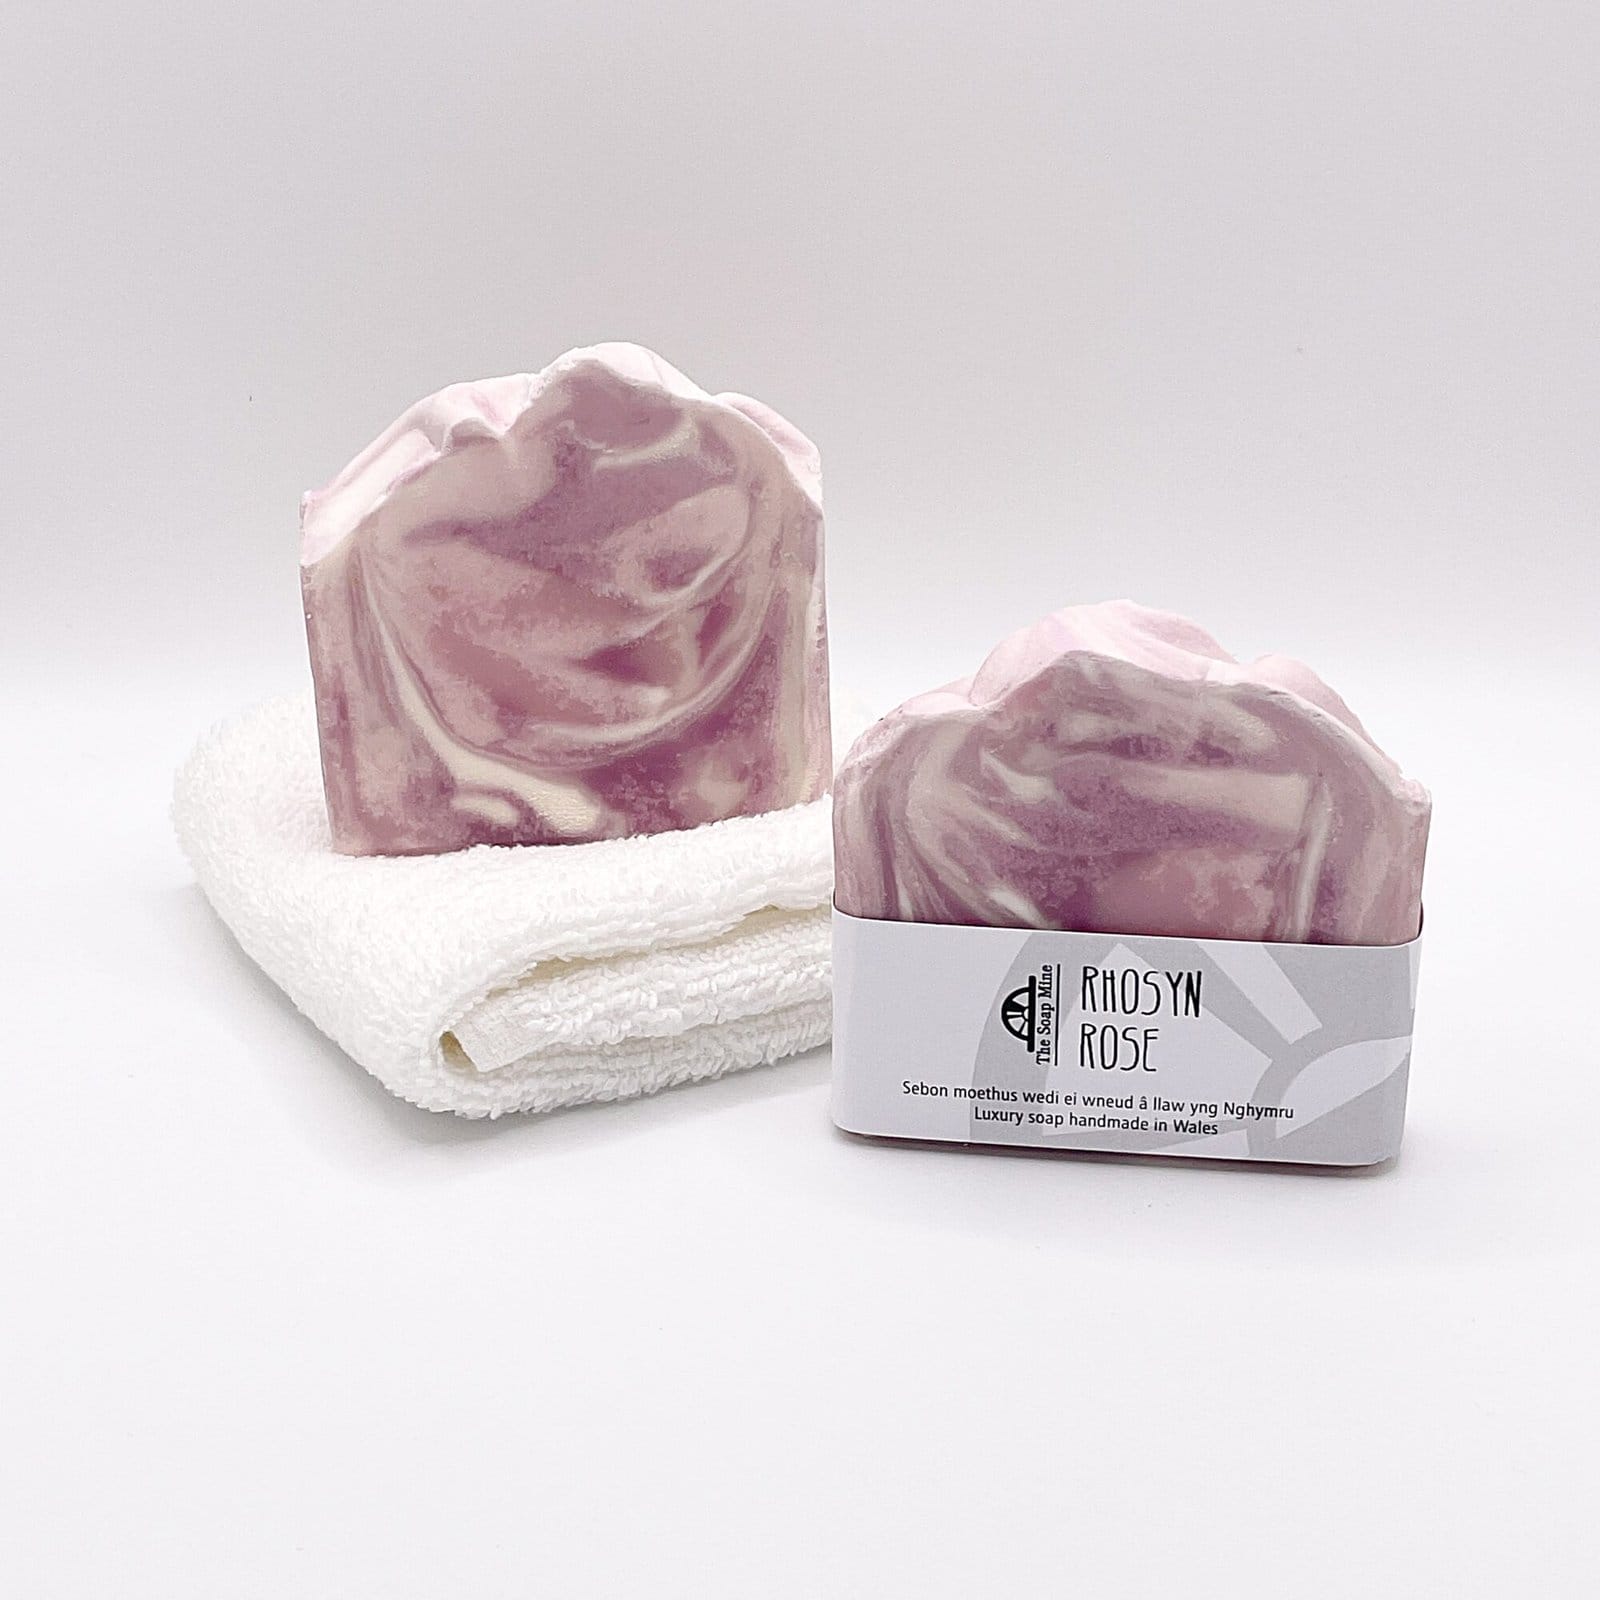
Two bars of Fresh Linen Handmade Soap
Fresh Linen Handmade Soap

Posted on — Leave a comment

Five mistakes that make a bar of soap disappear faster

Your lovely bar of soap really should give you more than three three showers and a disappointed sigh.  If yours seems to vanish at speed, check you’re not committing any of these bar soap sins…

1. Leaving it sitting in water

That little puddle beneath your soap? It’s slowly turning your bar into mush (or snot, as we call it in the trade – you know exactly what I mean!)  Give it a dish that drains properly, rather than its own private paddling pool.

2. Parking it under the shower

Even if you’re not using it, water spraying over your soap will keep washing it away. Put it somewhere the shower can’t reach because it really doesn’t need to join you for the entire performance.

3. Using a soap dish that doesn’t actually drain

A dish can look lovely and still be spectacularly bad at its one and only job. Your soap needs to sit above any collected water, with enough airflow to dry between uses. Empty and clean the dish regularly too.

4. Keeping a whole bar in a damp soap saver bag

Those little bags are brilliant for using up slivers. But a whole bar left in a wet bag can stay damp and soften faster. I recommend collecting up all those slivers towards the ends of their lives and THEN popping them in the exfoliating bag, so that you can use up every bit.

5. Rubbing the bar for the entire wash

You don’t need to keep scrubbing away at the bar once you’ve got enough lather. Lather up your hands, a washcloth or a loofah, then put the soap down (somewhere dry!!) and get on with washing. It’s allowed a tea break.

The biggest favour you can do your soap? Let it dry properly between uses.

You’ve paid for a lovely bar. Make sure you get to enjoy it before it slides down the plughole. 😉

Vicki x

Eryri Soap Bar is a wooden soap dish

Posted on — Leave a comment

Why I include a free sample in every order

A selection of soap samples
Soap Samples

Every Soap Mine order comes with a little soap sample tucked inside. It’s a small thing, but there are five very good reasons why I do it.

1. Because a little extra is always lovely

You’ve ordered soap. You’re expecting soap. But bonus soap? That’s got to make you happy 😁

2. Because you can’t smell a website

I can describe a fragrance until the cows come home, but there’s only so much “fresh, woody, with a hint of…” can tell you. Sometimes you just need a sniff.

3. Because your next favourite might surprise you

It’s easy to stick with the scents you know you love. A sample lets you try something different without committing to a whole bar. That one you’ve been scrolling past might actually be rather fabulous.

4. Because yes, I’d quite like you to come back

Let’s not pretend this is entirely selfless. 😂 If you love your sample and order a full-sized bar next time, we’re both happy. That’s a pretty good arrangement.

5. Because I appreciate every order

You have plenty of places to buy soap, and you’ve chosen mine. A little sample is one way of saying thank you for keeping this small business bubbling along.

Got your eye on something? Pop a request in the order notes and I’ll do my best to include that sample.

Vicki x

Posted on — Leave a comment

Blogtober 2026? Ahh, go on then…😬

It’s 1st October, and it seems I’ve decided to do Blogtober again. This would be a perfectly sensible idea if I had lots of spare time, nothing much going on, and the kind of organised life that allows for daily blogging.

Unfortunately, none of those things are true. 😂

The last time I did Blogtober was in 2021, and for some utterly unfathomable reason I’ve decided that five years later would be an excellent time to have another go.

So, for the next 31 days, the plan is to post something here every day.

Some posts will be about soap. Some will be about running The Soap Mine. Some will probably be little glimpses of workshop life, home life, Jac, autumn in Beddgelert, things I’ve learnt, things that have gone wrong, things I’m currently obsessed with, and whatever else happens to be going on that day.

Some posts might be useful, some might be mildly interesting and some may simply prove that I remembered to write something before going to bed.

I’m deliberately not setting myself the task of writing 31 enormous, beautifully polished blog posts because that would almost certainly result in me giving up by about the 4th October.

Instead, I’m treating this as a little diary of October 2026.

Thirty-one days of soapy life and everything in between.

Let’s see how far I get. 😬

Vicki x
Posted on — Leave a comment

Sustainability Without Smugness

Sustainability has a bit of a PR problem. Somewhere along the way, it picked up a tone. A wagging finger. A whiff of moral superiority.  I know you know what I mean.

That implication that if you’re not composting perfectly, growing your own veg, sewing your own clothes, and never putting a foot wrong, then you’re somehow failing. And that puts a lot of people right off.

The problem with “perfect”

This idea that sustainability has to be all or nothing is one big reason why people don’t engage with it.  Most people’s lives are full, what with juggling work, family, health, hobbies, energy levels (and don’t get me started on getting enough sleep…). The last thing we need is another stick to beat ourselves with.

Small changes absolutely count (more than you might think)

You see, doing something is always better than doing nothing. You don’t have to overhaul your entire life and you certinly don’t have to be perfect. Sometimes sustainability looks like small, everyday choices. Things like:

  • switching one product, not twenty
  • choosing something that lasts longer
  • buying less often
  • supporting a small business instead of a big one
  • picking a bar instead of a bottle

I make and sell solid soap and so yes, sustainability matters to me, but I’ve never been interested in guilt-based marketing, scare tactics or shaming people into “doing better” I’ve come to realise that people really don’t need to be convinced to care, they just need sustainability options that feel doable for them.

If switching from liquid soap to a bar works for you – hooray!
If it’s one small change among many – hooray again!
If it’s the only change you make this year – it’s still hooray!

Sustainability should feel supportive, not smug

The kind of sustainability I believe in doesn’t judge, doesn’t demand perfection and certainly doesn’t require a personality transplant. It is about finding choices that sit comfortably in your life. So if a small, everyday habit, like washing your hands or having a shower, can quietly reduce waste without making life harder?  Well, that feels like a win.  You’re choosing calm, practical, imperfect sustainability. And that’s the kind that actually sticks.

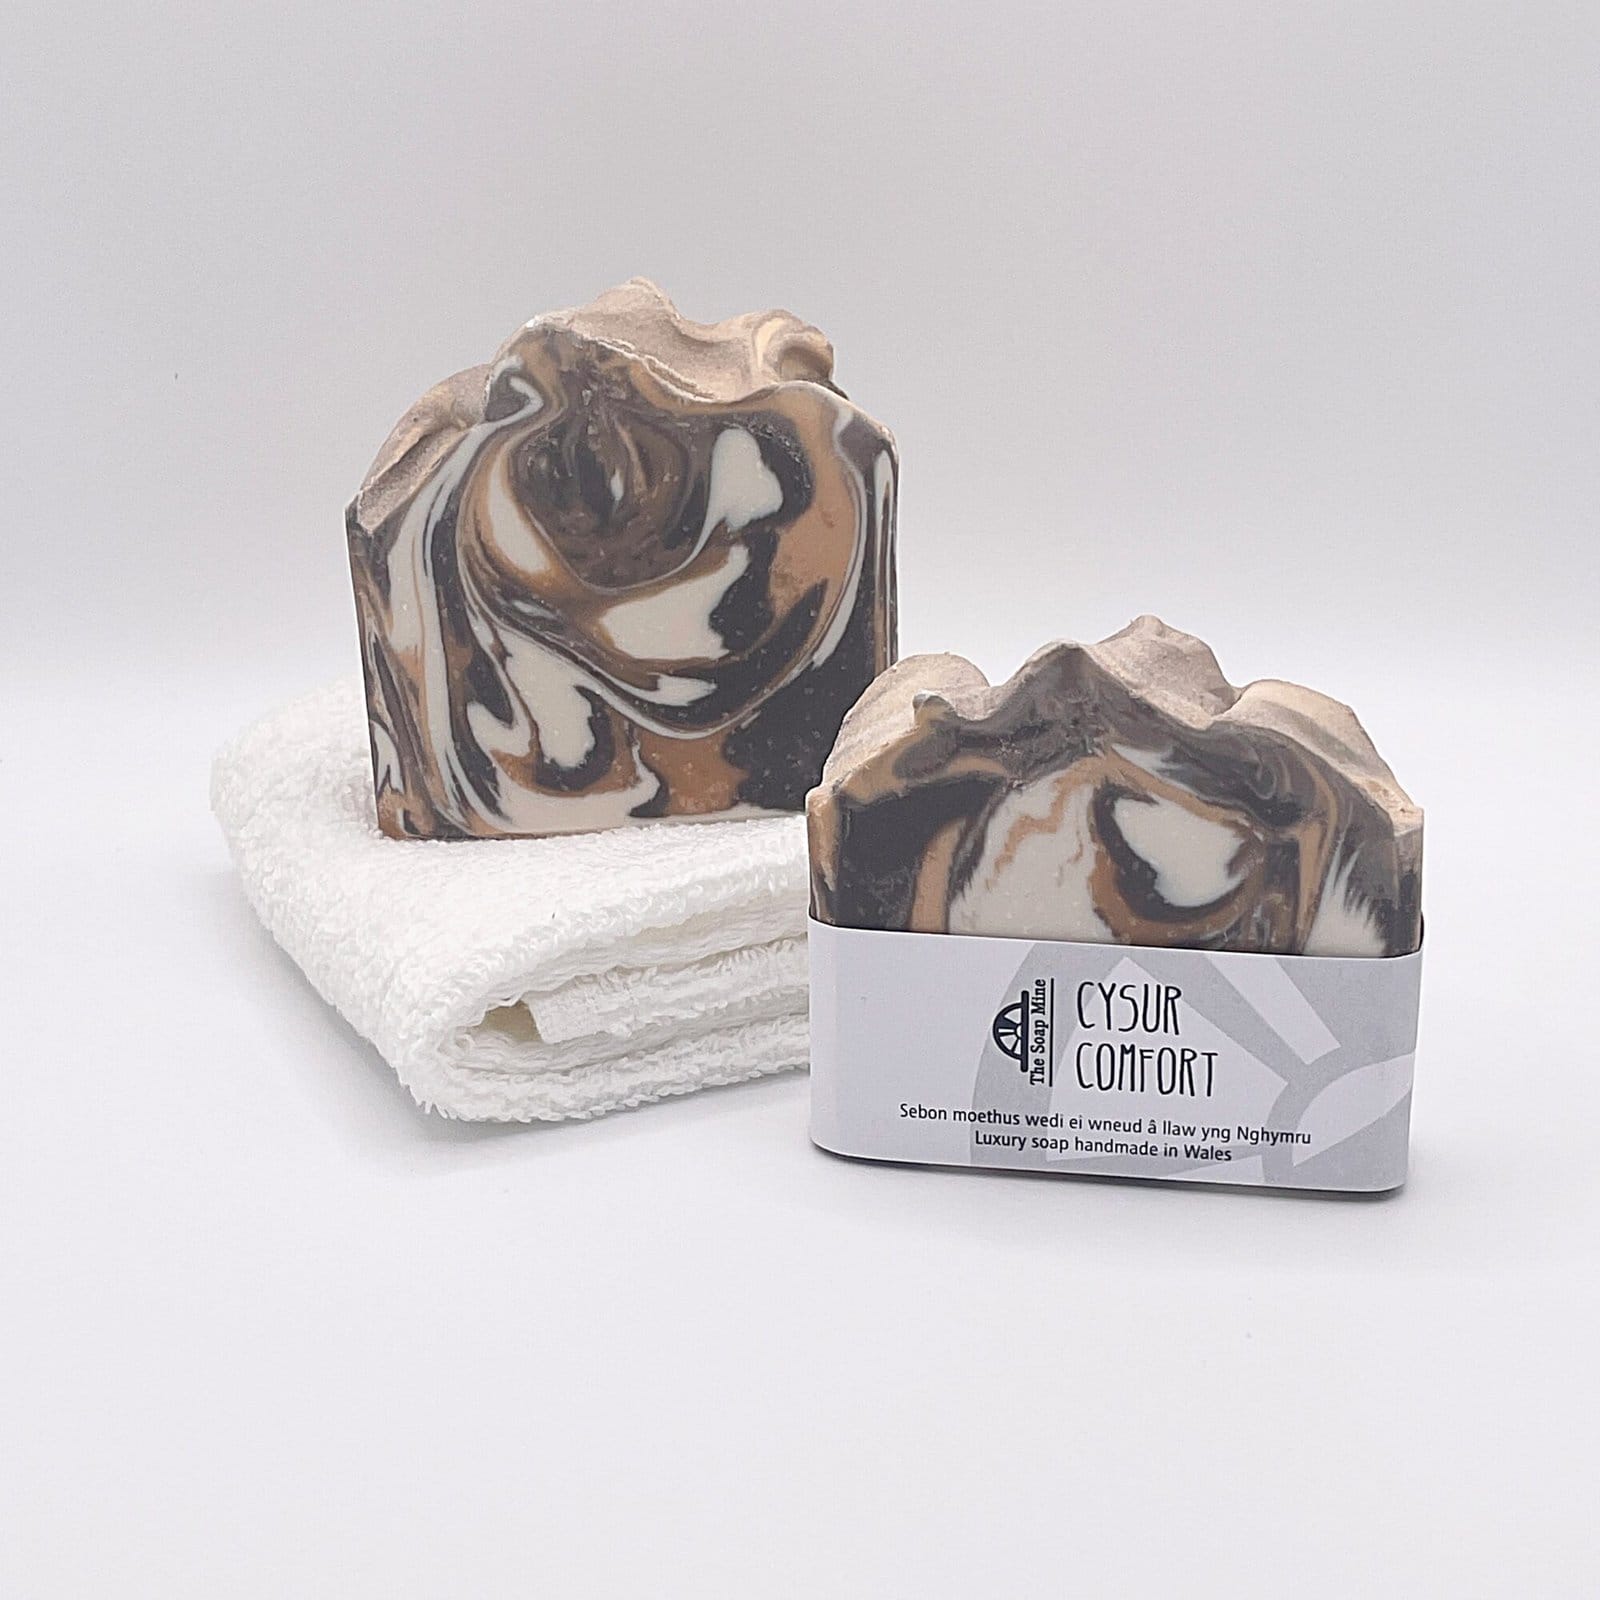
A bar of pink rose scented handmade soap

Posted on — Leave a comment

How to Read an Ingredients List Without Getting a Headache

Let’s be honest, most of us have picked up a product, flipped it over to read the ingredients, and instantly regretted it. All those long, complicated names in teeny-tiny writing? Half of them sound like something you’d find in a science lab or a sci-fi novel, not in your shampoo or soap dish.

But here’s the thing: reading an ingredients list doesn’t have to make your eyes cross (unless it’s the font size!). And just because something sounds a bit sciencey doesn’t mean it’s dangerous or unnatural. So pop the kettle on, and let’s break it down together.

The Fancy Names Have a Reason

The most important thing to know? Ingredients lists (if they’re compliant) use something called INCI names (short for International Nomenclature of Cosmetic Ingredients). These are standardized, internationally recognized names used across the industry so that no matter where you are in the world, you know exactly what’s in your product.

That’s why you’ll often see “Sodium Chloride” instead of just “salt,” or “Butyrospermum Parkii” instead of “shea butter.”

As far as ingredients lists go, Latin is most definitely not dead. Botanical ingredients are usually listed using their Latin binomial nomenclature, indicating the plant genus and species (e.g., Lavandula angustifolia for lavender). This is often followed by the part of the plant used and the preparation method (e.g., “Oil,” “Extract”).

Synthetic or processed ingredients are named using standardized chemical terminology, which may differ from their common names. For instance, “Tocopherol” refers to Vitamin E.

Fragrances are often listed collectively as “Parfum” or “Aroma.” This is because the exact formula of a fragrance can be classed as proprietary. However, specific allergens within fragrances must be individually listed if they exceed certain concentrations.

This is why you might notice a section at the very end of the ingredients list with names like linalool, limonene, or citral. These are specific compounds found in both essential and fragrance oils, and by law, they must be listed separately because some people can be sensitive to them. They’re not added in as extra ingredients, and many occur naturally in things like citrus oils, lavender, or peppermint. So unless you know you’re allergic, there’s absolutely no need to be concerned.

Order Matters

Ingredients are listed in order of quantity. The ingredient with the highest percentage always comes first, and the smallest amount comes last (unless it’s under 1%, in which case the order gets a bit looser). If a “Rose & Geranium Soap” lists rose oil right at the end? That’s your clue it’s more of a whisper than a bouquet. Colours usually come very close to the end and are generally indicated by their Colour Index (or ‘CI’) number, and then lastly come the potential allergens that are present in the product.

Additional Sources

If you ever want to understand an ingredients list a little better, a quick Google is often helpful, but if you want to dig a little deeper, the following websites are useful:

Remember – Chemicals Are Not Inherently Bad!

In my last blog post, I bemoaned the ‘chemical-free’ claims that seem to be everywhere at the moment. So I’ll say it again: everything is made of chemicals. Water is a chemical. Oxygen is a chemical. Your favourite apple, your pet dog, your nan – they’re all made of chemicals.

When any product claims to be “chemical-free,” it’s… well… completely and totally factually incorrect. Every single time. What we should be focusing on is whether the ingredients are safe, effective, and used in skin-kind amounts (and not worrying about whether they sound like something from GCSE Chemistry).

Always remember too that if you’re buying/using any type of hygiene or cosmetic product manufactured in the UK or the EU, that product must legally have been thoroughly assessed and approved by a chemist qualified to make that assessment, and it will (should*) be covered by a legally binding Cosmetic Product Safety Report. That way, you can rest assured that all ingredients in your product are safe.

Ingredients lists can seem intimidating, but they’re really just a tool to help you make informed choices, and the links I’ve provided above can give you more info on individual ingredients should you feel you need it.

Finally, one of the brilliant things about buying from small, independent makers is that we want to talk to you. I will happily natter on about soap ingredients all day (possibly longer if you offer me a biscuit). If you’re ever unsure about what something means, just pop me a message or drop a comment. No jargon, no judgement.

*Unfortunately, there are still products available for sale which have clearly not been through the assessment process. If you’re ever in any doubt, it’s okay to ask!

Posted on — Leave a comment

The Difference Between Body Lotion, Body Butter, and Body Cream (and Why I Chose Cream)

A set of eigh different tins of body cream

Let’s talk moisturisers. The world of skincare is full of fancy names, shiny promises, and confusing choices. Body lotion, body butter, body cream… what’s the actual difference? And why, out of all of them, did I decide to make a luxury body cream? Let me walk you through it. No jargon, no fluff, just a very quick read covering what you need to know (and if there’s anything I haven’t covered, please, just ask!).

A set of eigh different tins of body cream

So… what IS the difference?

Body lotion is the lightest of the three. It’s usually made with a high water content and a little oil, which makes it quick to absorb but not hugely nourishing. Think of it like a splash of hydration – great in summer when you don’t want to feel sticky, but it doesn’t hang around for long. Fine if your skin is already pretty happy. Less helpful if it’s feeling dry or cranky.

Body butter is the opposite end of the spectrum. Thick, rich, and packed with butters like shea or cocoa. It’s a bit like slathering yourself in custard (in a good way?). It’s brilliant for very dry or flaky skin, but it can feel heavy or greasy, especially if you’re trying to put on clothes five minutes later.

Body cream sits beautifully in the middle. It’s more nourishing than a lotion, but lighter and quicker to absorb than a butter. It’s the Goldilocks option – not too light, not too heavy, just right.

A tin of body body cream with a blue and beige label
Luxury Body Cream – Traeth

Why I went with cream

Honestly? I wanted something lush but also practical. Something that felt like a treat but didn’t leave you flapping around in a towel for half an hour waiting to dry off. (We’ve all been there!)

My body cream is rich enough to really soften your skin – elbows, shins, all those tricky bits – but it sinks in quickly and doesn’t feel sticky. I use nourishing, plant-based butters (shea & cocoa) but I balance them with a gentle water phase and emulsifier so you get that smooth, creamy texture without the greasy aftermath.

Plus, and this is important, I make it in scents that actually make you want to moisturise. I do have a “fragrance-free” option of course, but there’s also a scent (to match the most popular soap bars) for every taste. Think beautiful florals like Blodau, fun fruity favourites like Watermelon, or cosy, warming scents like Cysur.

When to use it

After a bath? Yes. Before bed? Absolutely. Legs out weather? Essential.

It’s great for everyday use, especially if you’re already using my soap, which is gentle and non-drying. It’s especially beneficial if you leave the skin slightly damp, rather than thoroughly dry, before using it – the cream just locks in any residual moisture and gives your skin that extra little bit of TLC.

Watermelon Body Cream

If you’ve ever stood in front of a shelf wondering what on earth to pick, I hope this helps. Lotion is quick but fleeting. Butter is rich but clingy. Body cream? It’s luxurious without being fussy, it’s kind to skin, and it’s easy to love.

That’s why I make cream. If you haven’t tried it yet… well, this might just be your sign. Click here to see all the options 😉

Posted on — Leave a comment

Why My Products Are Not “Chemical-Free” (And Why I’ll NEVER Claim They Are)

In the world of skincare and beauty, you’ve probably seen phrases like “chemical-free” or “free from nasty chemicals” plastered across product labels. It sounds reassuring, right? But here’s the truth: everything is made of chemicals – including water, essential oils, and even the air we breathe!

As someone who makes and sells handmade soap, bath products, and eco-friendly skincare, I believe in transparency. That’s why I never describe my products as “chemical-free” or claim they don’t contain “nasty chemicals”- because both of these phrases are misleading. Read on, and let me explain why these claims don’t hold up, what chemicals actually are, and why a more informed approach to skincare and sustainability matters.

What Is a Chemical

A chemical is simply a substance with a defined composition, whether natural or synthetic. Water (H₂O) is a chemical. So is table salt (NaCl). The scent of a rose? That’s a mix of chemical compounds like citronellol and geraniol.

Even the most natural ingredients you can think of, eg coconut oil, shea butter, or olive oil, are made up of complex chemical structures. Without chemicals, nothing would exist!

Common Ingredients People Think Are “Chemical-Free” (But Aren’t)

• Water (H₂O) – Yep, a chemical!

• Essential oils – Made up of hundreds of natural chemical compounds.

• Shea butter – Contains fatty acids like stearic acid and oleic acid (chemicals)

• Honey – A mix of fructose, glucose and water, plus enzymes (more chemicals)

• Soap – Created through saponification, a reaction between oils and an alkaline solution (again, for those at the back, chemicals!).

So, when a company claims their product is “chemical-free,” what they’re actually saying is… nonsense. It’s an impossible claim that plays on fear, rather than facts.

Why Do Some Brands Use “Chemical-Free” or “No Nasty Chemicals” Claims?

The term “chemical-free” is not scientifically accurate, but it sells products because many people associate “chemicals” with something bad or synthetic. This is a marketing trick known as chemophobia – the fear of chemicals – often fuelled by misleading advertising and misinformation. Just consider these search results that auto-completed when I googled ‘chemical free’:

A 2017 study published in Nature Chemistry found that many consumers assume “natural” means safer, even when that’s not the case. For example, botulinum toxin (botox) is completely natural – but it’s also one of the deadliest substances on Earth. Meanwhile, many synthetic ingredients are rigorously tested and are safer than their “natural” alternatives.

This now-famous graphic of the ‘ingredients’ (ie chemical composition) of a blueberry illustrates the point really well. How many people would avoid blueberries if this was on the label?

(Credit https://jameskennedymonash.wordpress.com/)

The Problem With “Nasty Chemicals”

Another phrase that gets thrown around a lot is “free from nasty chemicals.” But what does that even mean? There’s no scientific definition of a “nasty chemical”, it’s just another fear-based marketing term that implies some chemicals are inherently bad.

The reality? Whether a chemical is “nasty” or not depends on its use, concentration, and context – not whether it’s natural or synthetic.

Examples of “Scary” Chemicals That Are Actually Safe:

• Sodium chloride (table salt) – Essential for life in the right amounts, but dangerous in excess.

• Lactic acid – Naturally found in milk and used in skincare for gentle exfoliation.

• Citric acid – Found in citrus fruits and used to balance pH in skincare.

• Glycerin – A naturally occurring humectant that keeps skin hydrated.

Examples of “Natural” Chemicals That Can Be Harmful:

• Essential oils – Beautiful, but some can cause skin irritation or allergic reactions in high concentrations.

• Lead & arsenic – Both completely natural elements… and toxic to humans.

• Poison ivy oil (urushiol) – 100% natural and guaranteed to cause a rash!

Instead of labeling ingredients as “nasty” just because they sound unfamiliar, it’s far more important to ask:

✔ Is this ingredient safe in the way it’s used?

✔ Is it backed by science?

✔ Does it serve a purpose in the product?

Why I Focus on Science, Not Scare Tactics

Instead of making misleading claims, I believe in honest, informed skincare. Here’s how I approach my products:

✔ I list every ingredient clearly, with no “hidden” formulas.

✔ I choose ingredients based on safety, effectiveness, and sustainability – not just whether they sound “natural.”

✔ I don’t use fear-based marketing. My products are good because they’re well-made, not because I claim they’re “chemical-free.”

Ditching the Fear & Embracing Science

The idea that we need “chemical-free” skincare is a myth. Everything is a chemical, and what really matters is whether an ingredient is safe and beneficial – not whether it’s “natural” or “synthetic.”

So, the next time you see “chemical-free” or “no nasty chemicals” on a label, remember: it’s a marketing gimmick, not a scientific fact. Let’s focus on transparency, sustainability, and well-made products instead!

Posted on — Leave a comment

10 Ways to Use Your Luxury Body Cream

Buy one product, get nine free! Here are ten ways to use your pot of Luxury Body Cream to ensure you get the absolute best value for money.

A tin of body body cream with a blue and beige label
Luxury Body Cream – Traeth
  1. Moisturizer The original raison d’être and the one that keeps people coming back for more. For best results use after your bath and shower. Either thoroughly rub dry to get the blood flowing before smoothing on some cream, or gently pat dry to leave the skin a little damp before applying and locking in that moisture. Either way your skin will feel smooth, soft and perfectly hydrated.
  2. Hand Cream Keep some in your bag to soften dry hands on the go. (The new sample sized pots would be ideal!)
  3. Foot Softener Apply a generous amount immediately before bed, put on some socks and let that deep hydration happen while you sleep.
  4. Hair-Frizz Tamer Smooth a tiny amount onto hair ends to fix any frizzy flyaways.
  5. Tattoo Moisturiser Moisturising a new tattoo is essential to prevent excessive dryness, scabbing and flaking, and to keep it looking fresh and vibrant when healed. I would recommend using the Fragrance Free or the Lavender varieties.
  6. Sunburn Relief Smooth onto mild sunburned skin to cool and hydrate (not suitable for badly sunburned skin – seek medical advice).
  7. Post-shaving Soother Ever get those little raised red bumps after shaving? Smooth on a little Luxury Body Cream to calm the irritation.
  8. Cuticle Treatment Rub the cream directly into your cuticles to soften and prevent cracks.
  9. Elbow & Knee Softener Areas that tend to get dry and flaky can be transformed with a daily application of the Luxury Body Cream
    • Massage Cream I’ve never claimed you should only use it on yourself 😉

There you have it – Ten ways to turn your Body Cream into a money-saving workhorse!

Posted on — 2 Comments

The Luxury Body Cream – What’s in it?

Last Friday saw the release of the brand new Luxury Body Cream in eight varieties, and I promised to write a blog post explaining what each ingredient is, and why I’ve used it in this product. So here we go.

A set of eigh different tins of body cream

Over the last few years I’ve found myself getting more and more frustrated, and frankly, irritated, by the whole ‘everything must be natural, preservatives are evil, “chemicals” are toxic‘ movement. There seems to be a huge swathe of the population that doesn’t understand how ludicrous it is to claim that any product can be made ‘without chemicals’. There also seems to be a belief in some quarters that anything with a scientific sounding name must be a ‘nasty chemical’. I’ve seen a good few blog posts that claim that if a product contains ingredients that you don’t recognise, or are unpronounceable, then it must be bad for you, and should be avoided. I’m here to tell you that a lot of this is baloney. Not everything natural is good for you, or necessarily safe. Synthetic ingredients are not bad for you, and are always (certainly in the UK and Europe) used at safe levels. Preservatives are safe to use and are ESSENTIAL in many products. Chemicals are not inherently bad – arrgghhhh – do I really have to go there? I know most people reading this will understand the ridiculousness of this argument. Water is a chemical, our foods are chemicals… I’m not going to labour that point any more.

But I digress. Let’s dive into the Body Cream ingredients list. It’s worth noting that it is a legal requirement for all ingredients to be listed on products AND at point of sale* in their INCI (International Nomenclature Cosmetic Ingredient) format. You may also list them in plain English, but the reality is that most packaging doesn’t have the space for that kind of duplication. Here I’ll first list the ingredient as it appears on the packaging, and then in plain English if necessary.

Aqua = Water. The ultimate skin hydrator. Distilled water is used to ensure purity.

Theobroma Cacao Seed Butter = Cocoa Butter. Cocoa butter can improve skin elasticity and, like shea butter, contains fatty acids and vitamins which nourish the skin. The fat content in cocoa butter helps create a skin barrier to reduce moisture loss.

Butyrospermum Parkii Butter = Shea Butter. Shea butter is a great skin conditioner which has high concentrations of fatty acids and vitamins which add to its skin softening properties.

Isoamyl Laurate. A vegetable-based emollient derived from sugar beet or coconut and in this formulation is used as an alternative to Dimethicone. While dimethicone is perfectly safe for use in skincare, I chose a naturally derived alternative because Dimethicone is not biodegradeable, and Isoamyl Laureate is. Isoamyl Laureate aids in softening the skin without leaving a greasy feeling.

Caprylic/Capric Triglyceride = Fractionated Coconut Oil. Made by separating out different fats in coconut oil, fractionated coconut oil is, in its natural state, a clear, lightweight liquid which again is used as an alternative to non-biodegradable silicones in skincare products. It is a great emollient which helps soften and hydrate skin while being quickly absorbed, leaving the skin feeling silky and smooth.

Glycerin. Added to the formulation because it is an excellent humectant. This means that while it doesn’t actually add moisture to the skin, it attracts moisture and helps the skin retain moisture and therefore helps improve skin hydration. It also has emollient properties which means it adds to the skin softening properties of the cream.

Peg-100 Stearate / Glycerol Stearate. I’ve bundled these two ingredients together because that’s how I buy them, already combined. Together they form an emusifying wax, which is what turns the water into a cream-like consistency. Both ingredients are derived from plant sources – palm oil and/or palm kernel oil, coconut or sugar beet. Unfortunately there is currently no supplier in the UK that can guarantee their supply is palm-free. But I keep searching.

Cetearyl alcohol, chemically speaking, is a fatty alcohol derived from coconut or palm. Again, I’ve been unable to find a supplied that can guarantee that their product is palm-free. It is used to stabilize emulsified creams and is also adds a thick and creamy feel to skin products. It has the added benefit of being moisturising and skin softening.

Cetyl alcohol is a flaky, waxy, white solid derived from coconut, palm or vegetable oil.  Like Cetearyl alcohol above, it shouldn’t be confused with more aggressive alcohols like isopropyl alcohol or ethanol. Cetyl alcohol is a fatty alcohol that is gentle on the skin and is actually used to treat skin irritations. It’s used as a thickener, and emulsifier, but more importantly, for its moisturising properties.

Parfum = Fragrance. This might be naturally derived essential oils or synthetically produced fragrance oil.

Xanthan gum. This is a thickening agents which enhances the texture of cosmetic creams also stabilizes the emulsion to ensure that it doesn’t separate. It’s produced by the fermentation of glucose and sucrose (plant based forms of sugar)

Tocopherol = Vitamin E Vitamin E is a strong antitoxidant and anti-inflammatory, making it an excellent addition to skincare. It’s also a very effective emollient and humectant, which means like other ingredients above it can attract moisture to the skin and help create a barrier to stop that moisture from escaping.

Phenoxyethanol = Preservative. This is what prevents fungi, bacteria and yeast from growing in the cream. It gives them a longer shelf life and ensures safety. If your cosmetics products aren’t correctly preserved and become contaminated, they can be very harmful. Products which proudly claim to be ‘preservative-free’ are only good for a week or two at the most before they start to become dangerous.

So there we go, a full run-down of all the ingredients and their purpose in the new luxury skin cream. I hope this is helpful and answers any questions you might have. Please do ask if there’s anything else you’d like to know.

*If you come across a company online which does NOT share its product ingredient lists on its website, it isn’t legally compliant and personally I would avoid it.

Posted on — Leave a comment

Wax Melts

What are they and why should you try them?

Wax melts are small, scented pieces of wax that are designed to be melted in a wax warmer or burner. They are similar to candles, but instead of a wick, they rely on heat from an electric or tea light wax warmer to melt and release their fragrance.

  1. Compared to traditional candles, wax melts offer a longer-lasting fragrance experience. Because they’re designed to be melted slowly, the fragrance is gradually released over a longer period of time, providing more consistent scent diffusion.
  2. Unlike candles, an open flame isn’t necessary to enjoy wax melts. There’s a huge range of electric wax burners on the market, which makes them a safer alternative for households with pets or children. You can of course also use them in a traditional burner with a tea light if you prefer the ambience of a real flame.
  3. Wax melts are so easy to use – simply place them in a wax warmer and turn it on / light the tea light. They don’t require any wick-trimming or other maintenance, making them extremely convenient.
  4. Wax melts are cost effective because they’re often less expensive than traditional candles. This makes them an affordable option for people who want to enjoy great smelling home fragrance on a budget.
  5. By melting more than one melt together you can try different combinations. Create your own, completely unique home fragrance.

At The Soap Mine we offer six different wax melt fragrances to complement six of our most popular soap fragrances:

Wax melts offer a safe, convenient, and cost-effective way to enjoy home fragrance, and their customizable scents and longer-lasting fragrance make them a great choice for anyone looking to freshen up their living space.

Posted on — Leave a comment

Bar Soap 101: 8 Tips and Tricks to Make Your Soap Last Longer

Enfys Rainbow soap on a soap dish

When you’ve invested your hard earned cash in a bar of luxurious handmade soap, you’re going to want to make sure that it lasts for as long as possible. A well-made and properly cured bar will generally last longer than a bottle of liquid soap (or a bar of commercially made soap), but by following these tips you can ensure that your bar lasts as long as possible.

1. Store it properly: Until you’re ready to use it, store your soap in a cool, dry place away from direct sunlight. Soap can fade or discolour when left in sunlight, and it might also begin to lose its fragrance. Our grandmothers knew how to store soap – in their underwear drawers! This had the added plus that clothes would become scented by the soap – win-win!

2. Keep it dry: Clearly, you need to get your soap wet while in use, but allowing it to dry properly afterwards, and keeping it dry between uses, will keep your bar of soap nice and hard right to the very end. It’s also important not allow your bar to sit in water for any length of time.

3. Use a soap dish: The best way to keep your bar dry between uses is to store it on a soap dish or stand. There’s a mulittude of different options out there – some dishes have holes to drain water away, or ridges to ensure the soap sits above any collected water – just make sure that it drains well to ensure that your soap isn’t sitting in a puddle of water, however small. You can find soap dishes for all budgets here

4. Position: Keep your soap dish / stand away from the shower where it might be exposed to excess moisture. Keeping your soap in the shower might be convenient, but it won’t help your soap to stay dry between uses if it’s being dripped or sprayed on. For the same reason don’t leave it by an open window if it’s raining outside.

5. Use a washcloth: Using a washcloth / facecloth / loofah or similar can help extend the life of your bar by creating abundant lather which means you can use less soap.

6. Reduce friction: Handmade soap is a pleasure to use but as tempting as it is to roll it over and over in your hands, try not to do so if you want your soap to last as long as possible. Less friction = longer lasting soap.

7. Reduce the temperature: The hotter the water, the faster your bar of soap will dissolve. Cooler water is the best option for handwashing IF you want your soap to last longer.

8. Use a Soap Saver: Finally, when your bars of soap have worn right down to a sliver, think about using a Soap Saver Bag. Made from sustainable natural materials, these bags create an exfoliating skin scrubber when filled with soap ends, thus ensuring that every last little scrap of your soap is used.

Posted on — Leave a comment

10 Great Reasons to Switch from Liquid Soap to Bar Soap

Bar soap sometimes gets a bad rap and, for a soapmaker and obsessive solid soap fan, this is hugely frustrating. There are so many good reasons to swap from using liquid soap to bar soap and here, in no particular order, are my top ten great reasons to consider switching. Please note that these points relate to real, handmade soap rather than commercially produced soap. That is a different kettle of fish altogether!

  1. Bar soap is more convenient to travel with as it’s less likely to leak or spill, and of course if you fly hand-luggage only, you won’t be forced to bin it before going through the security checks.
  2. Bar soap can be more satisfying to use than liquid soap, as it creates a rich and luxurious lather that feels indulgent on the skin. Contrary to what many detractors say, well made soap is NOT as drying as most liquid soaps on the market.
  3. Bar soap is usually much cheaper per use than liquid soap, making it a more cost-effective option.
  4. Bar soap is available in a huge range of shapes and sizes, making it easy to find a product that suits your needs. There are vegan and non-vegan (eg tallow soaps) options, soaps fragranced with essential oils or fragrance oils, or with no fragrance at all. Soaps coloured with clays, or botanicals, minerals or natural/synthetic micas, and soaps with no added colour whatsoever. There are goats milk soaps, and coconut milk soaps, soaps with added spices and soaps with exfoliants. Soaps made with fancy, expensive oils and those with more basic ingredients. There’s something to suit everyone, which isn’t necessarily the case with liquid soap.
  5. According to the McGill Office for Science and Society*, the carbon footprint of a bar of soap is about 25% less* than that of a bottle of liquid soap. This is partly because liquid soap is largely water, which makes it heavier and requires more energy to transport. Another reason is that the plastic container and the liquid soap itself both typically take more energy to be made than does a bar of soap and its packaging.
  6. Solid soap doesn’t require the use of a plastic dispenser, making it a more eco-friendly option. Bar soap is more environmentally friendly as it typically comes in minimal packaging and generates less waste than liquid soap.
  7. Well-made and well-cured (for a minimum of 4 weeks) solid soap lasts longer than liquid soap. This is epecially true if it’s kept in a dry place between uses. Again, the McGill Office for Science and Society* says: “On average, people use about 2.3 grams of liquid soap to wash their hands but only about 0.35 grams of a bar soap”.
  8. As a general rule, bar soap is more gentle on the skin than commercially produced liquid soap which, in actual fact, is usually a synthetic detergent, originally created as laundry soap. These synthetic detergents often include ingredients that can cause dryness, skin irritation or allergic reactions.
  9. Bar soap is easier to store and takes up less space in the bathroom than bulky liquid soap dispensers. Plus you get to treat yourself to beautiful soap dishes!
  10. By buying handmade bar soap you are usually supporting a small business, whether from the maker directly or a local independent retail outlet that stocks their products. This puts money back into the community rather than a large conglomerate.

*https://www.mcgill.ca/oss/article/health/liquid-or-bar-soapy-tales

Share this with anyone who still needs convincing. Oh, and do comment below with any reasons people still have for not using solid soap. I’ll work on some counter-arguments 😀