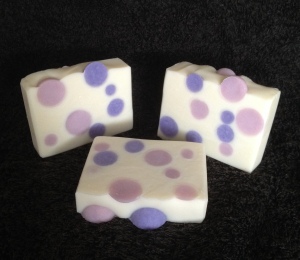
Posted on 18 Comments

The ‘Tall & Skinny Shimmy’ Challenge Soap

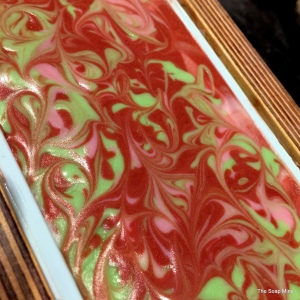
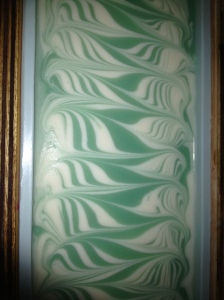
November’s challenge over on Amy Warden’s Great Cakes Soapworks was to (attempt to) recreate what Amy named the ‘Tall & Skinny Shimmy’. This technique is also called the wall pour or segment filling, and has been perfected by Tatiana Serko, an amazing soaper who created the tutorial video for the challenge. I’ve seen this design before and always wondered how it was done, SO there was no doubt in my mind as to whether I’d be giving it a go this month.  Here’s the design she created for the tutorial:

Tatiana's Tall & Skinny Shimmy
Tatiana’s Tall & Skinny Shimmy

I recently bought a shiny new tall & skinny mould, and this challenge marked it’s first outing. This was the first problem. Turned out the mould holds more soap than my regular mold. I kind of thought it would, but checked on the website where I bought it to make sure.  Unfortunately, in my haste, I looked at the wrong listing, and so had the wrong volume in my head. Luckily I’d had a sneaking suspicion that that figure might be incorrect (just by looking at the mould – which is LONG), so I prepped two batches of my masterbatched oils, just in case.

I decided (once again) to use a fragrance I’d not used before. Not as crazy as it sounds – I used a blend of Patchouli & Sweet Orange essential oils, both of which I’ve used separately many times without any problems.

I added the fragrance blend to the oils, then added the lye and mixed gently with a whisk until the soap was fully emulsified, but no more. In her tutorial, Tatiana said that she doesn’t use a stick blender, and simply lightly hand mixes her soap. With some trepidation, I decided to do the same, and split the soap into seven, colouring each portion a different shade, and mixing thoroughly by hand.
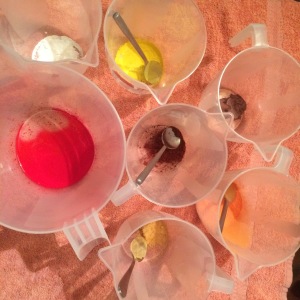
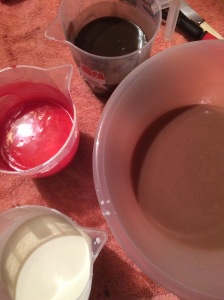
Prepped colourant
Prepped colourants

I then set up my mould as per Tatiana’s instruction.  I placed two pencils parallel to each other on my work table, on either side of my mould.  I put one side of the mould onto one of the pencils, so that there was a tilt to the mould, and then poured the first colour down and along the side of mould that was NOT on the pencil.  I then moved the mould so that the other edge was sitting on the other pencil (and the mould was therefore tilted lengthways the other way) and poured down and along the opposite side. I did this with all seven colours, alternating the side each time. The soap was very thin, and had barely reached trace – I think it perhaps could have been just the tiniest bit thicker – note to self for next time…

Anyway, of course, it turned out I didn’t have enough soap made up to fill the mould, so I quickly separated out another three portions of the second batch, added colour, and continued to pour. The pouring was fast and fraught, and I didn’t get the opportunity to take any photographs – sorry!

Once the pour was complete, and the mould was full, I swirled to the top and put it to one side to harden up.
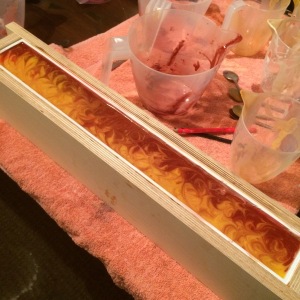
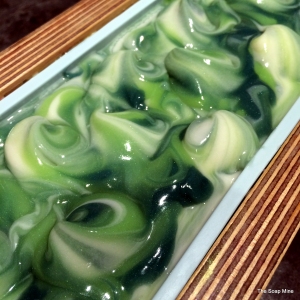
Tall & Skinny Shimmy in the Mould

As it was poured at such a light trace, it took a while to harden up sufficiently, but three days later I felt confident enough to take it out of the mould:

Tall & Skinny Shimmy in the mould
Ready for cutting

I was REALLY apprehensive about cutting this one, I didn’t have the time (or the ingredients) to make another one, so I was hoping it wasn’t a complete disaster. As it was, it’s not too bad. I did get a little bit of a shimmy, but there’s no doubt that the pouring left a lot to be desired!!
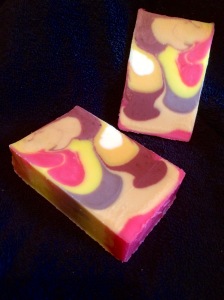
Tall & Skinny Shimmy (kinda)

I think had I had the correct volume of soap from the beginning, and just had the seven colours to pour, I may have had more luck – it’s clear that my scrabbling for more soap towards the end caused issues with the design at the top.

Another issue I had was that the silicone liner was so tall and long, it didn’t stay flush to the sides of the mould – the sides bent into the middle, and so while pouring down one side, I had to use my other hand to hold the other side of the silicone mold away from the middle, which was a bit awkward.

I’m really happy to have been able to give this one a go, and will probably try it again at some point in the future – thanks Amy!

Thanks for reading – I’ll be back soon with a post on my holiday soaps.

Posted on 6 Comments

International Soap Swap Part 3 – USA & Canada

My apologies, this post has been much longer coming than I’d hoped (or planned!). Things got very busy preparing for the festive season, but I finally got it finished. Thank you for your patience 🙂

Six of the participants in this summer’s soap swap were from USA or Canada, and this last post will focus on the lovely soaps that came all the way over the Atlantic into my eager little hands.

Just as in the last post, the following are in no particular order… apart from this first one. Once the soap swap had been set up, and we had decided the date by which all soaps should be with me, all there was for me to do was sit back and wait for the soapy parcels to arrive. I can’t tell you how excited I was the first time the postman knocked on the door with a soap filled parcel. That parcel was from Pam Leis of By The Sea Soap.

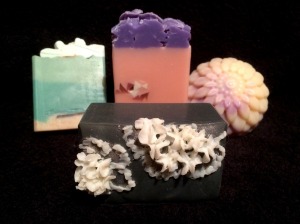
Pam was extraordinarily generous and sent me not only the full sized bar that each participant received but also FOUR extra treats.  You can see three of them in the picture below – a sample of her Newport Beach Sand soap, a flower shaped Sweetpea & Rhubarb soap, which has some natural sponge embedded in the bottom AND a ‘Black Bamboo – Detox bar, with some amazing white piping on the top.

They are all stunning, but my absolute favourite fragrance is that of the Newport Beach Sand soap.  It’s called Sea Moss by BrambleBerry, and I NEED to find something similar in the UK.  It’s described as  ‘a unique blend of Bergamot, Orchid, Jasmine and Violet with supporting notes of Ozone (air), Sandalwood, Musk and of course, Moss. This fragrance could be described as fresh, green and almost a little kelp-y’. It’s reminiscent of something I’ve come across before, but I just can’t recall it. If anyone has any ideas – please let me know!

By The Sea Soaps
By The Sea Soaps

Pam also sent me some beautiful dried rosebuds, and I’ll be using them on something special soon!

Dried Rose Petals
Dried Rose Petals

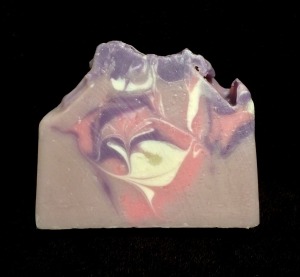
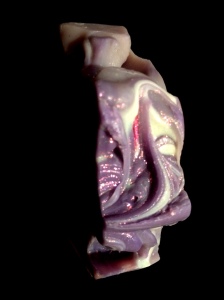
Here is Pam’s swap soap, and a closeup of the sparkly top. It’s called ‘A Pink Philosophy’ and I’m afraid the photos don’t do justice to this beautiful bar, but I can assure you it’s lovely!

A Pink Philosophy from By The Sea Soap
A Pink Philosopy - Top
A Pink Philosophy – Top

You can find more of Pam’s soaps on her Face Book page

If you’re a fan of soapmaking videos, you’re probably familiar with Emily of Shieh Design Studio. She has her own You Tube channel, and I am only one of a great many people who enjoy watching her make soap.  Emily makes her own soap boxes, and they’re a testament to her perfectionism:

Handmade soap box by Shieh Design Studio

It seemed a shame to have to break it open, but, I admit, I didn’t hesitate for long 🙂

The soap I received was called Mayan Gold, and it’s a beautiful riot of colour. The fragrance is a blend of oriental notes and chocolate / vanilla.

Mayan Gold by Shieh Soap Design

The top is decorated with golden chunks of soap

Mayan Gold - top of bar
Mayan Gold – top of bar

Isn’t that just beautiful?

You can read Emily’s blog here or catch up with Shieh Design Studio on Facebook, You Tube, Instagram and Etsy.

Next up was Louise of SoGa Artisan Soaperie in Canada. Louise’s bar was fragranced with the ever popular (and delicious!) Black Raspberry Vanilla fragrance, and featured berry colours and a hanger swirl design. Here it is packaged:

Black Raspberry Vanilla by SoGa Artisan Soaperie

And here it is in all its glory. I love the hanger swirls and the overall design really suits the fragrance I think.

Black Raspberry Vanilla by SoGa Artisan Soaperie

The top of the bar also features some lovely shimmery swirls. I tried and tried to take a good enough picture of this top which adequately showed the beauty of the top but this is the best I could do. I can assure you that it looks much better in real life:

Black Raspberry & Vanilla Top

Louise can be found on Facebook, YouTube, Instagram and also has her own website. Do check them out!

Next up was Barbara of Moon Goddess Garden. She sent this lovely flower shaped bar. It came shrink wrapped which kept it in pristine condition during its travels, and all the company info was on a label on the back:

Moon Goddess Garden
Moon Goddess Garden

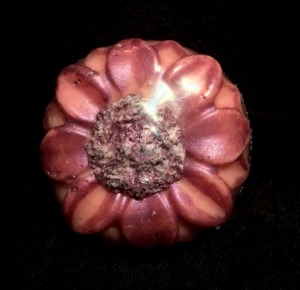
Here it is unwrapped.  The petals are decorated with mica and the centre is created from poppy seeds which give a nice bit of exfoliation. It’s called ‘Summertime Taffy’  and the fragrance really is summery – bright and a bit fruity and JUST what I need at this time of year as the rain lashes down outside!!

Moon Goddess Garden
Moon Goddess Garden

Do have a look at Barbara’s Facebook to see more of her beautiful soaps.
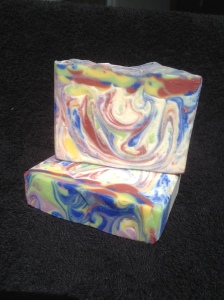
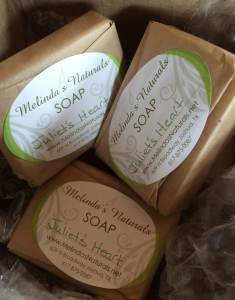
Melinda, of Melinda’s Naturals, sent us each a bar of ‘Juliet’s Heart’:

Juliet's Heart by Melinda's Naturals
Juliet’s Heart by Melinda’s Naturals

Here it is unwrapped and you can see the fine swirls that adorn the inside and the top of the bar:

Juliet's Heart by Melinda's Naturals
Juliet’s Heart by Melinda’s Naturals

This soap was a special edition, created just for us, and is scented with a soft, warm floral essential oil blend. It features jojoba oil and illipe butter, and feels very luxurious to use.

You can find Melinda on Facebook, Instagram and on her own website

Finally we have Zahida of Handmade in Florida.  Zahida’s beautiful and hugely popular soaps invariably sell out within hours of their release, and she has a massive following on social media.

Allow me to deviate a little here because the box in which the soaps arrived was so exquisitely packaged I had to take a photograph of every step:

Handmade in Florida Packaging

Now, given how difficult it is to get your hands on a bar of Zahida’s soap, imagine my delight when I learnt that Zahida had sent me (by way of a thank you for hosting) not one but TWO bars of her soap to try – Amber and Sensual Oudh. Let me tell you, they both smell wonderful, but my favourite is the Sensual Oudh, described as ‘a deep and complex blending of oudh, sandalwood, cedarwood, leather, patchouli, vetiver, amber, tonka, and vanilla’ – amazing!

Amber & Sensual Oudh by Handmade in Florida

And unboxed:

Amber & Sensual Oudh by Handmade in Florida

How beautiful are those swirls? In case you don’t know, Zahida is the original creator of the oft imitated butterfly swirl – check out her creations on You Tube, Instagram, Facebook, Website and Blog

And THAT, my friends, brings to an end this year’s International Soap Swap.  Of course, it’s not the end for those of us who participated, as we each have a rather large box of lovely soap to keep us going well into the New Year. Mind you, I have a funny feeling it may well happen again at some time in the future, so watch this space!

Thanks for reading, I’ll be back soon!

Posted on 26 Comments

The ‘Clyde Slide’ Challenge Soap

This month’s challenge for Amy Warden’s monthly Soap Challenge Club over at Great Cakes Soapworks is to create a soap using the  ‘Clyde Slide’ technique.  The Clyde Slide is named after Clyde of Vibrant Soaps, who uses this technique to create beautiful (and exquisitely coloured) soaps –  do check out his videos on YouTube if you get the opportunity.

As I’ve just started production of this year’s Christmas soaps, I decided to design my challenge soap around a fragrance oil called ‘Yule Log’. It’s a chocolately, almondy,  cakey fragrance, with notes of cinnamon, ginger, vanilla and musk and is delicious out of the bottle.  How does it smell in soap? I’d love to tell you but, um, well, I forgot to add it. Oh well, sensitive noses deserve pretty soap too don’t they?

I used a light brown mica as the base colour, to represent the sponge, and dark brown mica, titanium dioxide (white) and red liquid colourant for the cream, chocolate and holly berries elements. I did consider using a little green too for the holly leaves, but in the end I’m glad I didn’t.

I prepped the soap batter and added the colours, making sure I kept the batter at a light trace:

Coloured soap
Coloured soap

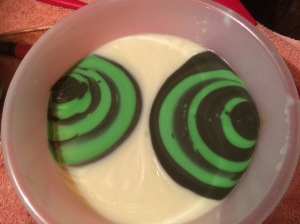
Then I poured the white, red and dark brown soap batters into the bowl containing the lighter brown soap.  I completely forgot to take a photo of this stage, but I used exactly this pattern (this was my second attempt):

Clyde Slide in the Pot

Usually, when I use the ‘In the Pot’ technique, I would now give the pot a quick stir, just once or twice, but I always stir before pouring.  For a Clyde Slide, you DO NOT stir. I can’t tell you how much I wanted to stir!!

Here it is mid-pour:

Clyde Slide mid-pour

Then I swirled the top:

Clyde Slide top swirl

And two days later, Ta Da!!  My unscented Yule Log Clyde Slide:

Clyde Slide, The Cut

And here’s a close up to show the trademark ‘Clyde Slide’ feathering – it’s not a blurred photo, honest :-D:

Clyde Slide Close Up

Many thanks to Amy for her major feat of organisation (apparently there are over 180 entrants this month!), I’m really looking forward to seeing all the other entries. Good luck if you’ve entered!

Posted on 4 Comments

Two months later…

Yep, it really has been almost 2 months since my last post.  The summer season has been incredibly busy, and it’s been as much as I can do to keep up with demand on the soaping front.  Days have been spent keeping the children occupied during what seems to have been the wettest summer on record, and evenings have been spent making, wrapping and labelling soaps to supply the eleven local retailers that now stock The Soap Mine soaps.  Since April I’ve also been doing twice monthly soapy talks for a local holiday company, and have done a couple of soapmaking demonstrations for the Women’s Institute – something I’d really like to do more of.

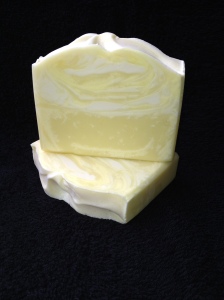
Needless to say there isn’t much innovation or new designs to share from the last couple of months, but I do have one new one to share.  Now I do love my colours and swirls, but my mum has long expressed a preference for a plain, white, citrussy bar, and I finally got round to making one for her.  The only colourant is a touch of titanium dioxide, and it’s fragranced with a smidgen of lemon & grapefruit essential oils. (The prototype was fragranced with lemon & lime, but I much prefer lemon & grapefruit combo).

I’ve named it ‘Peace’ and it’s proved a hit with customers as well as mum, so I’ve added it to the regular line-up.

Peace
                    Peace

There was one other exciting soap related event over the summer. I was honoured  to be able to host an international soap swap between myself and 11 other amazing soapmakers from the US, Canada and Europe. I’ve got a couple of posts coming up soon just about the soap swap, but here, to whet your appetite, is a little teaser of my haul,   If you’re a fan of handmade artisan soaps you may well recognise some of these brands…

International Soap Swap Soap Haul
     International Soap Swap Soap Haul

Thanks for reading, I’ll be back soon 🙂

Posted on 11 Comments

Taming the Vanilla

I’m going to quickly gloss over how long it’s been since I last posted and share a soapy pic – ‘cos that’s what you’re here for right? 😉

Soap fragrance oils containing vanilla are often considered tiresome because of their propensity to discolour and potentially ruin a carefully designed soap. But they smell so good! I absolutely love the smell of ‘Pink Kisses’ from Gracefruit, but my first attempt at using it was a complete disaster. It was early on in my soaping career, and discolouration wasn’t even on my radar.  I used a selection of pretty pink colours and was so excited to see what it would look like, so imagine my disappointment…

Looks ain't everything!
              Looks ain’t everything!

Every failure’s a learning opportunity eh? 😀

Four (!!) years on and I decided to give it another go – this time I was a little more careful with my design. Splitting the batter into two, I coloured one half with Orchid Pink Mica, and added the fragrance oil to the other other portion only, adding a little Titanium Dioxide to mitigate the effect of the vanilla. This was the result:

First Kiss Cold Process Soap
                 First Kiss

Needless to say I’m so much happier with this one. I think the browning effect of the vanilla actually improves the look of the bar and gives it some depth and interest.

I hope you’ll agree that my photography skills have improved a little too 😀 😀 😀


Posted on 10 Comments

Soap in the Mould

Freshly made soap, in the mould, has such a vibrancy and gloss about it, I can’t help but take a photograph every. Single. Time.  Here are some of my recent favourites:

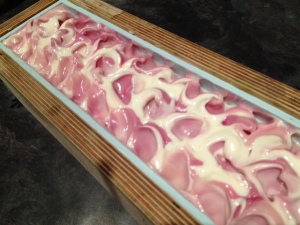
‘Delicious’ is fragranced with a dupe of a DKNY fragrance and is described as ‘A fresh, green floral fragrance of crisp green apple, watermelon, cassis and a hint of cucumber’ and underneath those green waves is an In The Pot swirl.

'Delicious' Handmade Soap in the Mould'Delicious' Handmade Soap in the Mould
‘Delicious’ Handmade Soap in the Mould

I wrote about the redesign of Tutti Frutti in my last post here. It’s scented with a very fruity Jellybeans fragrance oil, and this time I’ve kept the same design but have tried to intensify the colours somewhat so that they’re brighter in the finished bars. The soap batter was very slow to trace this time (not sure why – same recipe, same fragrance :-s) so rather than attempt to texture the top I just swirled the colours together, and I love the effect it gives.

'Tutti Frutti' handmade Soap in the Mould
‘Tutti Frutti’ Handmade Soap in the Mould

And last (for now!) is a batch made with a new-to-me fragrance – a zingy, citrussy scent with pink grapefruit, kumquat, orange, and cranberry –  I’ll soon be running a little competition to come up with a fitting name so get your thinking caps on…

Cold Process Soap in the Mould
Soap in the Mould – name yet to be decided!

Cut pictures to follow just as soon as I get round to taking them 😀


Posted on 11 Comments

Makeovers (3: Tutti Frutti)

Tutti Frutti is one of the soaps from my fragrance oil range and is particularly popular with children and young people   Scented with a fruity fragrance oil, it has both berry and citrus notes on a sweet vanilla base and is reminiscent of jelly beans. When I first started using it in soap, I wanted a design that reflected the complex fruity gragrance, and came up with this four colour bar:

1st Incarnation of Tutti Frutti

When I decided to standardise my designs last year, I chose the In The Pot (ITP) swirl from my fragrance oil soaps. I wanted to keep the multicoloured idea, and so this is what happened:

2nd Incarnation of Tutti Frutti

It sold ok, but to me it looked messy, and not particularly appealing, so I had to think again.  This is the current Tutti Frutti design. I’m much happier with it, despite it being a little more time consuming to make, and doesn’t really fit, design-wise, with the rest of the range (but rules are made to be broken eh?!).

3rd incarnation of Tutti Frutti
Posted on 9 Comments

Sneaky Peeks

Believe it or not I’m STILL restocking and wrapping at the moment.  The first craft fair of the year is coming up this Saturday, and I’m really looking forward to getting back to face to face selling again.

Here are a few in-the-mould teasers of what what I’ve been up to recently.

Clarity
Fragranced with Lemongrass & Clary Sage Essential Oils

Clarity Essential Oil Soap

Serenity
Fragranced with Bergamot, Patchouli, Orange & Ylang Ylang Essential Oils

Serenity Essential Oil Soap

Enigma
Fragranced with Rose Geranium, Rosewood and Palmarosa Essential Oils

Enigma Essential OIl Soap
Enigma Essential Oil Soap
Posted on 15 Comments

Makeovers (2: Wake Up!)

Wake Up! was the first soap that I ever made using a blend of essential oils, way back in early 2010. Up until then I’d used fragrance oils in soap but, despite having an interest in aromatherapy, I’d never tried blending oils myself. Oh how things change! It’s a simple but refreshing mix of Peppermint and Rosemary essential oils – perfect for waking up the senses in the morning shower. While the fragrance blend has stayed the same since that time, it was a couple of years before it got its true name. Up until some point in 2012 it went by the predictable, if uninspiring, ‘Peppermint & Rosemary’.

This is the very first :

1st Incarnation of Peppermint & Rosemary - now known as Wake Up!
1st incarnation of Peppermint & Rosemary – now known as Wake Up!

I quite like the sprig of mint used there as a prop, but the least said about the background the better!

It wasn’t long after the above photo above was taken that I acquired my very first loaf mould (from The Moulds Shop – highly recommended btw), and my soaps became a more uniform shape and size.  For a while I was obsessed with the Tiger Swirl, and Wake Up! looked like this:

2nd incarnation of Wake Up!

Interestingly, it’s only now that I realise that I hadn’t started bevelling the edges at this point – something I always do these days.

These days Wake Up! looks something like this:

Wake Up! from The Soap Mine
3rd incarnation of Wake Up!

Currently all my essential oil soaps are made using the Drop Swirl technique, as I wrote about here. Sometimes they have textured tops, sometimes mica swirls, but they are always (for now!) Drop Swirls.

I’m really enjoying looking back over old designs, so please bear with me in the short term while I indulge myself with these makeover posts – I will try to intersperse them with some other stuff as well 😀  Thanks for popping by!

Posted on 14 Comments

Makeovers (1: Serenity)

Quite a few of my soaps have had a makeover recently. No matter that I have (more or less) a set range of fragrances & designs, there’s always room to improve and to flex those creative muscles.

One of the most popular essential oil soaps that I sell is Serenity. The fragrance is a blend of Bergamot, Patchouli, Orange and Ylang Ylang essential oils.  The very first time I made a full batch of this one I carefully weighed out the appropriate amount of essential oil blend for the amount of soaping oils used, then put it to one side.  I then split my batter into three, coloured one white and two different shades of blue, then poured the soap into the mold, creating what I fully expected to be an awesome drop swirl. Except I’d forgotten to the add the fragrance. Argghhhh! There was nothing to do but scoop it all out, thoroughly mix in the essential oils, and put the whole lot back into the mould. Of course I ended up with a very plain, pale blue bar of soap which smelled amazing but looked nothing like my original plan:

Serenity Take 1
First incarnation of Serenity

The next few times I made Serenity, I decided to go with a single colour drop in a paler background.  Most of my drop swirls up to this point had been a white soap with coloured drops, but I wanted to try something a little different.  Here I used Icelandic Blue mica for the base colour and Denim Blue mica for the drop:

The second incarnation of Serenity
Second incarnation of Serenity

I used that design for a while, and it sold well enough, but it didn’t wow me, and last year I decided it needed updating.  The current Serenity has a base of Icelandic Blue mica, and drops coloured with Titanium Dioxide and Blue Dragon mica. I think it’s rather pretty and goes well with the name, so this design will be staying (for now anyway :-D)

Third incarnation of Serenity


Posted on 16 Comments

A Daffodillian Disaster

Daffolidish? Daffodilesque? Daffolidic? I don’t know, answers on a postcard please 😀 What I DO know is that I won’t be soaping with Daffodil fragrance oil again any time soon!

It’s been a while since I participated in one of Amy’s challenges over at Great Cakes Soapworks so I decided to give the December challenge a shot. ‘Cos of course I’m not really really busy with Christmas Fairs at the moment, oh no, not me…

Having decided to sign up for the challenge (which, by the way, I have done for the last goodness knows how many months but not actually managed to make anything in time) I also signed up for a new idea Amy’s organised, a Soap Swap. I really love trying other soapers’ creations, but if I’m honest I think my main motivation for signing up was to make sure that I actually entered the challenge. Once I’d commited to swap my soap with another contestant, I knew I couldn’t just ‘not get round to it’.

The challenge this month was to make a soap using the spoon swirl method. This is something I’ve done many times before, and which I knew needed no fancy equipment other than the usual, plus a spoon. And Amy’s excellent tutorial video confirmed that yes, I did indeed already know how to do this one. So far so good.

I took a moment to decide on which fragrance to use. I didn’t want to use any of my regular range, as they have fixed designs, none of which is a spoon swirl. So something different, something that could, possibly, become part of the range if it turned out fantabulous. I opted for a delicious daffodil fragrance. First mistake. Using a new-to-me fragrance for a challenge / swap soap was not one of my greatest decisions.

I melted the oils and butters that needed it, then stirred in the liquid oils, and the fragrance oil. I chose three lovely micas which I thought represented daffodils perfectly, and combined them with a little of the melted fats. I know many soapers add the powdered mica directly into the soap and stick blend it in, and it works just fine. I keep meaning to try that but I guess I’m a little stuck in my ways!

Prepped Micas
Prepped Micas

I usually soap at room temperature, so I used some pre-prepared (water discounted) lye solution, and there you have my second mistake.  Knowing that floral fragrances have a tendency to accelerate, I really should have used the full recommended water amount.

Anyway, you can probably guess what’s coming. I slowly added the lye solution to the fats and immediately it started to thicken. There wasn’t a lot I could do but, knowing that I wasn’t going to get another opportunity to make a challenge soap by the deadline, I carried on, managed to get a bit of colour mixed in, and squished it into the mould.  I DID then spoon swirl it. I really did! If you look closely at the pic below you can see where the spoon moved within the mould, but it’s not really that clear 🙁

Daffodil Spoon Swirl (honest!)

Oh dear. My poor swap partner.  Sam – if you’re reading this, I will send you a bar of this one (it does smell lovely!!) but I’ll also send you one of my more successful soaps!

Posted on 11 Comments

Soap Tops

I’m in full ‘Operation Christmas Fairs’ mode and have been for a good few weeks now. All my soapmaking has been restocks, and there is a LOT of time being spent packaging and labelling soap. Consequently there hasn’t been much opportunity for creativity so I’ve playing around with my soap tops and and trying out different styles and techniques. I mostly swirl the soap while it’s still fairly fluid, but I have tried letting the soap thicken up a bit and creating texture that way too.

I’ve tried mica in oil swirls:

Mica/Oil swirl
                       Mica/Oil swirl

Swirling the still very fluid soap with a chopstick/skewer (or similar):

Chopstick swirl
         ‘Chopstick’ swirl

Chopstick swirling at a slightly heavier trace:

Chopstick swirl
       Chopstick swirl

A more formal ‘mantra’ style chopstick swirl:

Mantra swirl
             Mantra swirl

Using a spoon to add texture to the top:

'Spoon' textured top
‘Spoon’ textured top

Adding grated soap to create some detail on the top:

Grated soap detail
Grated soap detail

A simple ‘splatter’ technique. This one looks really effective on the cut bars:

'Splatter' method
       ‘Splatter’ Method

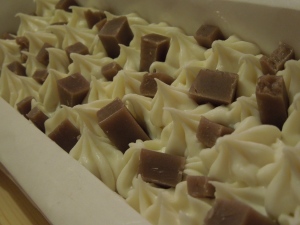
Here’s one I made a few years back – Chocolate Cake – chocolate chocolate chunk embeds set amid piped ‘cream’ topping:

Piping  & Embeds
                      Piping & Embeds

There seems to be an infinite number of techniques and methods, and I’m looking forward to doing some more experimenting in the quieter post-holiday months ahead.


Posted on 12 Comments

A Planning Failure

If there’s one thing I’m learning, as the business slowly grows, it’s that planning is everything. Actually, I hope I’ve learnt a lot more, but planning IS crucial. I like to cure my soaps for a full six weeks before releasing for sale, and trying to work out potential demand a good month and a half ahead of time isn’t always easy.  Last year I made two Christmas soaps, and I had a good deal more left after the Christmas rush than I would have liked. How popular do you think a soap called ‘Christmas cake’ is in January? Yup…

This year, I was determined to avoid the same mistake again, and decided to make just one Christmas soap. I chose my fragrance carefully, and opted for ‘Jewelled Cranberry’, described as a ‘festive berry fragrance of juniper berries, elder berries and cranberries with supporting notes of pine nuts, orange peel and crisp apple’ and supplied by Gracefruit.

Jewelled Cranberry
Jewelled Cranberry

I gave it the usual six weeks cure time then posted it on my Facebook Page stating that it was a limited edition. The response was as amazing as it was unexpected – all 15 bars were sold within 24 hours. So that was it, my whole Christmas offering sold out before the end of October!  I was thrilled of course, but also a bit frustrated, at myself, for not foreseeing this possibility. Yes, I could have made more, but by the time I’d ordered the fragrance, made the soap, and waited the requisite six weeks, I would most likely be too late for the Christmas shopping period, and would end up with a surfeit of holiday soap in January again.  Very poor planning from a business point of view, but a valuable lesson learnt for the future!

Oh, and that Christmas Cake soap? I changed the name and it sold rather nicely, thank you very much 😉

Have you made Christmas soaps this year? Please share your links in the comments – I’d love to see them!

Posted on 13 Comments

All Hail the Soap Cutter

Ever heard of a ‘Bud’? In the context of soapmaking I mean, not as in the popular American alcoholic drink.  To be honest, unless you’re big into soapmaking, you probably haven’t.  If you ARE big into soapmaking, you may already have a Bud, or you may, like me, have craved a Bud for a long time. OK, a ‘Bud’ is a Soap Cutter handcrafted by the lovely Bud Haffner in the US.  I first came across Bud and his cutters a few years back, and have wanted one ever since. When I first started making soap I used a knife. A really big knife. I’m not sure I EVER succeeded in cutting a bar with right angles. I then progressed to using one of these:

Yup. A cheese board with integrated wire. As mad as it sounds, it actually worked rather well, after a fashion.  It did at least cut cleanly and straight – but there was plenty of scope for user error.  Can you see the faint score mark just below the ‘cut’ line?  It was to there that I moved the end of the bar to after each cut, with a view to getting the same width bar every time. *Ahem* I’ll say no more about that.  The wire broke on a regular basis and replacements were hard to find and fiddly to replace *sigh* Since moving home to Wales the soap business has really taken off, and a good few months back I decided to bite the bullet and buy a bespoke soap cutter. I specifically wanted a single wire cutter, as a) I couldn’t really justify the cost of a multi-wire just yet and b) I really do still love that moment of discovery each time you cut a bar and see what you’ve got design-wise.  Anyway, I was really surprised to discover that I couldn’t find anyone in the UK selling them.  There were plenty of cutters that use a metal slicer like this one… …but only a wire cutter would do for me.  I also found a couple of UK based companies that sold multi-wire cutters, but I had my heart set on a single wire. So it was that, having heard many great comments and read some fantastic reviews about Bud’s soap cutters, I decided to order one from the US. Bud only seems to sell through Etsy, so I logged onto the site and bought my perfect single-wire soap cutter. Within hours I had a message from Bud to say he would be shipping the following day, and less than 2 weeks later it had arrived!  It’s extremely solid and well made, and an absolute pleasure to use.  Here it is in all its glory (here modelling this season’s ‘Parisian Flora’) :

And another shot from a different angle – just because I can

photo 2(2)

The bar width adjuster is simple and really easy to use:

photo 1(1)

I’m absolutely thrilled with my new cutter – for the first time ever all my bars are exactly the same width! It’s so easy to use, is beautifully made, and Bud provides excellent customer service. I’m already eyeing up one of the multi-wired cutters (affectionately known as a ‘tank’ within the soaping community) and, if the business grows as I hope it will, I fully intend to get one one day 😀

Posted on 12 Comments

I’m back…

…definitely, absolutely, for good this time!!

I’m so sorry – the last two months have had so much going that I’ve struggled to find time to get on here to post, and then, over the last couple of days, I realised that I’ve  been putting it off as I didn’t know where to start. This is just a quick post to ‘break the spell’ as it were – I have loads more posts in the pipeline.

We finally moved! We’ve been in our new home for about 6 weeks now. It’s a ‘doer-upper’ and there really is so much to do, but it’s ours, it’s warm, it’s dry and we love it! Our eldest (4y) started full time school last month and has settled really well, and our youngest (18m) becomes more of a little monkey every day. Literally – she will climb, or attempt to climb, ANYTHING!

The soap business continues to grow, though with the little one demanding so much of my time I’m wary of committing to too much too soon.  My soap is now in 5 retail outlets, and I’m in discussions about another project. I did my first custom order of party favours recently, and the last craft fair I did was really successful. I’ve also put together my first ‘multi-item’ gift sets, experimented with piping, and invested in a new piece of hardware for the business – an amazing soap cutter imported from the US.  All good stuff and I’ll fill in the gaps in future posts.

And finally (because I refuse to post a photo-free update), I created my first exfoliating soap:

Super Scrubby Peppermint Soap
            Super Scrubby Peppermint

Oatmeal and ground apricot stones make this soap wonderfully scrubby – great for gardeners’ or mechanics’ hands. It’s fragranced with nothing more than pure peppermint essential oil, and simply coloured with a green mica. They’re not the prettiest bars I’ve ever created, but oh they do feel good on tired feet 😀

Posted on 6 Comments

My Soap Mountain is Growing

Well, I said I wouldn’t leave it so long next time and I’ve been as good as my word – only a month has passed since I last posted and I’ve awarded myself an end of term grade of C- for consistency. I think that’s usually considered a ‘Must Do Better’ grade 😀

I’ve not been idle though. The Soap Mine soaps are now being stocked in THREE retail outlets, and I’ve got my eye on another.  I’ve also been accepted to sell at a local monthly craft fair – the first of which is in just over 2 weeks time.  Soooo, I’ve been soaping like a demon. Originally it was to make sure I had enough for the launch of the website (and before you ask – nope!) but now I also need to make sure I’ve got enough for the three shops and the market – eeek!  I’m finding it quite hard to plan how many bars to make, given that I always work with a 6 week cure time, and I have no idea when, or how much, the retailers will reorder.  I suppose it’s not ‘Best Practice’ business-wise to work in such a way, but all three retailers are quite small concerns, and it would be difficult to get them to commit to taking, say, a set number of bars a month, until they’ve at least got some idea of how well (or otherwise!) they sell.

So, as the title says, my Soap Mountain is growing! My poor mum’s dining room (nope, we’ve not moved either!) has become a soapy storage area, and I’m constantly on the lookout for more storage crates, boxes and anything suitable I can get my hands on.

Anyway, these are some I made a few weeks back – I’ve got a lot more to share once I get round to photographing them!

Blackjack:

Blackjack CP Soap
Blackjack – Aniseed & Spearmint EOs

Chocolate:

Chocolate FO ITP Swirl

Orange & Ylang Ylang EOs:

(I’m struggling to come up with a name for the one so if anyone has any ideas I’d appreciate suggestions)

Orange & Ylang Ylang EOs

Serenity:

Notice the similarity between this one and Blackjack above? My mistake – I didn’t expect the darker blue in this one to be quite so dark, so the two bars are more alike than I wanted them to be.

Bergamot, Patchouli, Red Mandarin and Ylang Ylang EOs

Finally, just because I love it – a mica swirl on the top of my last batch of Luscious Lavender. Cut pictures to follow – eventually 😀

In the mould Lavender Mica Swirl
Lavender Mica Swirl

Thanks for checking in – especially those of you whose blogs I’ve not had the chance to catch up on for what feels the longest time – I’ll get back to you soon I promise!


Posted on 11 Comments

A Quick Catch Up

So my poor blog has been sorely neglected again – six whole weeks since my last post!! I think that’s probably the longest I’ve ever gone without posting, so I’ve had a word with myself, am suitably chastened, and will not be leaving it so long again 😀

Ok, lets get the inevitable out of the way.  No, we’ve still not moved into our new home, and no, the website isn’t ready yet. Both still trundling along though, so I should be able to share good news on both fronts at some point 😉

The great news is that two local retail outlets have now agreed to sell The Soap Mine soaps. Woop!  They’ve each taken a dozen soaps to display in their shops, and if they sell, they’ll take more. Fingers crossed!!

I’ve been busy building up stock levels again – sticking to the plan of ITP Swirls for FO soaps and Drop Swirls for EO soaps I wrote about last time:

Welsh Rose
Welsh Rose (ITP Swirl)

Welsh Rose is actually made with an FO called English Rose, but living in Wales, what else could I call it?!  Coloured with TD and pink mica.

Oatmeal, Milk & Honey ITP Swirl
OMH (ITP Swirl)

OMH (or Oatmeal, Milk & Honey) FO is so popular in the soaping community, but this is the first time I’ve used it. To me it smells very sweet, almost like marzipan, and I LOVE it.  Coloured with TD and three different brown micas.

Wake Up! (Drop Swirl)

This is a restock of my very popular Wake Up! soap.  Fragranced with Rosemary and Peppermint EOs and coloured with TD and green / blue micas

Parisian Flora
Parisian Flora (Drop Swirl)

Another redesign / restock. Parisian Flora proved very popular in its last incarnation, so although the fragrance is exactly the same (a blend of Lavender, Rose Geranium and Ylang Ylang EOs), as are the colours (TD and three pink micas), it’s now made using the drop swirl technique

Luscious Lavender
Luscious Lavender (Drop Swirl)

Luscious Lavender, simply fragranced wth Lavender EO, is by far my biggest seller. It really surprises me to be honest, but there’s no doubt about it, when I look back over my records, Lavender is definitely the one that I’ve made the most often over the years. This one thickened up on me a little quicker than normal, so the drops aren’t quite as delicate as I would have liked.

I also have a Marshmallow FO soap that was cut this morning, and isn’t yet ready to meet its public 😀 and tonight I made Black Jack – a blend of Aniseed and Spearmint EOs. That one’s still in the mould, so pics to follow sometime soon.

Posted on 16 Comments

A Range? Really…?

So, as work continues on my website (I know, I know, that’s another thing I’ve been banging on about for ever) my Web Designer and trusty assistant (aka my husband) has informed me that I need to develop ‘A Range’. Apparently I can’t keep making random batches of whatever I want to, with whatever ingredients / fragrances / colours I fancy trying and using a near infinite variety of design techniques. Nope, I need ‘A Range’…

Now I’ve read enough on Soap Business Best Practice over the last couple of years to know that this is true.  The main reason I guess is that I’ll lose business if I don’t have a range of bestsellers which are always in stock. I also think the website’s going to look a little crazy if there’s too much choice (and of course keeping a website up to date with an unlimited number of different products will be (I was told, sternly) a ‘nightmare’).

So, despite my misgivings, I’ve had to narrow things down a little and make some decisions.  I’m still going to make both Essential Oil soaps and Fragrance Oil soaps, though they’ll have their own separate categories, with no more than eight in each category to begin with.

To simplify things even further, Essential Oil soaps will all be made using the ‘Drop Swirl’ technique:


Enigma - Clary Sage, Rose Geranium and Lemon essential oils
Enigma – Clary Sage, Rose Geranium and Lemon Essential Oils


Spice Island - Aniseed and Orange Essential Oils
Spice Island – Aniseed and Orange Essential Oils

And Fragrance Oil soaps will be made using the ‘In The Pot’ (ITP) Swirl technique: (this first one is the soap that was in the mould in my last post – my first ‘post-move’ soap!)

Delicious - a dupe of the popular DKNY Be Delicious fragrance
Delicious – a dupe of the popular DKNY Be Delicious fragrance
Lemon Meringue - An intensely lemony yet sweet fragrance.
Lemon Meringue – An intensely lemony yet sweet fragrance.

The two techniques can sometimes look quite similar, and I might decide in time that that’s not such a good idea, but I’ll wait and see.

I’ll should still be able to indulge my creative streak as I’m hoping to make more seasonal soaps – I’ve missed a trick in the past by not making specific (for example) Christmas, Summer or Valentines Day soaps so that’s where I think I’ll be able to try out different fragrances and designs.

What do you think of my plan?

Posted on 15 Comments

…and two months later…

Wow, I realised on Monday that it was exactly two months since I last posted on here.  TWO MONTHS!! I knew I’d take a bit of time out while we packed up our home and made the move to Wales, but I didn’t realise I would neglect the blog so thoroughly – so sorry!

Anyway, we’ve left the big city and are now settling into a much more rural way of life. This is the amazing view from my bedroom window:

photo 1

Not bad eh? We’re still staying with my mum, who has kindly allowed her peaceful home to be invaded by our family of four (thanks mum!) but we’re in the process of buying our new home – in the same village – yippee!

Needless to say the majority of our belongings are still boxed up and in storage and I’ve not been able to make soap BUT I decided last night that enough was enough – I had to get back to it. Mainly because a) I miss it, hugely and b)The Soap Mine is getting seriously low on stock…

So, I dug out all my soaping gear, whisked up a simple 3 colour ITP (in the pot) swirl (and oh oh oh loved every minute of it :-D):

photo 2(1)

  Delicious is scented with a dupe of DKNY’s Be Delicious fragrance, and smells utterly gorgeous. Coloured with two shades of green mica and titanium dioxide. Cut pics to follow soon.

Posted on 32 Comments

Anyone for Embeds?

This month’s challenge over at Amy Warden’s Great Cakes Soapworks was to make a soap with embeds, ie soap with different shaped/coloured soap embedded within in it. One of the examples Amy used in her tutorial was this beauty:

Rise-and-Shine-soap

Isn’t it gorgeous?

I wasn’t going to enter the challenge this month as we move next week (are you bored of hearing about it yet? 😉 ) but I do like getting involved so decided to whip up something simple at the last minute, just so that I could take part.  I’ve already taken a peek at some of the other entries and there are some absolutely stunning creations, I’m a little embarrassed to post my little simple soap, but hey ho – I might win the booby prize :0)

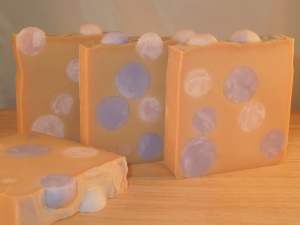
Back in 2012 I made a soap that was really popular, called Bubblicious:

Bubblicious

and I thought it would be a quick and easy one to replicate for this challenge.

So I made up two small batches of soap and coloured one pink and one lilac. After about 24 hours I unmoulded them and started to roll different sized balls out of both colours:

Soap balls

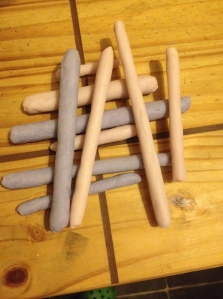
This soon became ridiculously laborious and I realised I could probably get exactly the same effect if I rolled lengths of soap like these:

Soap sticks

I then made up a larger batch of soap and added titanium dioxide to make it nice and white. I fragranced it with a lovely floral blend of Rosewood and Ylang Ylang essential oils.

I then simply poured a small amount of soap into the bottom of the mould, laid some balls in and covered them with the white batter, then repeated until the mould was full, making sure I kept enough balls back to decorate the top of the soap. Voila:

Bubbles in the mould

And here are the cut bars:

Bubbles!

Very simple, but a nice effect nevertheless.  There are so many ways to play about with this technique, I’ll definitely be making many more embed soaps in the future.

Thanks, as always, go to Amy Warden for organising the challenge and giving us all an opportunity to drool over each other’s creations :0)